Hello everybody!
I am new to this forum and new to bios modding. I modded my Asus laptop once and that got bricked after changing settings in the modded bios.
My Question is about the Acer E5-576G
I want to unlock the cpu tdp limit in the bios. I know i need a programmer to do so. Can anyone guide me through this process?
1. Is any programer good enough? Like the CH341A. (Picture below)
2. Also can I use the test clip so I don’t need to desolder? I am very bad in soldering.
After I manage this successfully or not. I want to try to fix my Asus G77JW with the Chip. So it’s not a waste to buy it. 
Thank you for your help!!

You may or may not need a flash programmer to unlock your Acer BIOS, we’d have to try some things and see if you can flash in mod BIOS, or if not then if we can work around the issue blocking that.
If programmer is required, yes, that is the tool set you need to do the Acer and fix your Asus << DO NOT Write to that system until you’ve dumped it and someone checked, otherwise you will loose your original UUID and Serial etc (some we can recover from stickers, but it’s much harder that way)
What is CPU type on the Acer? If AMD, then yes, programmer would be ideal, but may not be necessary, if Intel we have several options and methods to try and sort out flashing in mod BIOS without programmer.
Please link stock BIOS download page when you reply
Thank you for the reply. The CPU is an Intel i5 8250U. I am using the latest 1.49V.
www. acer.com /ac/en/PH/content/support-product/7333?b=1
I am new to this forum so I can’t post links yet so I added the spaces.
You’re welcome! Great, Intel is much easier than AMD for safely flashing in mod BIOS usually, thanks for BIOS download link.
This BIOS has x4 BIOS images inside it, what is your BIOS or Family ID? I think you can see this when you flash the stock BIOS EXE, it will look like one of these >> ZAA, ZAA2, ZAA3, ZAA4, ZAAR
If you don’t know, hopefully I can tell from your BIOS region you upload from below (go ahead and upload file from step #1 below too)
Please do the following below and let me know what error you get at step #2
If you have already modified the BIOS in ANY way, you will need to re-flash it back to factory defaults using factory method (NOT FPT)!!!
If you do not have Intel ME drivers installed, install them now from your system driver download page, then start over here after reboot.
Check your BIOS’ main page and see if ME FW version is shown. If not then
> DOWNLOAD HWINFO64 HERE < Once HWINFO is open, look at the large window on the left side, expand motherboard, and find the ME area.
Inside that section is the ME Firmware version.
Take note of the version. (
ie. write it down or get a screenshot)
Once you have that, go to the thread linked below, and in the section “C.2” find and download the matching ME System Tools Package for your system.
(
ie if ME FW version = 10.x get V10 package, if 9.0-9.1 get V9.1 package, if 9.5 or above get V9.5 package etc)
> DOWNLOAD " ME System Tools " packages HERE < Once downloaded, inside you will find
Flash Programming Tool folder, and then inside that a Windows or Win/Win32 folder (
NOT x64).
Highlight that Win/Win32 folder, then hold shift and press right click. Choose
“open command window here” (
Not power shell! >> * See Registry file below *).
If you get an error, reply to this post with a screenshot of it,
OR write down the
EXACT command entered and the
EXACT error given.
((If “open command window here” does not appear, look for the “Simple Registry Edit” below…)) Now you
should be at the command prompt.
You are going to BACKUP the factory
un-modified firmware, so type the following command:
Command:
" FPTw.exe -bios -d biosreg.bin " >> Attach the saved "biosreg.bin ", placed into a compressed ZIP/RAR file, to your next post!!! << Right after you do that, try to
write back the BIOS Region dump and see if you get any error(s).
Command:
" FPTw.exe -bios -f biosreg.bin "^^ This step is important! Don’t forget! ^^ If you get an error, reply to this post with a screenshot of it, OR write down the EXACT command entered and the EXACT error given. Here is a
SIMPLE REGISTRY EDIT that adds “Open command window here as Administrator” to the right click menu, instead of Power Shell
Double-click downloaded file to install.
Reboot after install may be required> CLICK HERE TO DOWNLOAD CMD PROMPT REGISTRY ENTRY < If the windows method above does NOT work for you…Then you may have to copy all contents from the Flash Programming Tool \ DOS folder to the root of a Bootable USB disk and do the dump from DOS
( DOS command: " FPT.exe -bios -d biosreg.bin " )
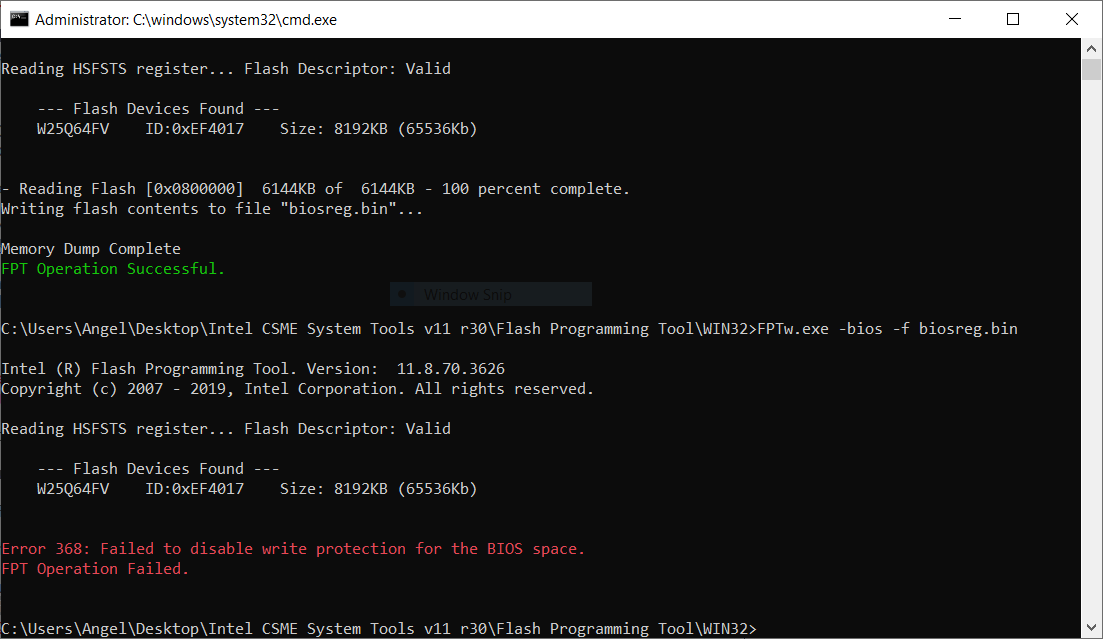
As soon as I open the stock BIOS EXE it will automatically reboot and flash the BIOS. No time to check anything. Anyways I attached the BIOS Region dump below.
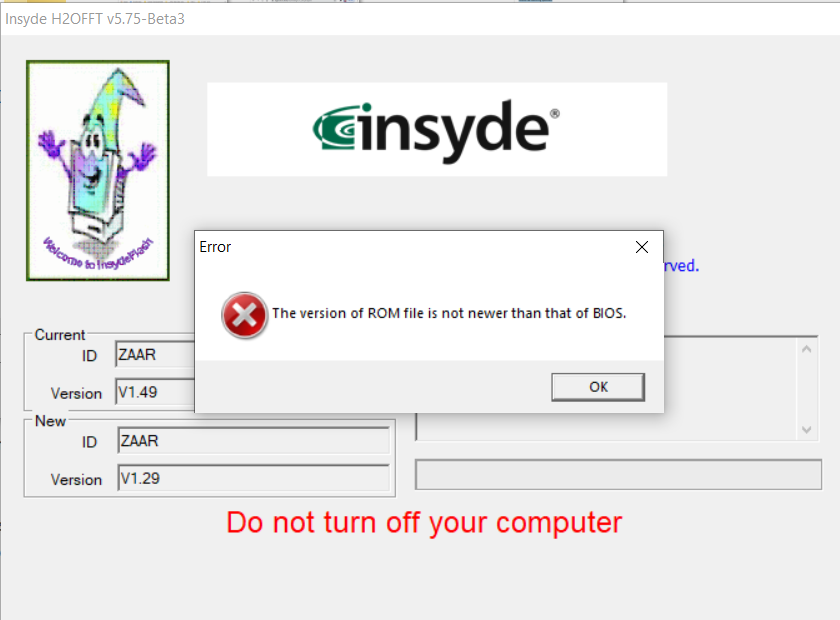
And here is the Error Code when I tried to write back the BIOS Region dumb.
biosreg.zip (3.91 MB)
Maybe we’ll get lucky then, since only 368 error! I wrote a guide for that, here, start at step #6 since I’ll do 1-5 for you and info will be posted below
[GUIDE] Grub Fix Intel FPT Error 280 or 368 - BIOS Lock Asus/Other Mod BIOS Flash
Alt boot to grub when no boot to EFI on exit page - [Help needed] Hidden Advanced menu Bios HP Z1 J52_0274.BIN (2) << you may need to use this, since I don’t see Launch UEFI Shell on your exit page, follow the link in this post, do step 1-2 only, then do rest as shown at this link
BIOS Lock variable to change >> 0x784
FPRR variable to change >> 0x612
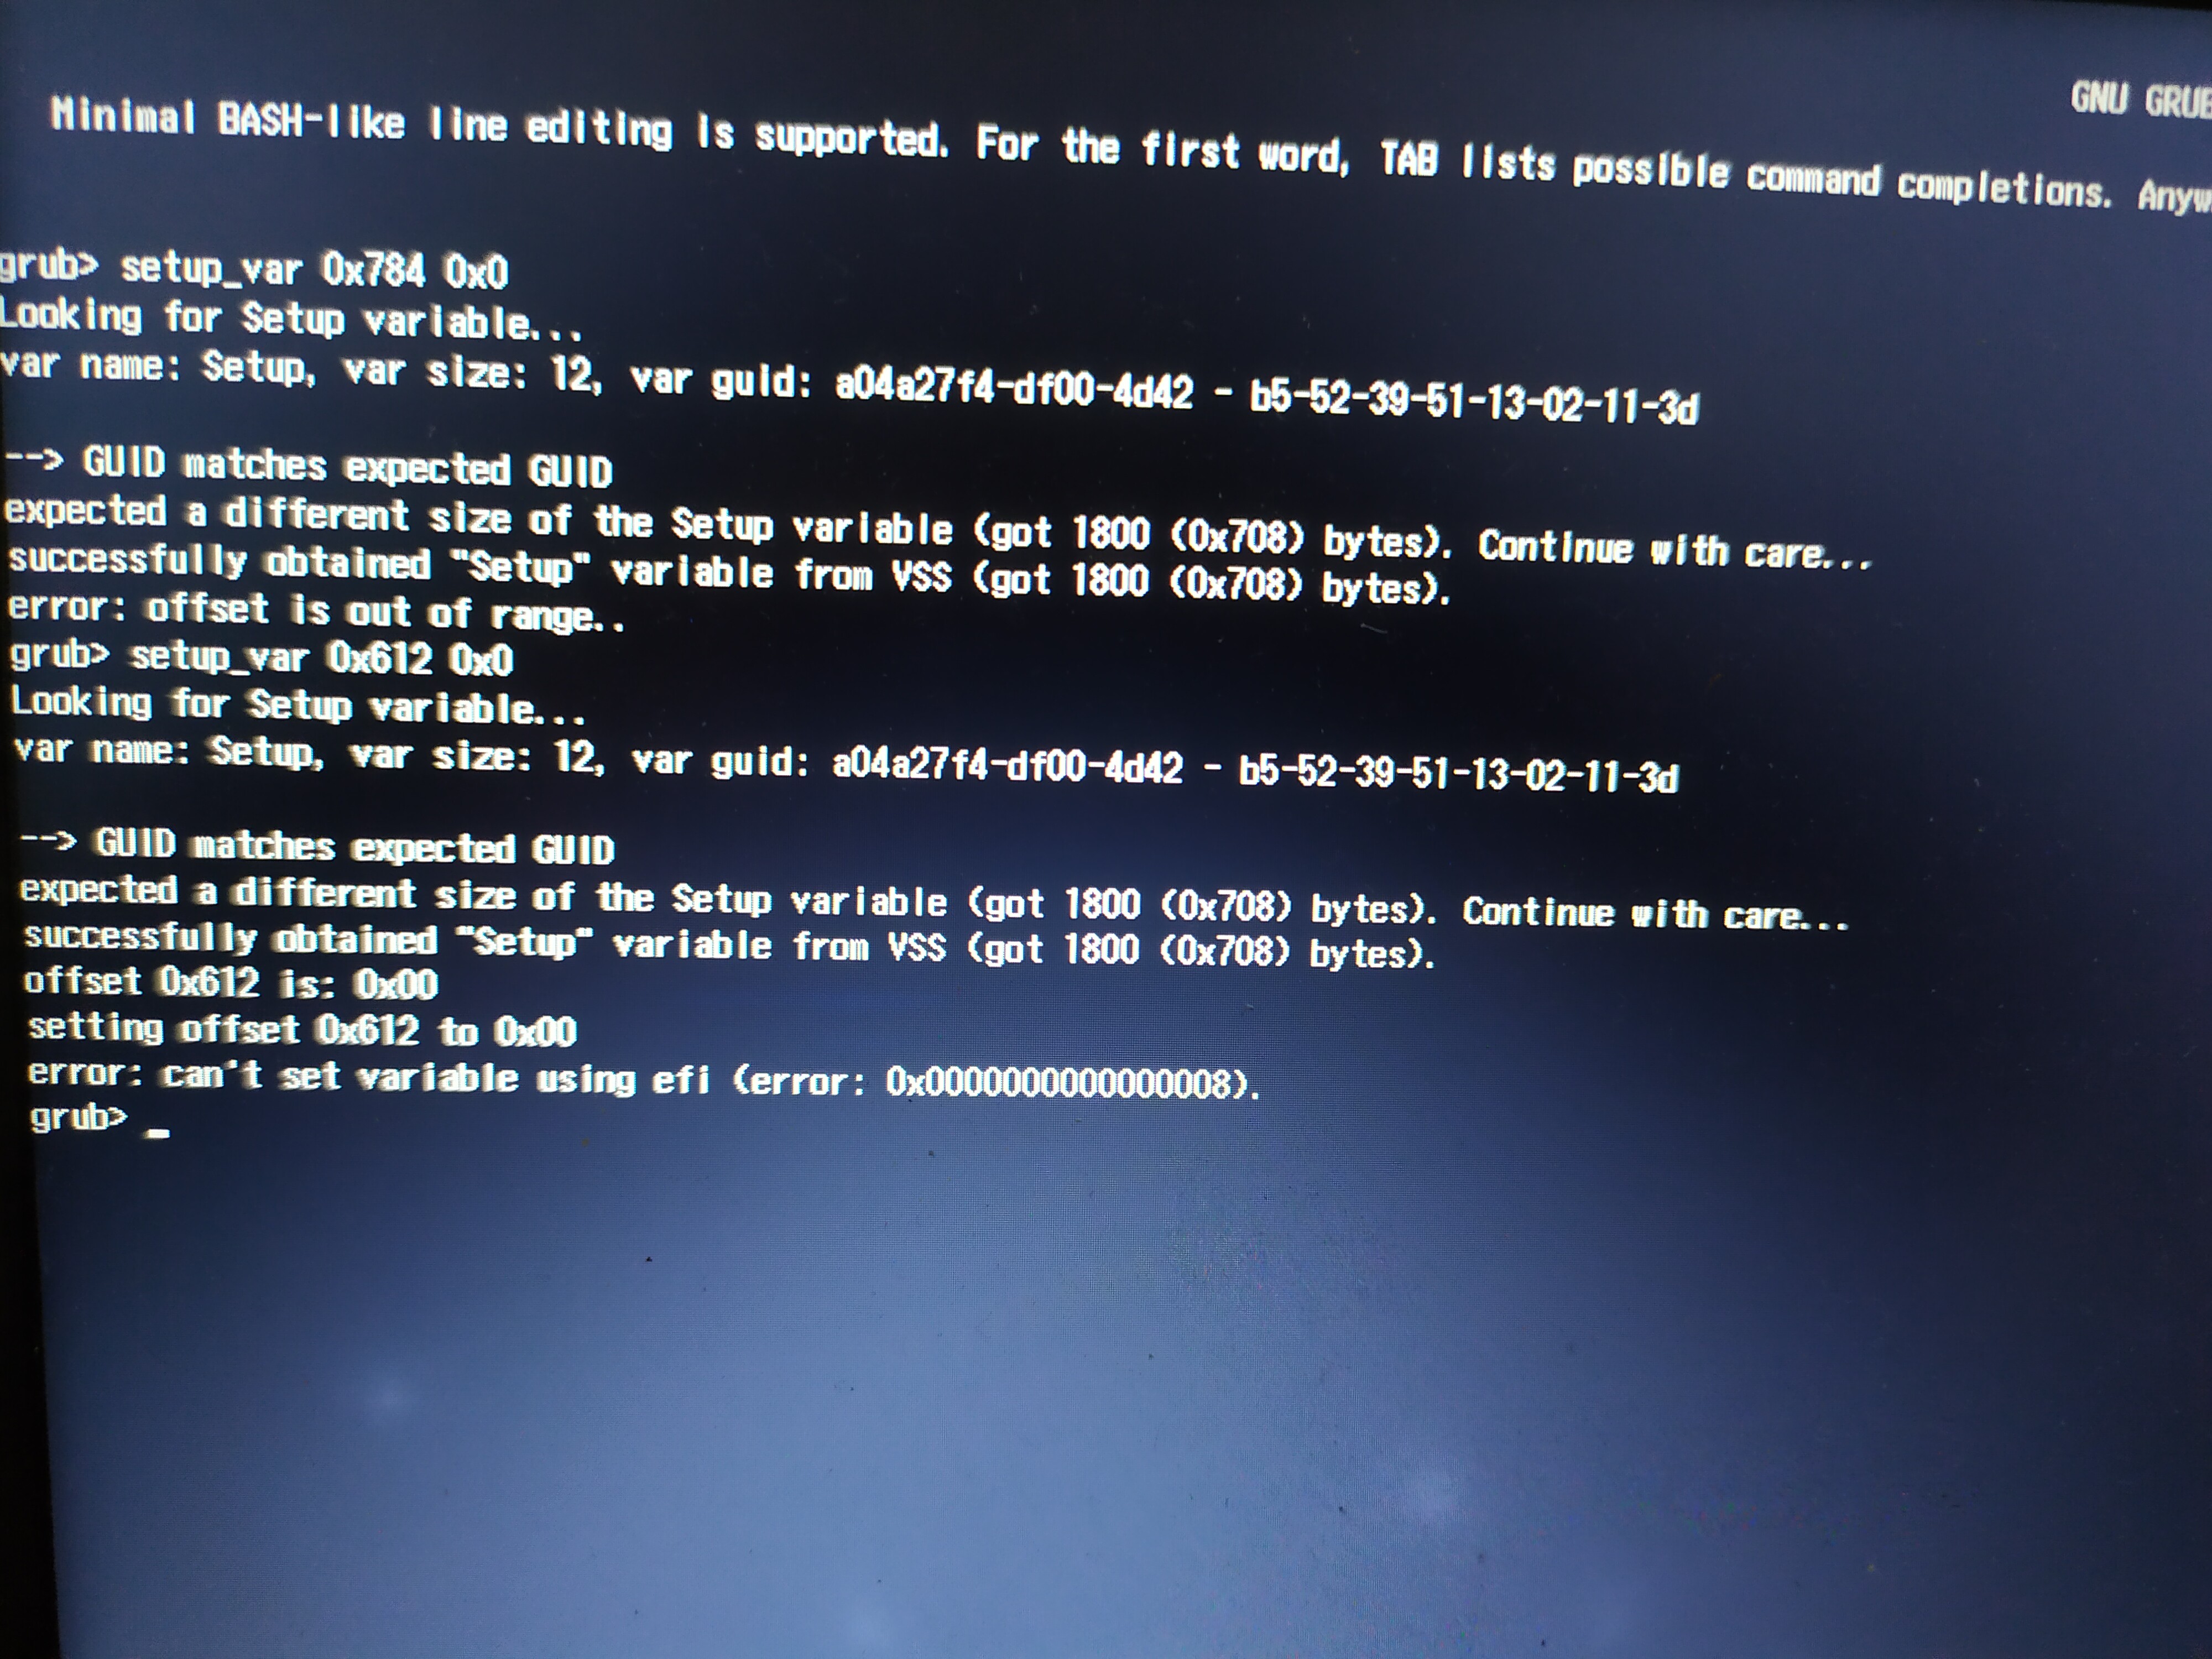
So at grub prompt, you will type the following, one line at a time, enter between each (case sensitive) - Show me image of this page after both commands entered so I can see if normal error, or if we need to use other method instead
setup_var 0x784 0x0
setup_var 0x612 0x0
Then reboot and try FPT BIOS region write again (Step #2 in spoiler above), if still fails, wait until I get to see your grub page image before I give other method.
Additionally, you can test and see if your BIOS has S3 sleep bug here. Put system to sleep (S3, not hibernate) and wait one full minute, then wake it up and try the FPT write again (step #2 in above spoiler)
* Edit - Might as well give you the other method while I’m here, so you can also do this too while you wait. Download this package, and unzip. From each version folder that directly contains the EXE, run the following command.
http://s000.tinyupload.com/index.php?fil…732875438124725
Command to run >> H2OUVE.exe -gv vars.txt
There may be errors, some may not work at all etc. Once done, leave all files in place, zip back up with max compression and upload to tinyupload.com or uploadfiles.io
To make it easier if you want, you can install this registry entry and reboot, this will add Open Admin CMD Prompt to right click, so you can just right click the folder with exe inside and open CMD directly via right click - http://s000.tinyupload.com/index.php?fil…134606820377175
I did the other methode here https: //ufile.io/ykvhiugd . Windows Defender flaged the files as virus but I got around it.
EDIT:
I run the grub prompt commands with errors. Picture attached below. Then I tried the FPT BIOS region write again and still same 368 error. Then I tried the sleep bug and still the same error.
I really hope we can unlock the Advanced BIOS options without the flash programmer.
@gtasaryder - Good thing I gave you second method, I expected grub/setup_var would fail us 
Here, now take the following package and run the command below. There will be errors and success messages in long line, this is normal, reboot once done and then do FPT stuff over again (toss out previous BIOSreg.bin file, you will make new)
Do step 1+2 in FPT spoiler above, if step #2 FPT write success, then send me the new BIOS region file. if it fails still, then you need flash programmer 
Hmm, wait! Nothing in file you sent, no vars.txt created! So all versions error’d out on you when running the command?
Please redo, I’m able to dump vars on my end from your BIOS, so you should be able to from your end directly too! Maybe you didn’t do something correct?
Specifically, I tested this one and it worked, so you can use that version only and send it back to me once you’ve created vars.txt >> H20UVE_100.00.16.08
Also, now tested >> 100.00.16.11 & H20UVE_100.00.16.08 & 100.00.18.04, so all versions work!!! Go ahead and use only the one I mentioned above, then send me vars.txt it creates
That is strange. The Var Files were successful before. All except the Version 200.00.01.00. Anyways I recreated them again. For some reasons Version 100.00.18.04 is giving me an error : LoadDeviceDriver fail, GetLastError = 0x2
For some weird reason Windows Defender must have deleted my files before I could upload them. Almost every time I run the command for the var files, the keyboard stops working, only a reboot solves that. Seems weird but I successfully uploaded them now. I hope it works now. 
https: //ufile.io/sgru9vud
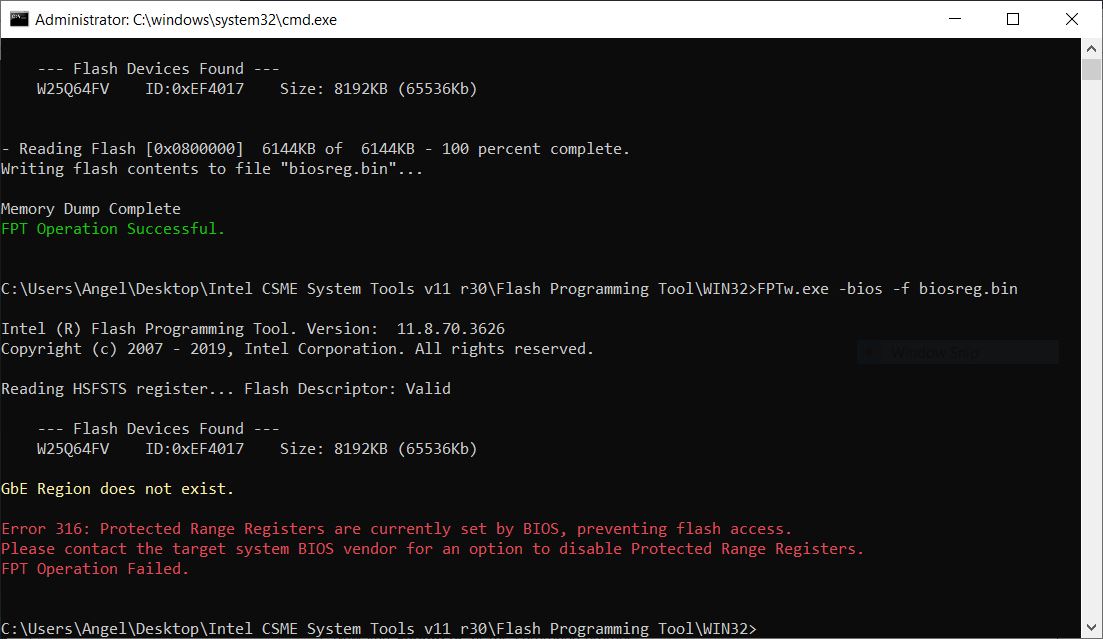
This time I got a different error. Here is the new BIOS Region Dump http: //s000.tinyupload.com/?file_id=29005380637448194597
The Error Log is posted below. I guess I am out of luck now without the flasher? If so I will order the flasher now and update this thread once it arrives!!
The flasher now arrived after 2 weeks more or less. I decided not to continue this because I am scared for things to wrong. Like the Laptop won’t boot. Or is it safe to do so? @LOST_N_BIOS
My first post, mods, if this should be somewhere else, please advise.
BIOS: Insyde H20 Zaar V 1.49
Currently running in Legacy mode
Goal: return to UEFI
Laptop: Acer Aspire e 15 576G-5762
I intentionally rolled back the BIOS on my Acer Aspire e 15 576G to “Legacy.” Now, for some reason, there are NO options available to select and I WOULD like to restore UEFI Bios. Again, all options are greyed out/not able to be selected on the BIOS screen, I can’t even set an administrator password
I found a similar thread on flashing BIOS akin to a hard factory reset but before I did that I wanted to see if anyone on this thread has a better suggestion.
I’ve re-installed windows and tried booting from restore disks via Rufus but, basically, almost all my options come back to the central problem of my firmware not being able to support more advanced restore options (via USB recovery). Using Insyde’s own BIOS updater, it doesn’t allow me to downgrade my BIOS.
Thanks!
@electricSNICK - Please explain what you mean you did, when you say you “rolled back the BIOS on my Acer Aspire e 15 576G to “Legacy.”” Does this mean you changed a setting, or flashed an old BIOS (if this, how, by force, or other method)
What happens if you try to flash in the latest BIOS using stock/standard update method (ie run the exe)?
Please do step #1 only from below, and send me the created file, I will help you for now to change this option to UEFI instead of legacy, and then we can see how BIOS is for you.
If things then still all grayed out, even after BIOS update to latest, I can ungray for you and help you to flash in mod BIOS
If you have already modified the BIOS in ANY way, you will need to re-flash it back to factory defaults using factory method (NOT FPT)!!!
Additionally, please remove all BIOS passwords, disable secure boot, and disable TPM or Encryption if you have enabled. Do this before moving on to below
If you do not have Intel ME drivers installed, install them now from your system driver download page, then start over here after reboot.
Check your BIOS’ main page and see if ME FW version is shown. If not then
> DOWNLOAD HWINFO64 HERE < Once HWINFO is open, look at the large window on the left side, expand motherboard, and find the ME area.
Inside that section is the ME Firmware version.
Take note of the version. (
ie. write it down or get a screenshot)
Once you have that, go to the thread linked below, and in the section “C.2” find and download the matching ME System Tools Package for your system.
(
ie if ME FW version = 10.x get V10 package, if 9.0-9.1 get V9.1 package, if 9.5 or above get V9.5 package etc)
> DOWNLOAD " ME System Tools " packages HERE < Once downloaded, inside you will find
Flash Programming Tool folder, and then inside that a Windows or Win/Win32 folder (
NOT x64).
Highlight that Win/Win32 folder, then hold shift and press right click. Choose
“open command window here” (
Not power shell! >> * See Registry file below *).
If you get an error, reply to this post with a screenshot of it,
OR write down the
EXACT command entered and the
EXACT error given.
((If “open command window here” does not appear, look for the “Simple Registry Edit” below…))
Step #1Now you
should be at the command prompt.
You are going to BACKUP the factory
un-modified firmware, so type the following command:
Command:
" FPTw.exe -bios -d biosreg.bin " >> Attach the saved "biosreg.bin ", placed into a compressed ZIP/RAR file, to your next post!!! <<
Step #2Right after you do that, try to
write back the BIOS Region dump and see if you get any error(s).
Command:
" FPTw.exe -bios -f biosreg.bin "^^ This step is important! Don’t forget! ^^ If you get an error, reply to this post with a screenshot of it, OR write down the EXACT command entered and the EXACT error given. Here is a
SIMPLE REGISTRY EDIT that adds “Open command window here as Administrator” to the right click menu, instead of Power Shell
Double-click downloaded file to install.
Reboot after install may be required> CLICK HERE TO DOWNLOAD CMD PROMPT REGISTRY ENTRY < If the windows method above does NOT work for you…Then you may have to copy all contents from the Flash Programming Tool \ DOS folder to the root of a Bootable USB disk and do the dump from DOS
( DOS command: " FPT.exe -bios -d biosreg.bin " )
Thanks for the response.
I was attempting to create a Hackintosh with my Acer 576G per this guide. Sadly, I think I wasn’t paying close enough attention to the CustoMac ID system and, foolishly, I rolled back my BIOS from UEFI to Legacy thinking I needed to do that for my hardware. Hindsight shows that I was wrong. If you want to read more, check out my post at tonymacx86.com
Unfortunately, I DO have password protection lock on my BIOS and, because I can’t select any options in that BIOS, I can’t remove them (not able to set/reset admin pw in BIOS). Because of that, I’m not able to follow your instructions to the letter.
Unless I hear from you, I’ll give it a shot (step #1 only) without being able to disable pw and update you on my progress.
------------------
I was able to complete Step #1 but keep in mind that I could not disable pw protection …
biosreg.zip (3.92 MB)
@electricSNICK - I am still not quite sure what you mean >> “Rolled back from UEFI To legacy” << Do you simply mean you changed a single BIOS setting, or if not, what exactly do you mean?
Sorry, those links are alien to me, I know very little about MAC/OSX, only a few mods I know how to do for users that need them, the rest of all the stuff you guys do I am not familiar with (example, I followed your hindsight link and didn’t see anything on that page relevant to our discussion)
Why do people password protect their BIOS!!! There may be nothing we can do now until you get a flash programmer (CH341A + SCOI8 test clip with cable), due to that!
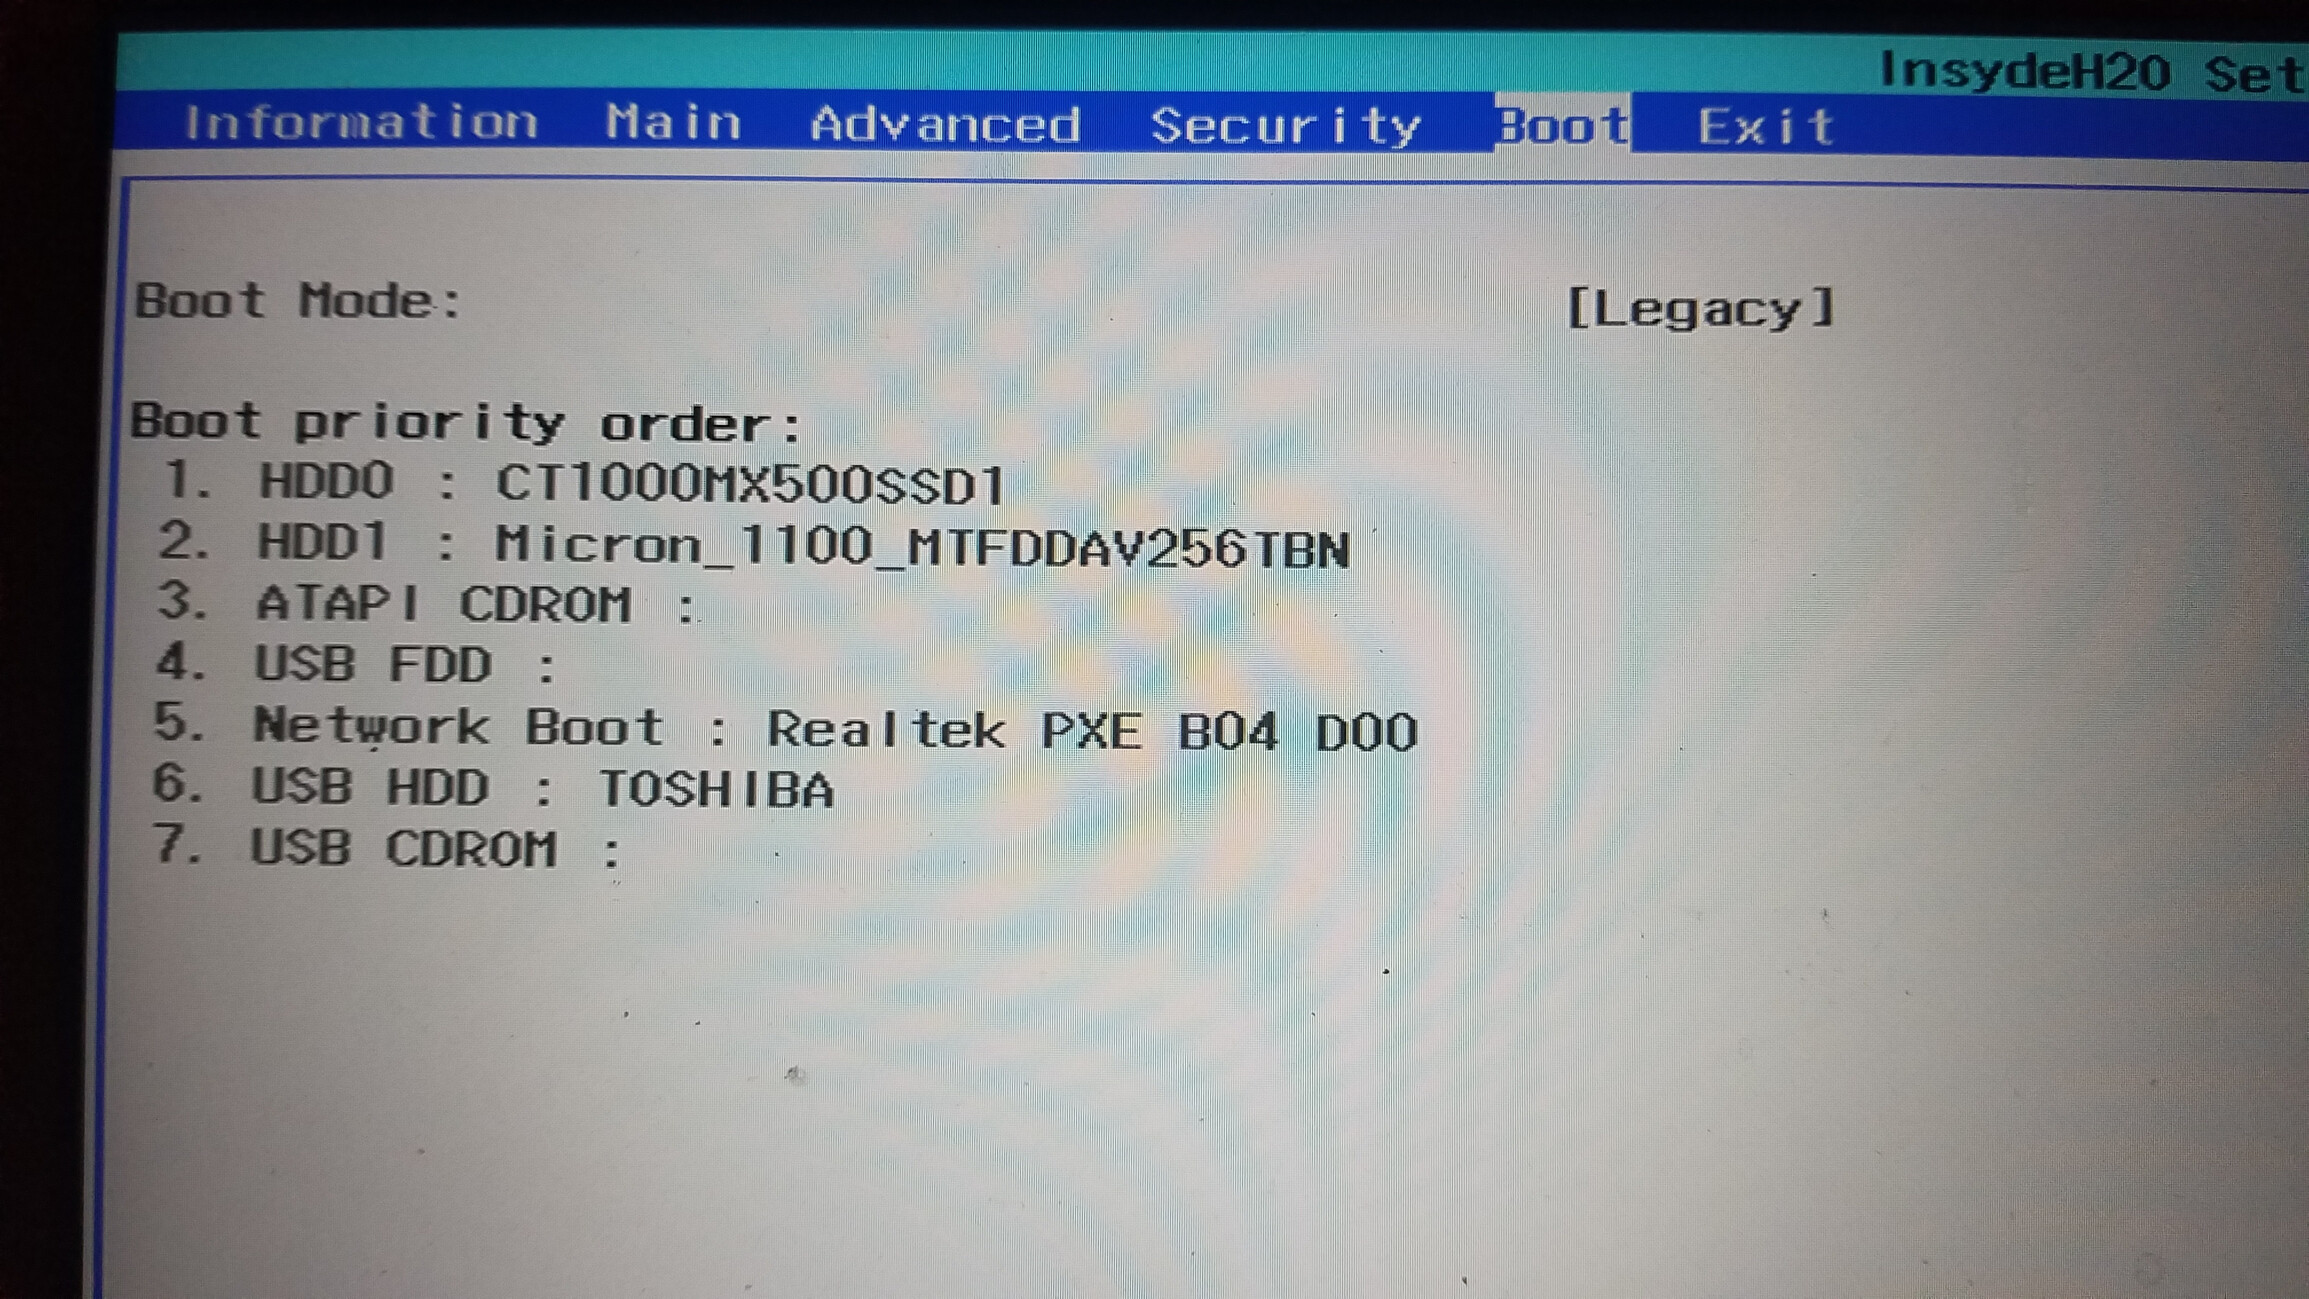
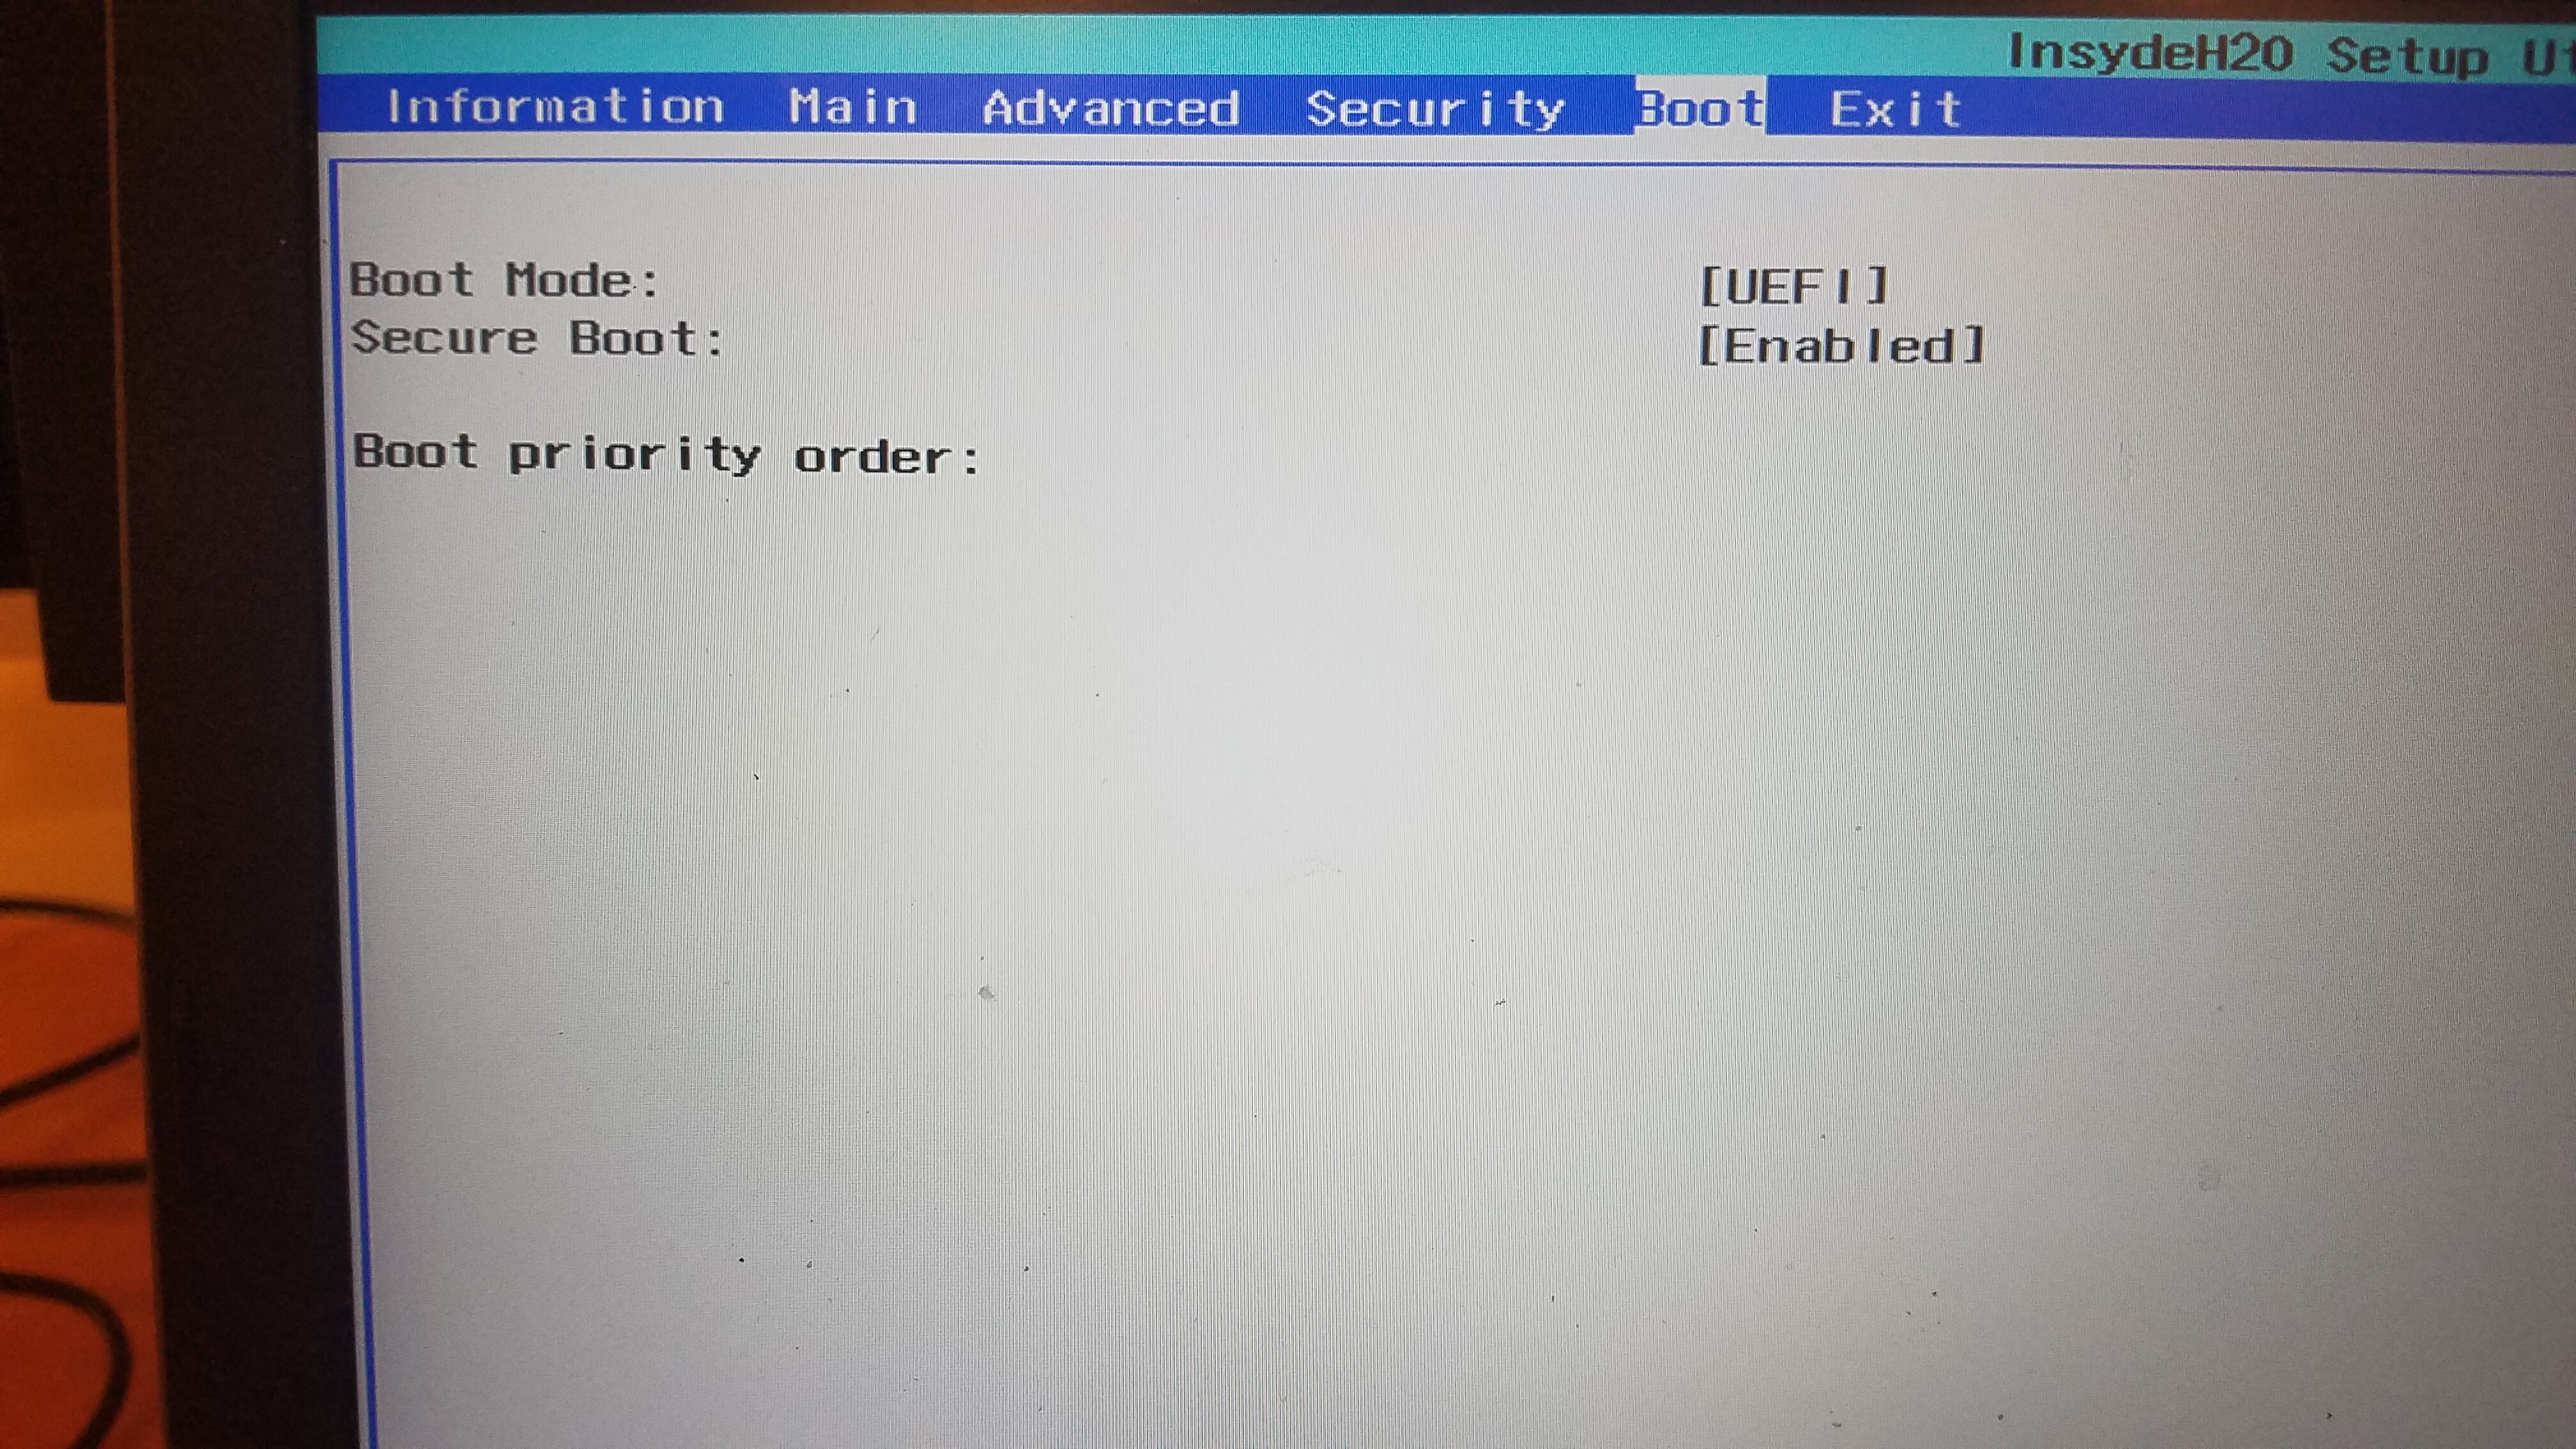
However, we can try to change BIOS “Boot Mode” to UEFI instead of Legacy, once you confirm for me that this is all you meant >> You change that setting shown on your first image at post #14 to Legacy instead of UEFI and this = rolled back my BIOS from UEFI to Legacy you keep mentioning 
Is that all you mean, and is that all you did, before this happened?
Well, this is all part-and-parcel of me being a noob and recklessly breaking stuff to learn. 

>> I changed a single BIOS setting from UEFI to Legacy. Yes. That was it. Now, I can’t access anything on my BIOS menu; it’s all greyed out/inaccessible. I’ve attached a screenshot and here’s a video of the screen.
Is there some other way to enter BIOS that will re-enable my access to the Boot Mode (and other) menus?

------------------
What do you think about the option of removing the CMOS battery to default back to factory BIOS (per this video for my laptop)?
@electricSNICK - It’s OK, we all have to learn stuff sometimes, and BIOS can be tricky!
Thanks for clarification, tonight when I have more time, I will write you out info on how to change that setting back, and then hopefully it will be possible and that will unlock your BIOS back to how it was before (password set may be an issue, for everything here).
Yes, I did not watch the video, but you can try to clear CMOS and see if that resets BIOS back to UEFI mode. You can also try to change this by loading optimal defaults on the BIOS exit page, if that is not also grayed out to you now as well.
If you can clear CMOS, it should reset the setting, because UEFI would/should be default I think (didn’t check to confirm though, no time to look right now). This will not remove your password though
Well, I did a factory reset by unplugging the the computer battery and removing the CMOS battery from the motherboard. Here’s what’s interesting, the factory UEFI were installed, but I still have NO options available in the UEFI menu.
Hmmmm …
 I disable it from the start and use Malwarebytes
  The reason your other system failed to boot is probably due to you wrote BIOS with wrong software or ID per it’s chip ID, we’ll fix it too, don’t worry