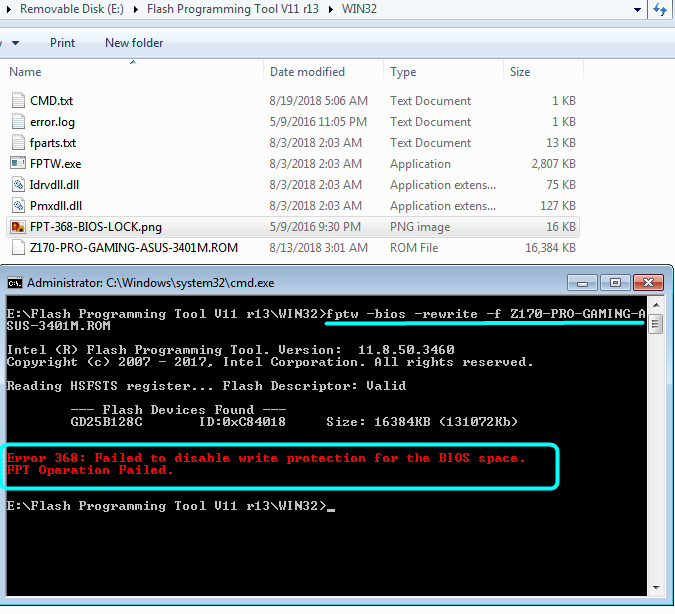
How to fix this specific Intel FPT Error 368 Write Protection @ BIOS region issue with Modified Asus BIOS, and other related locks
Goal of this guide is specifically to change "Setup Variable" from BIOS setup module - (VarOffset/VarName): 0x8A6, VarStore: 0x1 (Change to 0x0)
This is due to "BIOS Lock" bit set in the BIOS itself, and this method can be applied to other BIOS HSFS register type locks such as SMI/SMM Lock (error 280), GPIO Lock, BIOS Interface Lock
I will show how to get the variable ID here also initially, in case this changes in the future for this model, and so that others in the future that find this will also be able to check and find the locks on whatever board BIOS they look into fixing.
Tools used, will be linked here or attached below
UEFITool 0.25.0 - Download in first spoiler
UEFITool NE Alpha A51
Universal IFR Extractor - attached below
Hex editor of your choice - Here’s a good free one HxD, I use paid version of Hex Editor Neo, I’m unsure how good the free one is
EFI Shell boot64.efi file - attached below, rename to Shell.efi for this specific Asus board, BIOS tells you in hover/hint on "Launch EFI Shell" what file name it expects.
* Before getting started on this, it’s best to flash the new stock version of the BIOS you intend to flash modified version of, do that using normal Asus method (ie EZ Flash)
Then, take a backup of the BIOS region using FPT (FPTw -bios -d backup.bin), and to this apply any and all edits you need to make, this will be the file we reflash.
This way you do not loose your Serial #, UUID, DTS Key etc. LAN MAC ID is usually stored in GbE region of BIOS, which we don’t flash, but when it not it’s within the BIOS region so this will save it.
Thanks @chinobino for the reminder on this!
1. Open BIOS in UEFITool and UEFITool NE Alpha side by side. Both version are used in this instance due to this particular Asus BIOS the modules are not all properly labeled.
This way it’s easier to find setup using NE Alpha and then copy GUID to 0.25 version, or you can extract directly using NE Alpha, showing both methods here for better user understanding.
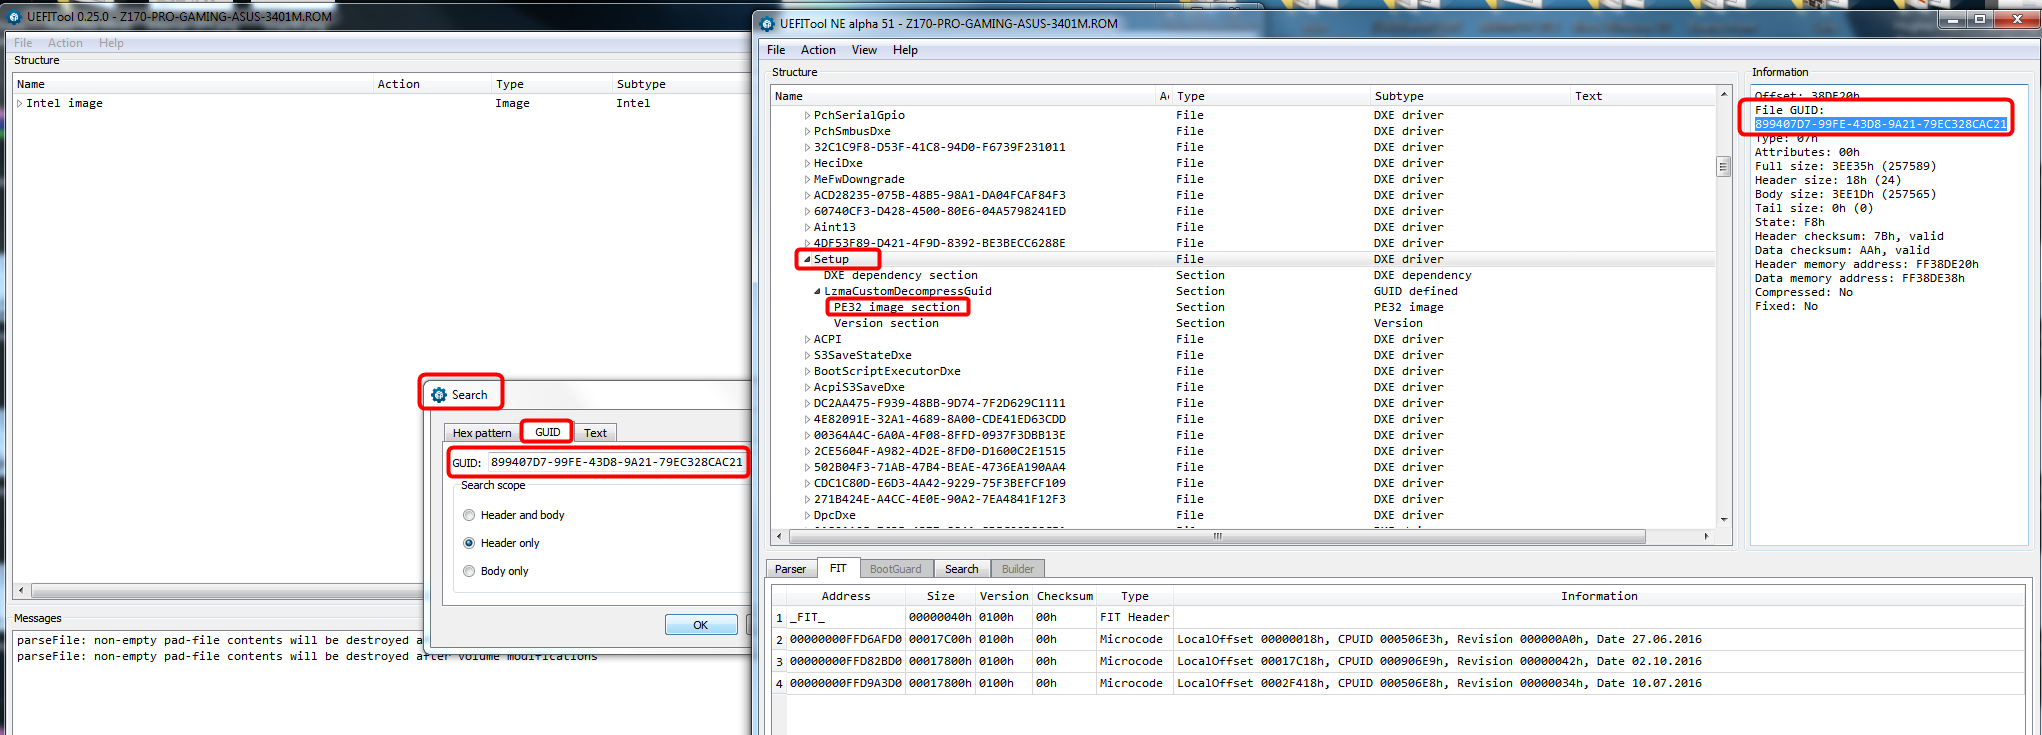
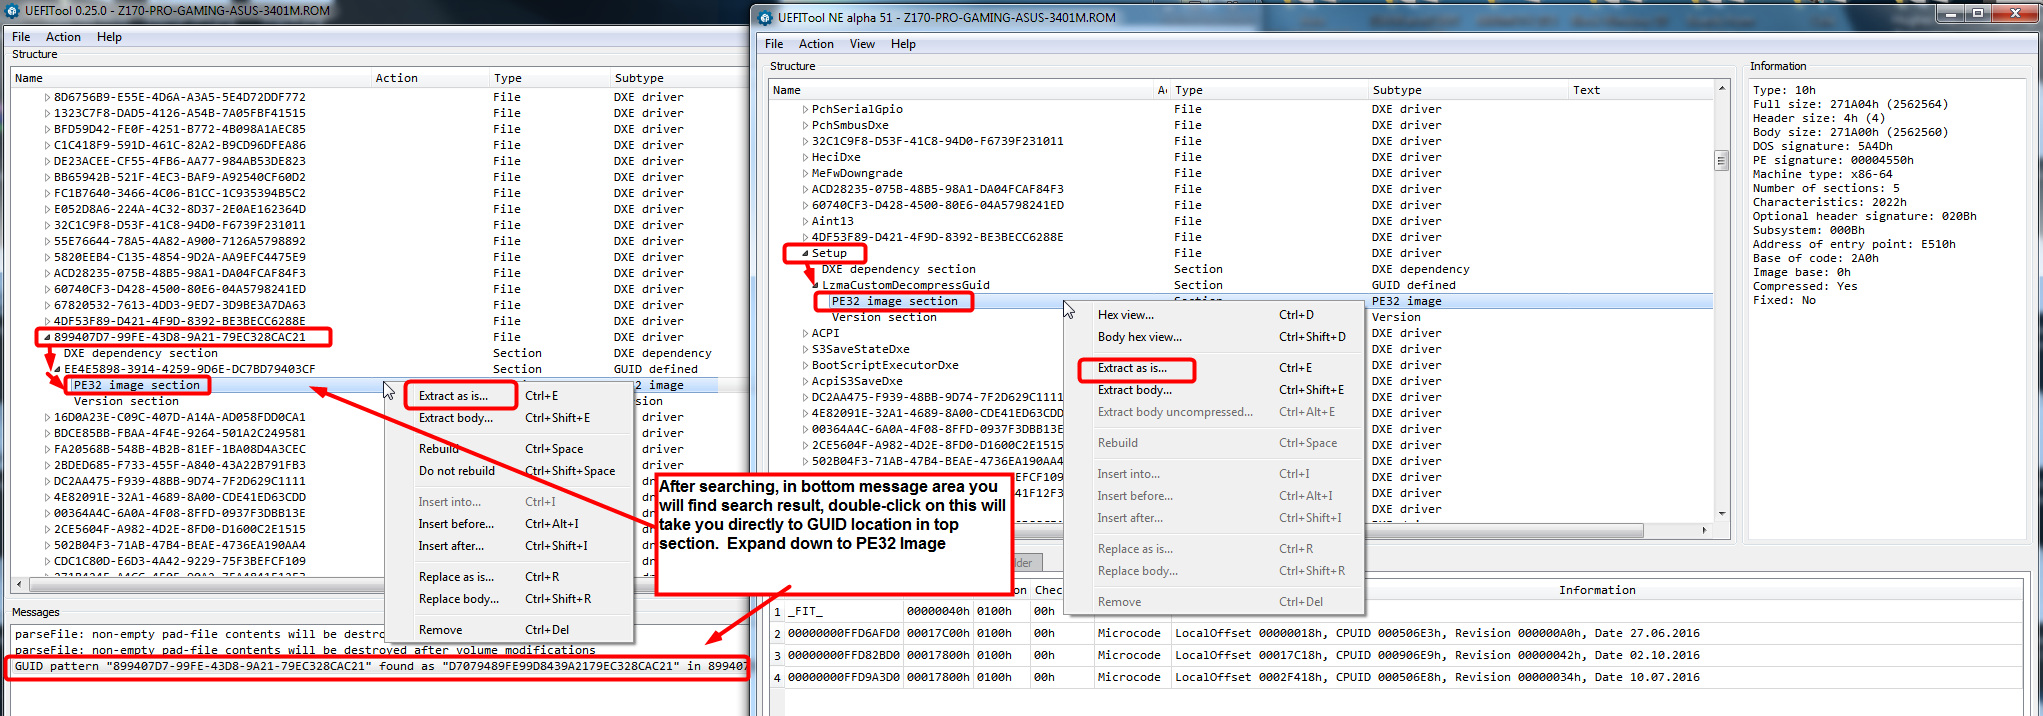
2. Find setup module (in this instance this is GUID - 899407D7-99FE-43D8-9A21-79EC328CAC21 - find via search/GUID tab, copy/paste GUID if taking value from one program to the other), right click and the GUID and extract as-is.
Normally you will be extracting the PE32 module as shown in the image, not the entire GUID, but sometimes BIOS lock or other lock also located in a Setup SubGUID ending with a bunch of 0000000’s.
To know which it is easily you can search using UEFITool "Unicode" for BIOS Lock Name file per GUID Or PE32 Or SubGUID-asis, so you will know your extracted location and method, good habit to get in for other usage later.
This is the file we will use in next step with IFR Extractor to find Setup_Var needed to disable locks
3. Open Universal IFR Extractor and browse to the module you extracted above. "Protocol" will show Green UEFI, this means IFR can be extracted from this module.
Wait a few seconds, then hit extract and save txt file with similar name so you know what module you obtained the IFR from, usually this will be auto-named for you but not always.

4. Open IFR Extractor output text file, and search for "BIOS Lock" in this instance, other locks mentioned above can also be search during when other similar mod BIOS flashing issues occur with FPT. Only "BIOS Lock" is used in this case.
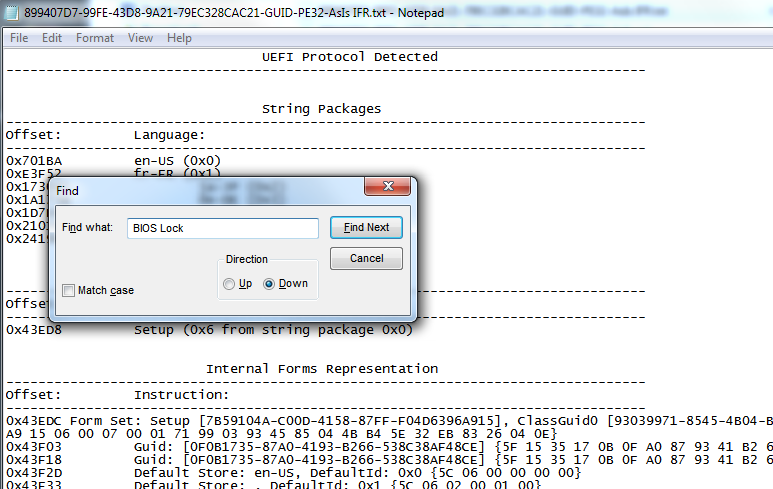
5. In BIOS Lock string line, locate the VarOffset/VarName and note it’s default setting (0x1). Write this VarOffset/VarName down (0x8A6) on paper to have in front of you physically, you will use it later to change the default value of 0x1 = enabled to 0x0 = disabled
This particular info is for BIOS 3401, in latest BIOS 3805 VerOffset/VarName is 0x8A7

6. Rename boot64.efi file to Shell.efi now, and place it in the root your USB stick, ie - not in any folders, and leave this connected to USB Port until removing later when instructed
7. Get copy of FPTw that comes from a Intel System Tool package that matches your current ME version and place that along with your modified BIOS in same folder on your desktop, ie put modbios.bin into same folder as FPTw.exe and it’s included system files.
For this instance FPTw is included attached below with boot64.efi file and he Universal IFR Extractor
8. Now, lets head to BIOS to disable secure boot - Disable secure boot via one of the links below, or follow my images as we go along
https://www.qualityology.com/tech/disabl…fi-secure-boot/
http://www.rodsbooks.com/efi-bootloaders…ot.html#disable
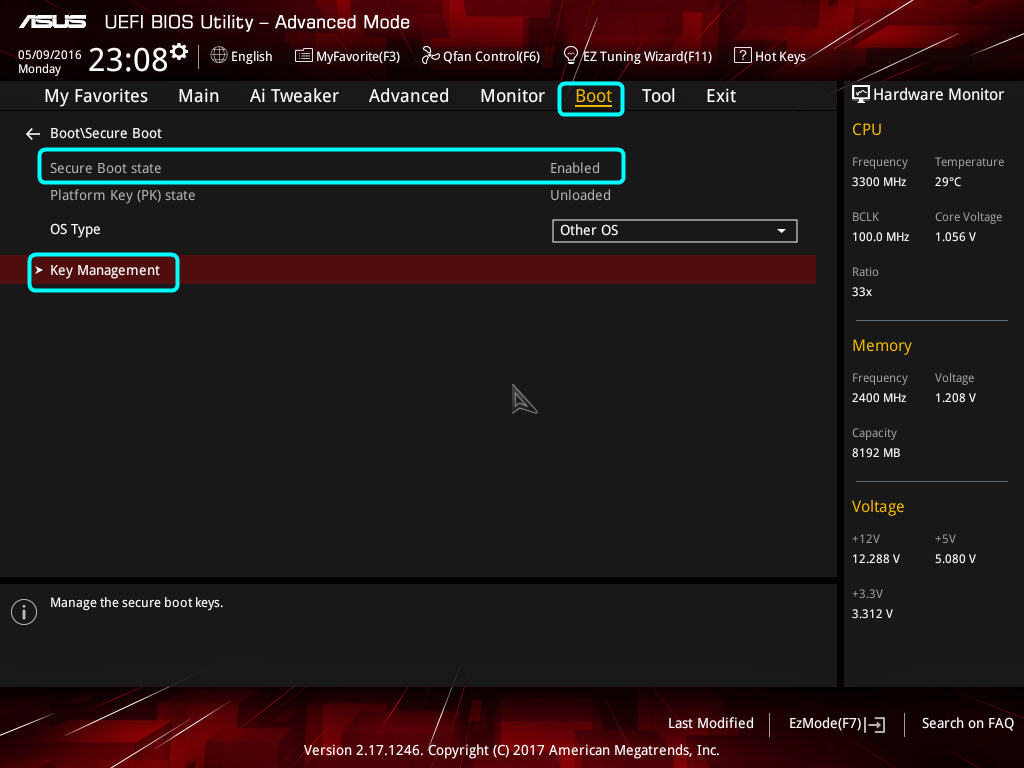
9. Boot to BIOS, once inside hit F7 to get text based GUI. Go to "Boot" section, then into "Secure Boot" section

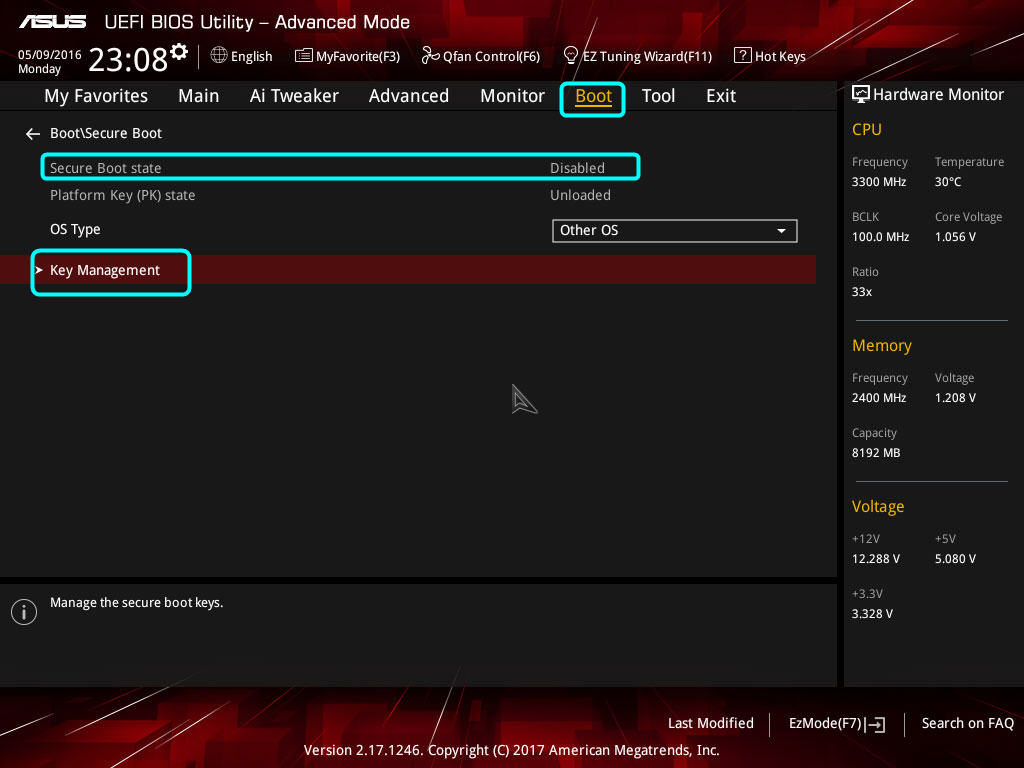
10. In secure Boot section, note the "Secure Boot State" and OS Type, desired state is disabled. If "Secure Boot State" is enabled Change OS type to "Other OS" and enter "Key Management"
If "Secure Boot State" is disabled, move to step 13
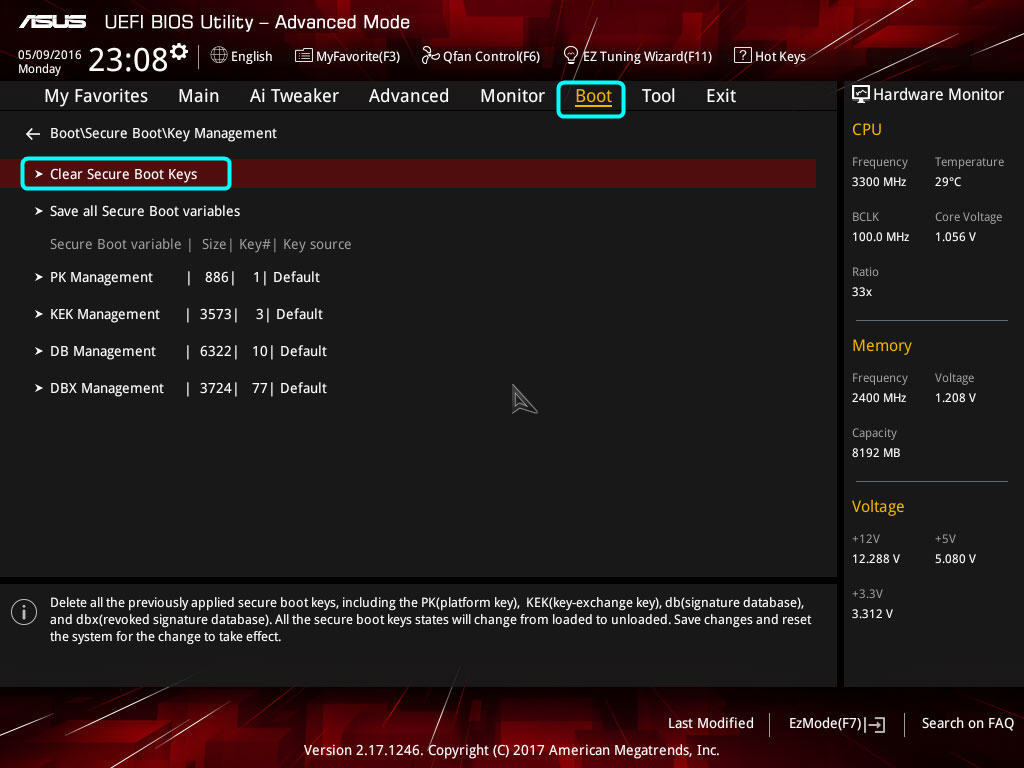
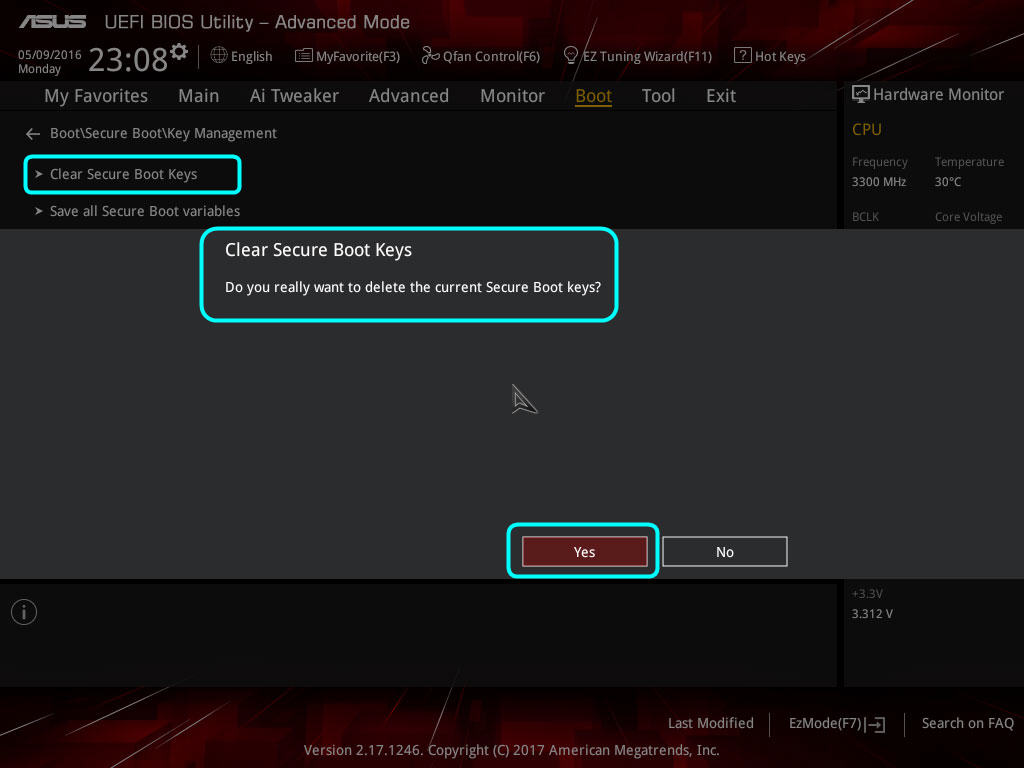
12. Enter "Key Management" and then select "Clear Secure Boot Keys" - these can be restored later if needed from stock BIOS itself by re-enabling Secure Boot/reloading/generating new stock keys, or saved now if you are currently using then restored from backup later.
13. Go to "Exit" section of BIOS, and then choose "Launch EFI Shell from USB drive"
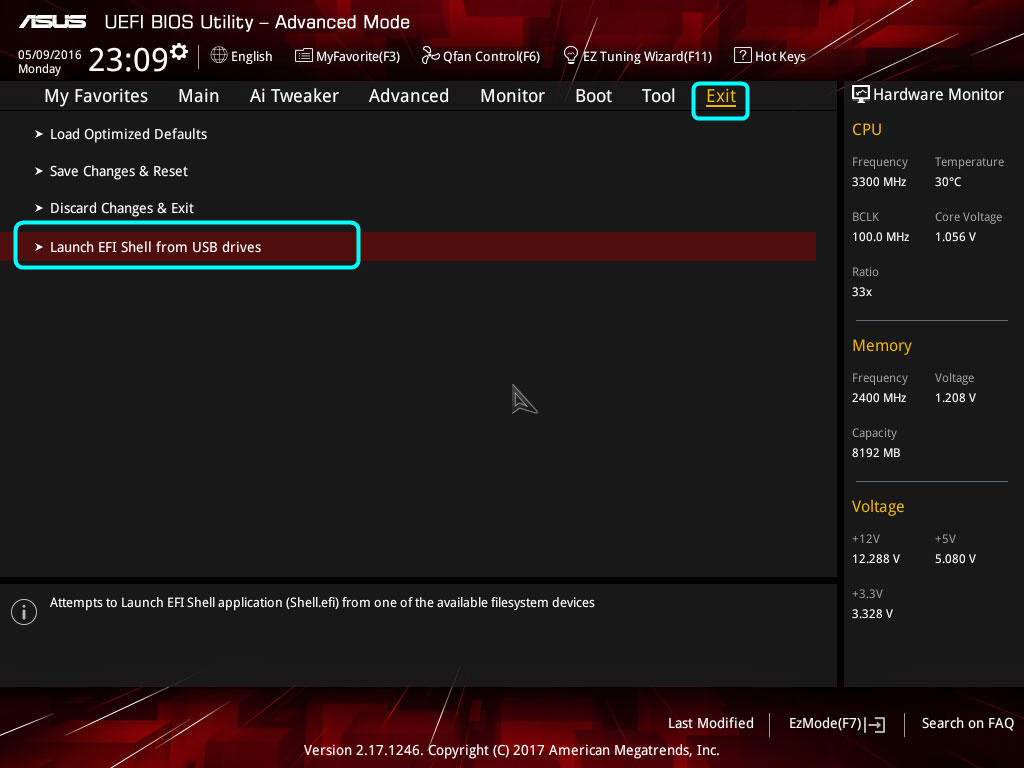
14. Grub screen will show instantly, this is where we will change the Setup_Var value from step #5 above. If you receive error, or it reboots to windows either EFI file name is not what BIOS expects on the USB, or not in root of folder.
If BIOS says Secure boot enabled, go back and set OS type to Windows 8-10 etc, then change back to OS Type other, reboot and start at step 8 again ensuring secure boot is now/still disabled and try lauching EFI Shell again.
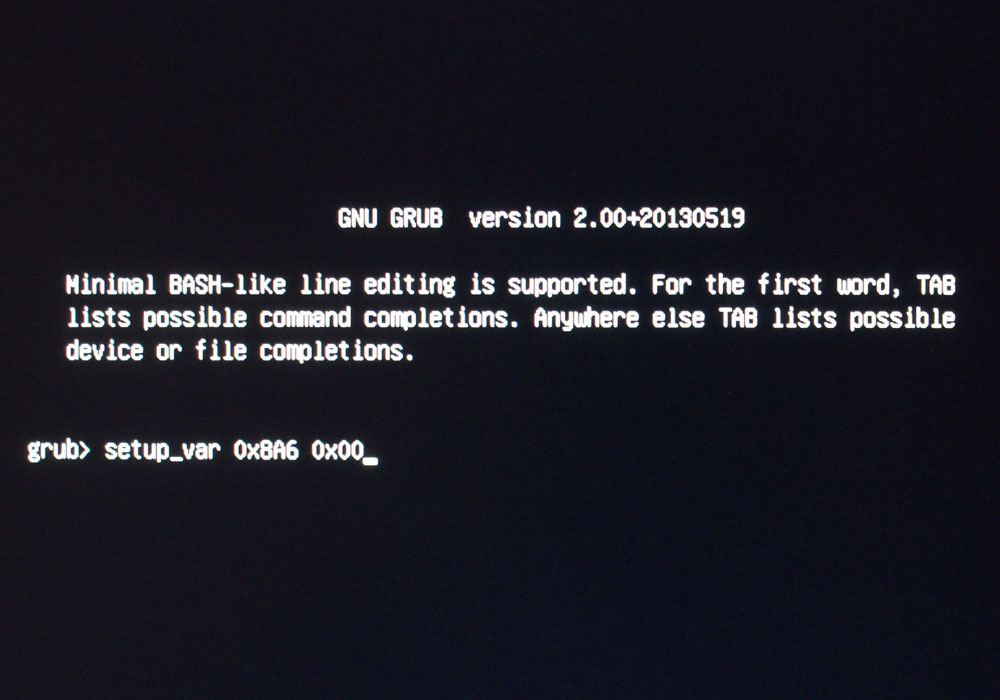
15. At the prompt type the following (Do not type the >> symbols) >> setup_var 0x8A6 0x00 (or 0x0 = same for this instance) - This particular info is for BIOS 3401, in latest BIOS 3805 VerOffset/VarName is 0x8A7
This changes stock BIOS setting for this variable to 0x0 disabled from it’s default of 0x1 enabled.
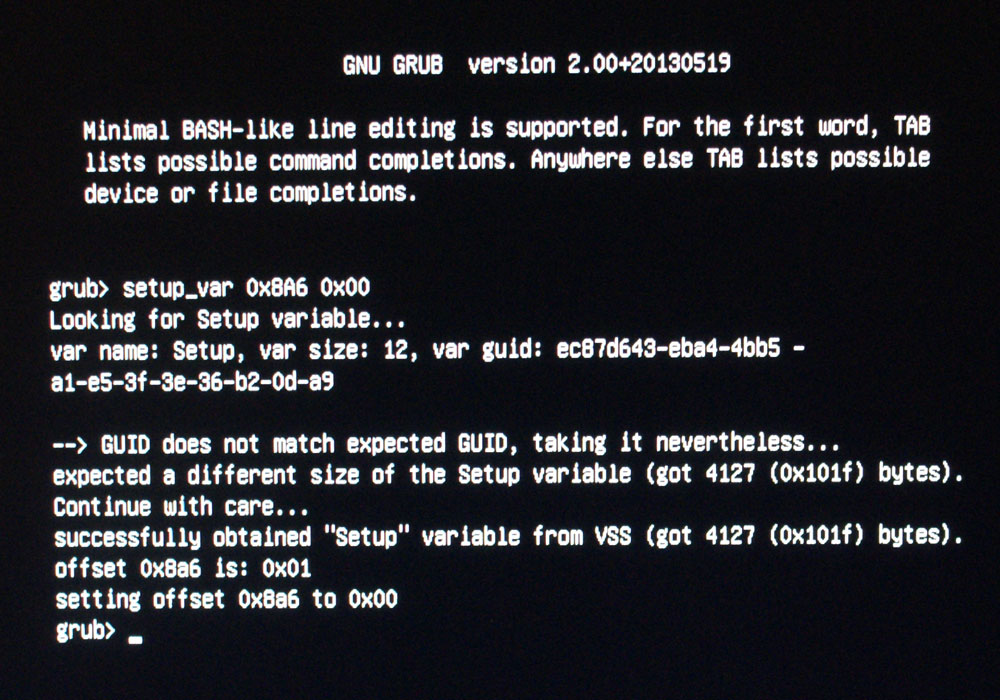
16. Once command is entered you may see some errors or output that’s not expected, it’s OK as long as it looks similar to below and you have input the command as shown and you see setting offset 0x8A6 is: 0x01 and then setting offset 0x8A6 to 0x00.
Remove the USB Stick when this is done.
16. Hit Control+ALT+Del to reboot, let windows load.
* Before flashing anything next, please take note of the warning at the top! Start your BIOS mod using a backup from stock of version you update to, modify that, and then flash
Do not flash this method using stock BIOS/BIOS region you may loose UUID, Serial, DTS Key
17. Open command prompt in windows from your saved FPTw and mod BIOS folder. To do this, hold shift on the folder the files are included in and hit right click, then select open command prompt here.
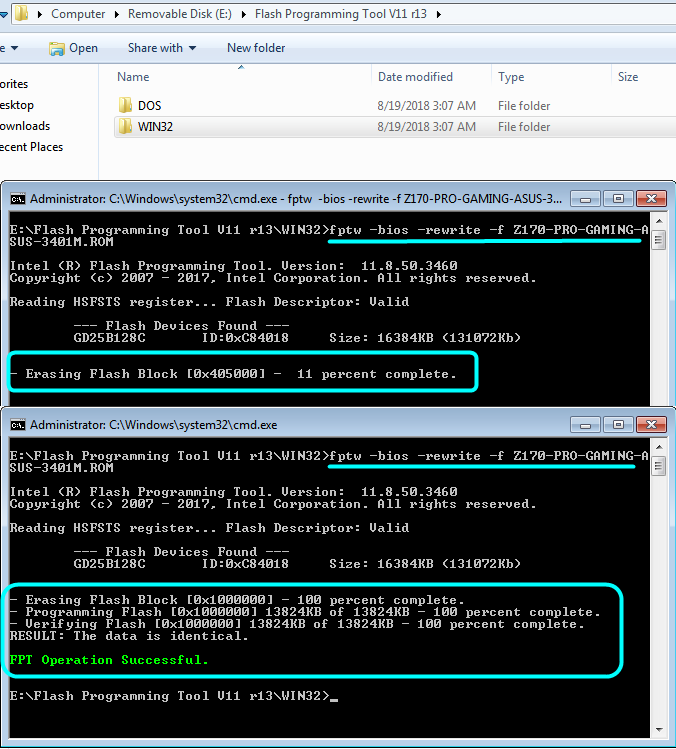
18. Flash modified BIOS per your original intended command, in this case that prompted this guide that is as follows
>> fptw -bios -f Z170-PRO-GAMING-ASUS-3401M.ROM
Or >> fptw -bios -f Z170-PRO-GAMING-ASUS-3805M.ROM
EFI-Setup-FPT-Universal-IFR-Extractor.zip (1.78 MB)
Edit by Fernando: Thread title shortened

