Hello,
After updating the CPU Microcode with the latest UBU Tool 1.70 RC10.2 my motherboard resets over and over.
I’m using ASUS P9X79 Pro motherboard with Intel XEON E5-1660 v2 ES (CPU Signature 306E4, Microcode Patch 416, LGA2011 v1) from the latest official BIOS P9X79-PRO-ASUS-4801.
My modifications:
- UEFITool used to add uncompressed NVMe module (NvmExpressDxE_4)
- Modded ASUS ME Tool used to update Intel ME Firmware to version 8.1.70.1590 (1.5M)
- UBU used to update EFI Intel PRO/1000 UNDI from version 5.5.23 to 0.0.19
- UBU used to update OROM Intel Boot Agent GE version 1.3.72 to OROM Intel Boot Agent CL 0.1.13
- UBU used to update EFI Marvell SATA AHCI from version 1.1.0.1001 to 1.1.0.1020
- UBU used to update OROM Marvell 88SE9130 from version 1.0.0.1031 to 1.1.0.1002
Up to this point everything works fine… but after the Microcode update my motherboard resets over and over.
I’m using EEPROM programmer and tested it on 5 different BIOS chips (genuine winbond 25Q64BVAIG).
Any ideas?
@FirstEver - I never did like any of Asus X79 4801 BIOS, for any board! If you can’t get it let me know I will do mod manually, upload BIOS that’s OK/bootable with all your other mods and I’ll do the microcode for you.
@SoniX
Can you tell me how to update it manually?
My modded BIOS (no Microcode update) = WORK
My modded BIOS (UBU Tool Microcode update) = DOESN’T WORK
@Lost_N_BIOS
This is my modded BIOS - BIN file (please update the CPU Microcode only): https://www.firstever.eu/download/BIOS-Modded.zip
This is original BIOS from ASUS - CAP file (clean, please update the CPU Microcode only): https://dlcdnets.asus.com/pub/ASUS/mb/LG…O-ASUS-4801.zip
I would like to learn how to update the microcode ![]()
@SoniX
I used UEFIReplace method, is it better to use MMTool method?
UPDATE
I also found this… but I’m a bit confused with these RSTe versions: 3.8 / 4.5-4.7 / 5.0-5.3 and this RST versions: 13.1 / 13.2 / 13.5
Yes, use MMTool.
Thanks, it works but my NVMe drive disappeared from the boot list.
I will do it one more time and add the NVMe module on the end.
Problem in rebuilding PEI-volumes. Unfortunately, UEFIReplace (UEFITool) does not cope with this. ![]()
Everything works!
I had to change the order of modifications.
1. UBU
- UBU used to update EFI Intel PRO/1000 UNDI from version 5.5.23 to 0.0.19
- UBU used to update OROM Intel Boot Agent GE version 1.3.72 to OROM Intel Boot Agent CL 0.1.13
- UBU used to update EFI Marvell SATA AHCI from version 1.1.0.1001 to 1.1.0.1020
- UBU used to update OROM Marvell 88SE9130 from version 1.0.0.1031 to 1.1.0.1002
- UBU used to update CPU Microcode (MMTool method) from 416 to 42D.
2. UEFITool
- UEFITool used to add uncompressed NVMe module (NvmExpressDxE_4)
3. Intel ME Update
- Modded ASUS ME Tool used to update Intel ME Firmware to version 8.1.70.1590 (1.5M)
4. Intel RSTe & RST → the last things I can update but I’m not sure which modules to use (43A0A7B3-1E92-42EF-A46D-DDC03E52CB5C)
P.S.
I thought that after updating the CPU microcode the “Performance” in InSpectre will change…
Glad you got it @FirstEver and thanks for posting your method for others! I was just stopping in to do this for you, but you’re ahead of me and solved already!
It’s working well. Would be nice if you could give me a hint how to do this myself. Have to update some other amd boards and there might come another µcode adressing the still open ssb exploit on my cpu. I don’t really believe amd will develop another update for the old FX generation, but future will show.
P.S. Inspectre is outdated/don’t show the correct status on amd cpu (no update avail). The author don’t react on requests.
Better use microsoft powershell to get also the state (enabled/disabled) of the operating system.
Powershell> Get-SpeculationControlSettings
Speculation control settings for CVE-2017-5715 [branch target injection]
AMD CPU detected: mitigations for branch target injection on AMD CPUs have additional registry settings for this mitigation, please refer to FAQ #15 at https://portal.msrc.microsoft.com/en-us/…isory/ADV180002
Hardware support for branch target injection mitigation is present: True
Windows OS support for branch target injection mitigation is present: True
Windows OS support for branch target injection mitigation is enabled: True
Speculation control settings for CVE-2017-5754 [rogue data cache load]
Hardware requires kernel VA shadowing: False
Speculation control settings for CVE-2018-3639 [speculative store bypass]
Hardware is vulnerable to speculative store bypass: True
Hardware support for speculative store bypass disable is present: False
Windows OS support for speculative store bypass disable is present: True
Windows OS support for speculative store bypass disable is enabled system-wide: False
Speculation control settings for CVE-2018-3620 [L1 terminal fault]
Hardware is vulnerable to L1 terminal fault: False
Suggested actions
* Install the latest available updates for Windows with support for speculation control mitigations.
BTIHardwarePresent : True
BTIWindowsSupportPresent : True
BTIWindowsSupportEnabled : True
BTIDisabledBySystemPolicy : False
BTIDisabledByNoHardwareSupport : False
KVAShadowRequired : False
KVAShadowWindowsSupportPresent : True
KVAShadowWindowsSupportEnabled : False
KVAShadowPcidEnabled : False
SSBDWindowsSupportPresent : True
SSBDHardwareVulnerable : True
SSBDHardwarePresent : False
SSBDWindowsSupportEnabledSystemWide : False
L1TFHardwareVulnerable : False
L1TFWindowsSupportPresent : False
L1TFWindowsSupportEnabled : False
L1TFInvalidPteBit : 0
L1DFlushSupported : False
@vander - I did that edit so long ago I forget, but looking back at all the related posts, seems like I had to do manually per what SoniX mentioned. I checked the BIOS I sent you and updated microcode images and all codes are same size.
So that means 99.9% chance I did direct hex edit, in place search for each outdated microcode on full raw BIOS file, select all the old microcode one at a time, open new microcode to replace it and copy then paste in place over the old microcode.
B450 I AORUS PRO WIFI
Bios: F2, B450IAPW
https://www.gigabyte.com/de/Motherboard/…support-dl-bios
UBU v1.70 rc11
Hello @SoniX ,
i had two problems updating.
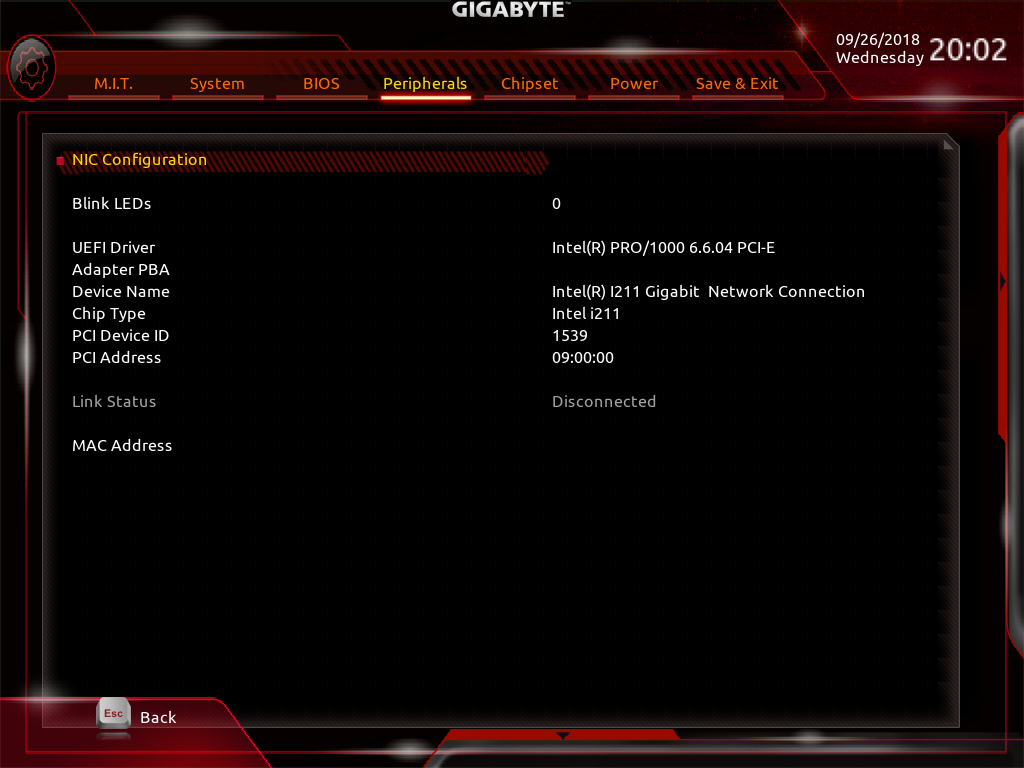
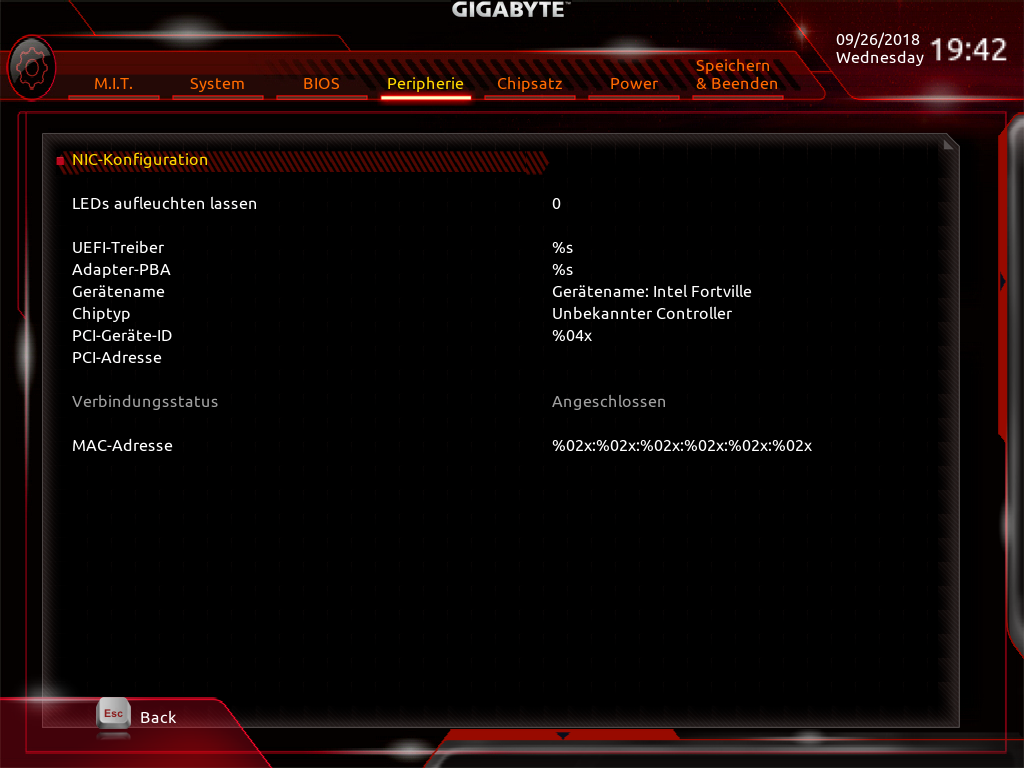
1) When updating the EFI Intel PRO / 1000 UNDI v6.6.04
on version 8.3.10 the bios no longer displays any information.
before:
after this:

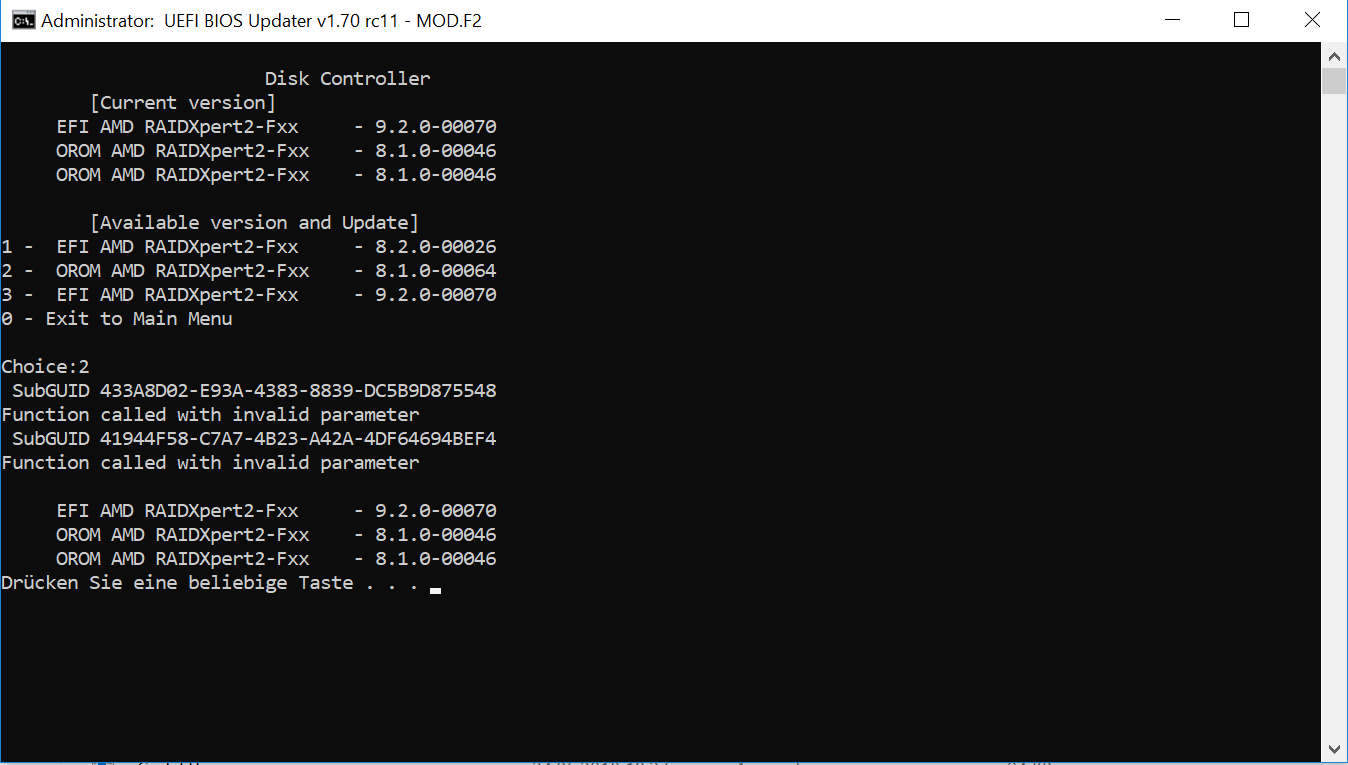
2) When updating OROM AMD RAIDXpert2-Fxx
the update is not carried out. only on the second try.
Sometimes comes an error message.
PS: Thanks for this great program!
@Ruin
1) Please look and write what is written on your LAN chip.
2) Fixed.
Added:
@Ruin
Can I ask you to do one test?
I asked - write, and not porn to lay out. :)))
Well… Let’s check one suspicion of strange compatibility.
In the folder “Files\Intel\LAN” do the following:
1) Rename “EPro1000X3.efi” -->> “_EPro1000X3.efi”
2) Copy “E1GbEX7.efi” -->> “EPro1000X3.efi”
3) Update, flash and show the result.
Okay,  I tried it.
The update was done on version: EFI Intel Gigabit UNDI - 0.0.19
After the update:
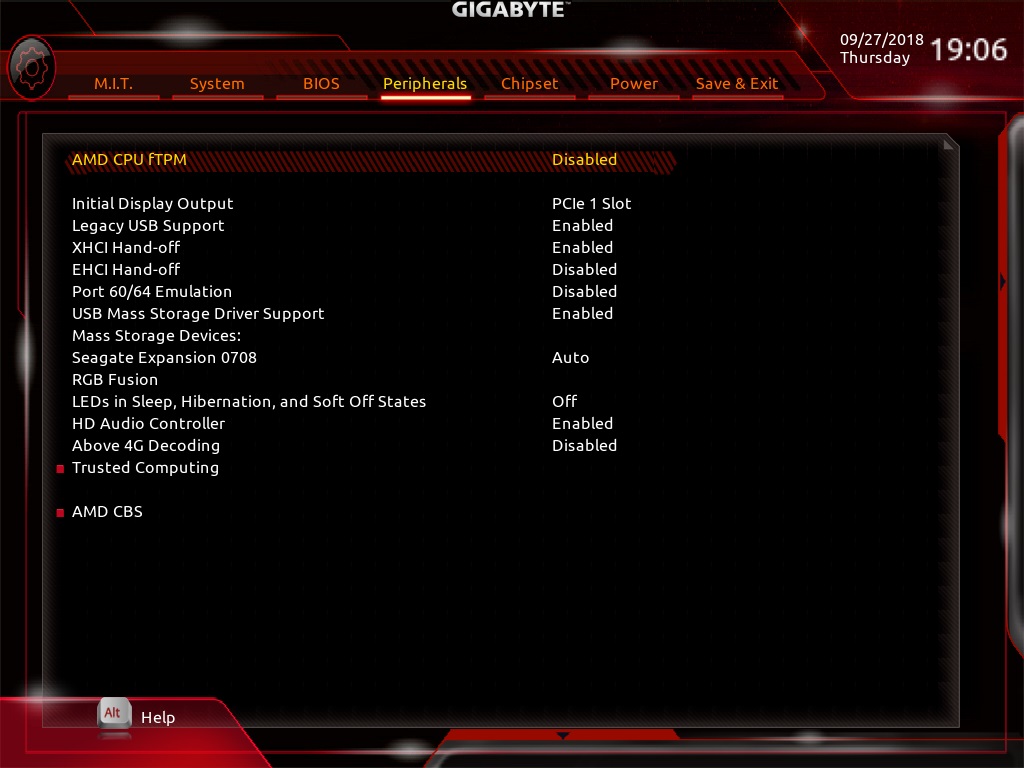
In the bios menu is the entry: Peripherals / “Intel (R) I211 Gigabit Network Connection” disappeared.
I have extracted the Intell211UndiBin from the original bios and compared it with the files in the \ Files \ intel \ LAN folder.
It is identical to E6604X3.EFI (EFI Intel PRO/1000 UNDI - 6.6.04)
Is the update to the file EPro1000X3.efi (EFI Intel PRO/1000 UNDI - 8.3.10) incompatible?
@Ruin
Fixed once again the update of OROM AMD RAIDXpert2.
LAN:
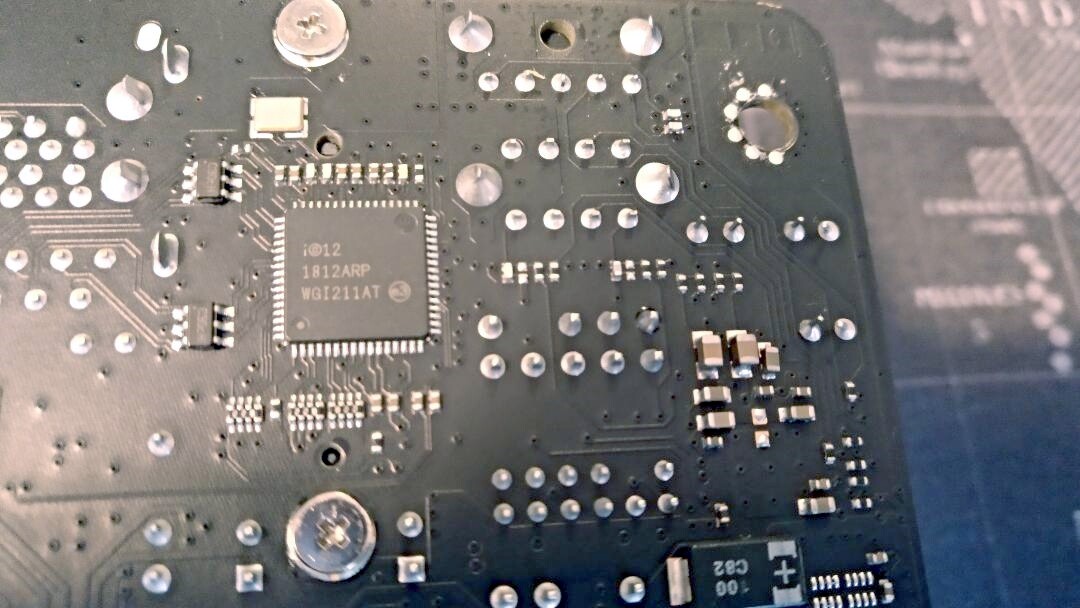
1) Write what is written on the LAN chip. And it’s hard to see in the photo.
2) Please, how the BIOS screen after upgrading to version 0.0.19.
@SoniX
The fix works very well!
LAN: Intel Ethernet-IC
1) i©12 / 1812ARP / WGI211AT
2)
before:

after that: