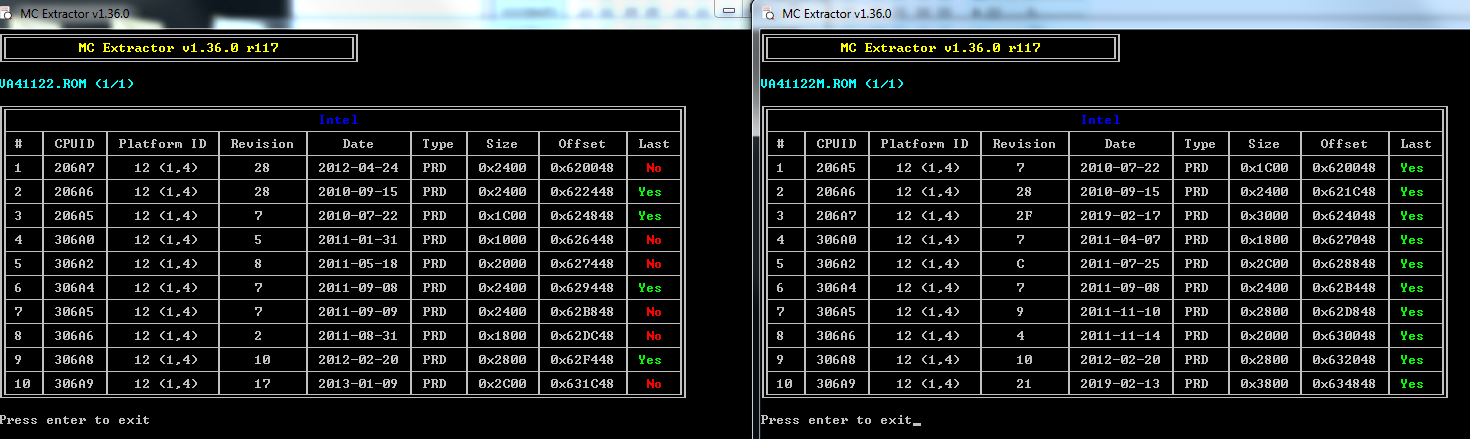
Yes, all the reasons I told you that your original mod BIOS was bad, applies to the dump you said was original dump too, so I assume your mod may have been OK originally if the dump was good you were working with.
Yes, dump always needs to be checked to be sure it’s good, valid, and proper, before you erase and do anything. Not every dump will be perfect, sometimes you need to use certain software or version of software
Always make a few dumps and compare too, unless you are certain you know what works and then have checked the file after you dumped it.
2.18 requires Win8 or above to install that BIOS, but that is using normal methods, this is mainly due to how they’re trying to restrict it and how the OS is setup to boot (UEFI mode). All that can be changed in BIOS
In your first two described attempts, do those again but with main hard drive removed. IE, try to do the same from DOS with winflash32, it may not work in DOS, but I’d try and see.
As explained already, the capsule is empty = 50 bytes of FF, thus they are stupid and this has nothing to do with security/flashing etc. They did this because some systems shipped with Win7/1.xx BIOS (legacy) and others shipped with Win8/2.xx BIOS (UEFI)
Then, you did this, not them 
 Always go slow, have someone check things for you if you are not sure, wait, do not proceed with anything BIOS related, when you don’t know for sure. Otherwise you end up in this kind of situation, or worse, at least you can boot the system
But yes, in general I agree, they should allow user to choose what BIOS they want, obviously anyone can change the BIOS setting to UEFI/Secure boot mode or legacy, if they leave the setting there and let user flash either BIOS. Yes, it’s dumb!
Can you find some other dump from same exact system with 2.17 or 2.18? If yes, give me a link, maybe I can fix your original dumped BIOS.
I’ll see what I can do with your dump and the stock file, maybe I can sort it out  I think I can fix it, but one may loose your NVRAM, since it’s corrupted in the dump, but we can also try with that as-it-is too.
As for crisis recovery, this needs to be done in a certain way, and I’m not sure it works around this kind of BIOS issue.
USB Should be small (128MB-2GB), formatted to FAT32, and BIOS should be on root of USB (not in folder) and BIOS has to have a certain recovery name and extension (usually .fd or .rom, not a capsule and you can’t simply rename that cap file)
But really, all BIOS you download from them is partial/update, to update/change what’s already onboard BIOS. None are complete BIOS, so crisis recovery from 1.xx to 2.xx isn’t going to be possible anyway.
Also, if you want, I can unlock FD in next/all BIOS I sent, then you can flash BIOS via Intel FPT from them on out, as long as with any/all BIOS you program in you unlock the FD if flashing the entire BIOS (usually only BIOS region flash needed though, so you’d leave unlocked FD alone and in there)
* Edit - for now, please test this, let me know outcome - this has FD Unlocked and SMM lock disabled too, so after you program this on you should be able to flash with FPT now (FPTw.exe -bios -f filename.bin) >> Backup via >> FPTw.exe -bios -d filename.bin
http://s000.tinyupload.com/index.php?fil…761772891118267
If this boots for you, before you check out anything else such as serial, LAN MAC ID etc, please backup the BIOS via FPT, and then immediately try to reflash the BIOS region via FPT, show me the error if you get any. If error is in red, do not proceed or you will have to programmer recover.
FPT is here, you need V8 ME System tools from Section C - Intel Management Engine: Drivers, Firmware & System Tools
FPT must be ran from admin command prompt >> find Flash Programming Tool folder, and inside that a Windows or Win/Win32 folder. Select that Win folder, hold shift and press right click, choose open command window here (Not power shell).

 , but BIOS broken at various places and should not be used, will not boot - as you already know now
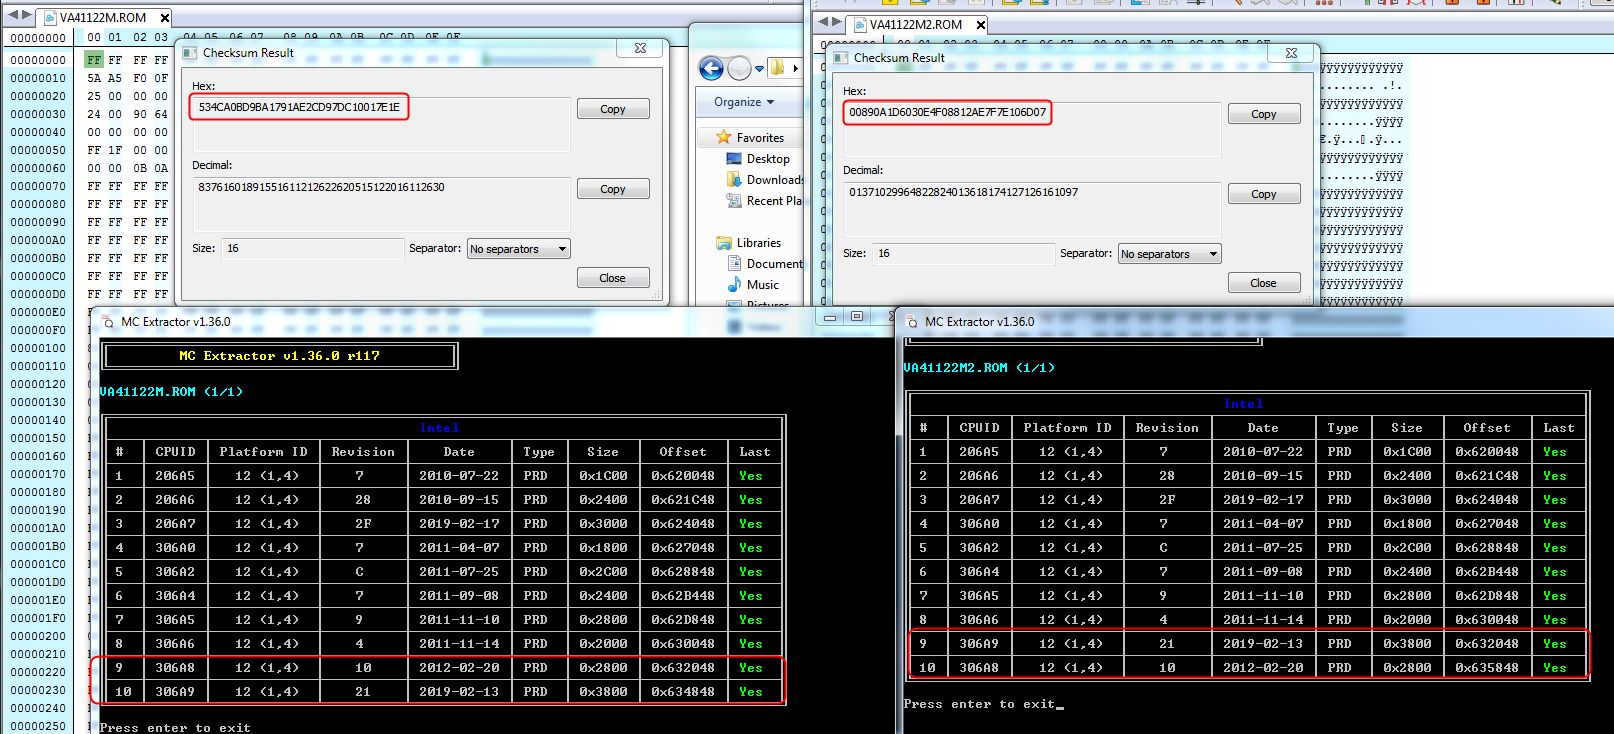

 (I’m wondering if my BIOS 2.18 may require information from the NVRAM that no longer exists and that’s why it brick the system ?)
 -the extension .cap is specific to the UEFI which increases security on many levels including the source fw
  - I would have to test from a live win10 usb win10 to complete my attempts, I’ll try to find that but if you know a good reference usb live iso win8/win10 do not hesitate to make it known.
  (original file) :