Thanks for all the hints and tips to upgrade old motherboards to handle ssd’s during boot process. As English is not my mothertongue, I apologize for my writing. I am dealing with an Asus P9x79pro, Bios is P9X79-PRO-ASUS-4801.CAP I followed all the described steps to modify the mentioned Bios and succeded somehow. However there a two points which worry me. 1) I extracted the “body” of bios and did the modification on the body succesfully. I marked the total body for copying and pasted it back into the original Bios. By this the Biosfile became appr. twice the size compared to original Bios, what seems to be logical; however is this correct (was unable to upload this version because even a zip-version is beyond 6MB)? I created a second version of of a modified BIOS by deleting that part of the file, which contains the old part of intel image (P9X79-MODred-ASUS-4801.CAP) 2) When looking into the modified Bios File with UEFI-Tool 0.28.0 at “informations” relatet to pe32 Image section of NvmExpressDxe_4 the related entrypoints seem to be incorrect, at least not logical: Imagebase at 0h is questionable and entrypoint at 314h is logical based on imagebase however questionable as well.
Type: 10h Full size: 5124h (20772) Header size: 4h (4) Body size: 5120h (20768) DOS signature: 5A4Dh PE signature: 00004550h Machine type: x86-64 Number of sections: 3 Characteristics: 2022h Optional header signature: 020Bh Subsystem: 000Bh RelativeEntryPoint: 314h BaseOfCode: 1C0h ImageBase: 0h EntryPoint: 314h
@andis_bios : Welcome to the Win-RAID Forum! After having checked your modded BIOS and compared it with the original BIOS here is my result: There is no problem with the modification - everything seems to be fine. Here are my answers to your specific questions:
The size of the modded *.CAP file must be 100% identical with the original *.CAP file. So you just have to add the previously removed original “Capsule Header” to the modded *.ROM file, if you want to get a *.CAP file with the originally signed capsule header again.
When I open your modded BIOs with the UEFITool v0.28.0, I don’t see your posted “informations” about the PE32 image of the NVMe module, but there is no reason to be worried about the exact location of the “entrypoint”. You should consider, that some “DXE Drivers” are compressed and this compression had to be increased to get the uncompressed NVMe module properly inserted without changing the BIOS size.
Godd luck for the flashing procedure! Dieter (alias Fernando)
Thanks for a fast and helpful answer. In meantime I failed to flash that modified Bios to my ASUS P9X79PRO. With Bios flash back the blinking LED in the flash button stops immediateli after its first blink and remains continuosly on. A second try with ASUS EZ flash shows a security issue as expected. I tried with different USB Sticks, all properly formatted. What I do not understand in the description of the flash procedure is the renaming process. I cannot find the mentioned renaming tool within the ASUS pages nor can I find information concerning "USB BIOS Flashback Rules", nor do I understand what that renaming process should to the modded Biosfile. Sorry for bothering, however I feel to be close to success.
@andis_bios : If you don’t know how to flash a modded ASUS BIOS, you should read the start post of >this< thread. Furthermore you may look >here< for a solution regarding renaming the BIOS.
Hy once more. I made it. Thanks to your second link I steped into a youtube video demonstrating an USB flash process (by the way I am familiar with USB flashing). Within this movie I saw a monitor in the background with a list of relevant names for BIOSes to be flashe to ASUS boards. So I was able to use the correct Filename and everithing went fine. SSD is available for booting.
I did not find any information concerning this name problem within the german ASUS pages.
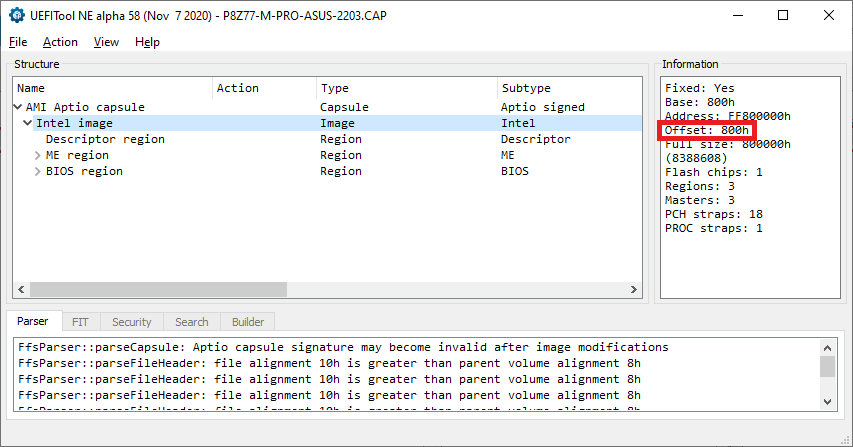
@Abban : Welcome to the Win-RAID Forum! If you should mean >this< guide, you should better ask its author Lost_N_BIOS. This is the picture I get after having opened the latest BIOS, which is offered by ASUS for your mainboard:
The starting offset of the BIOS Image ("body") is 800h. Good luck! Dieter (alias Fernando)
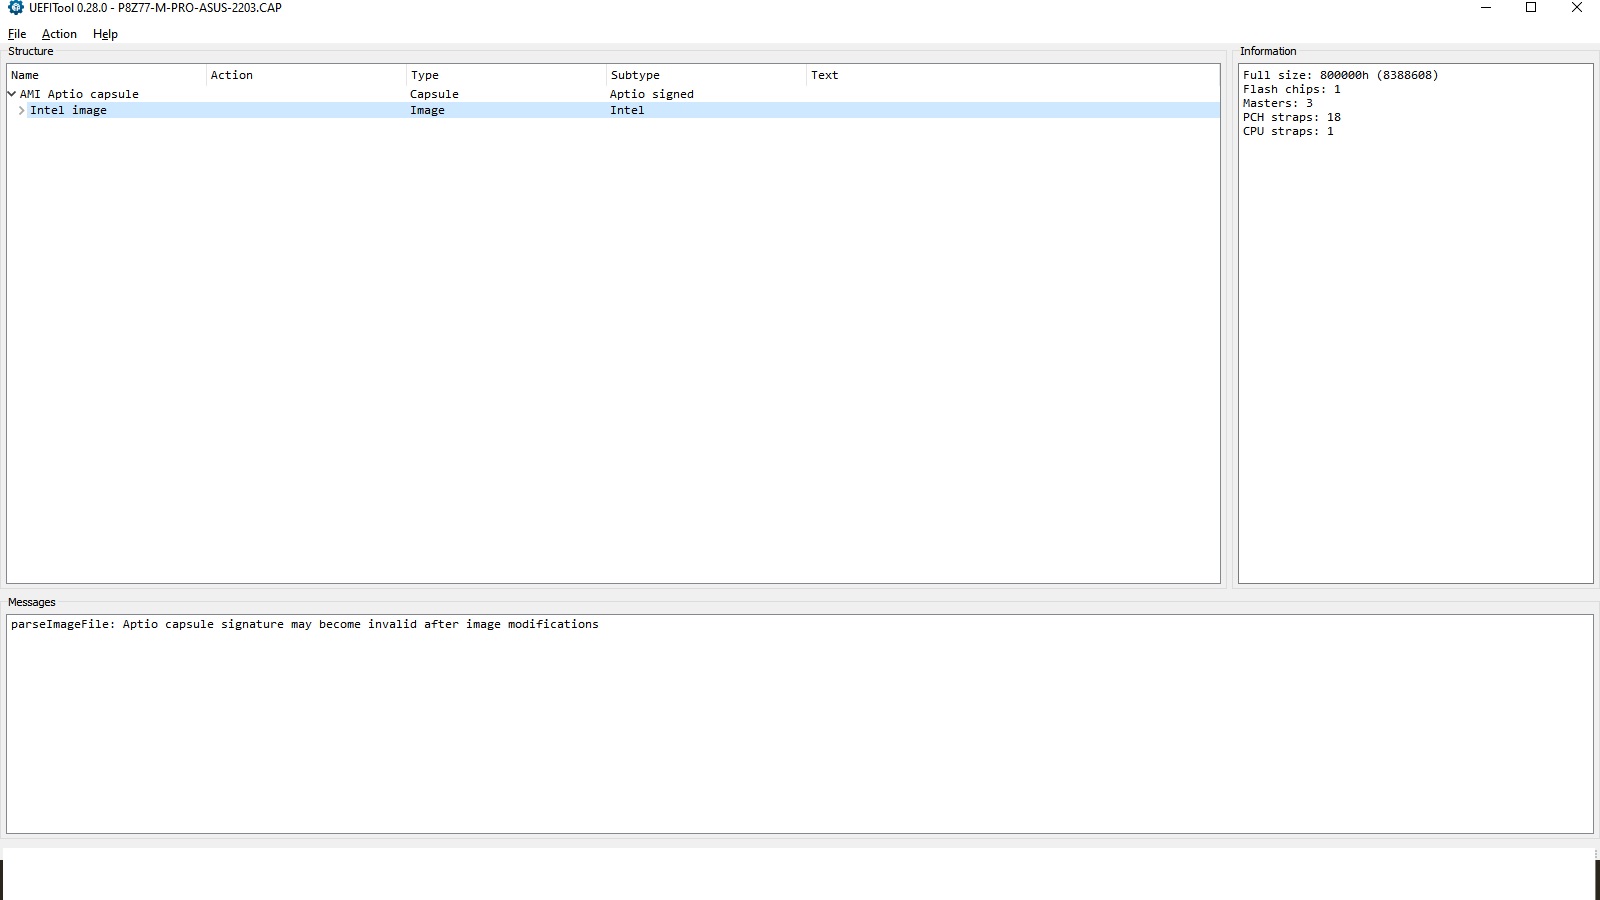
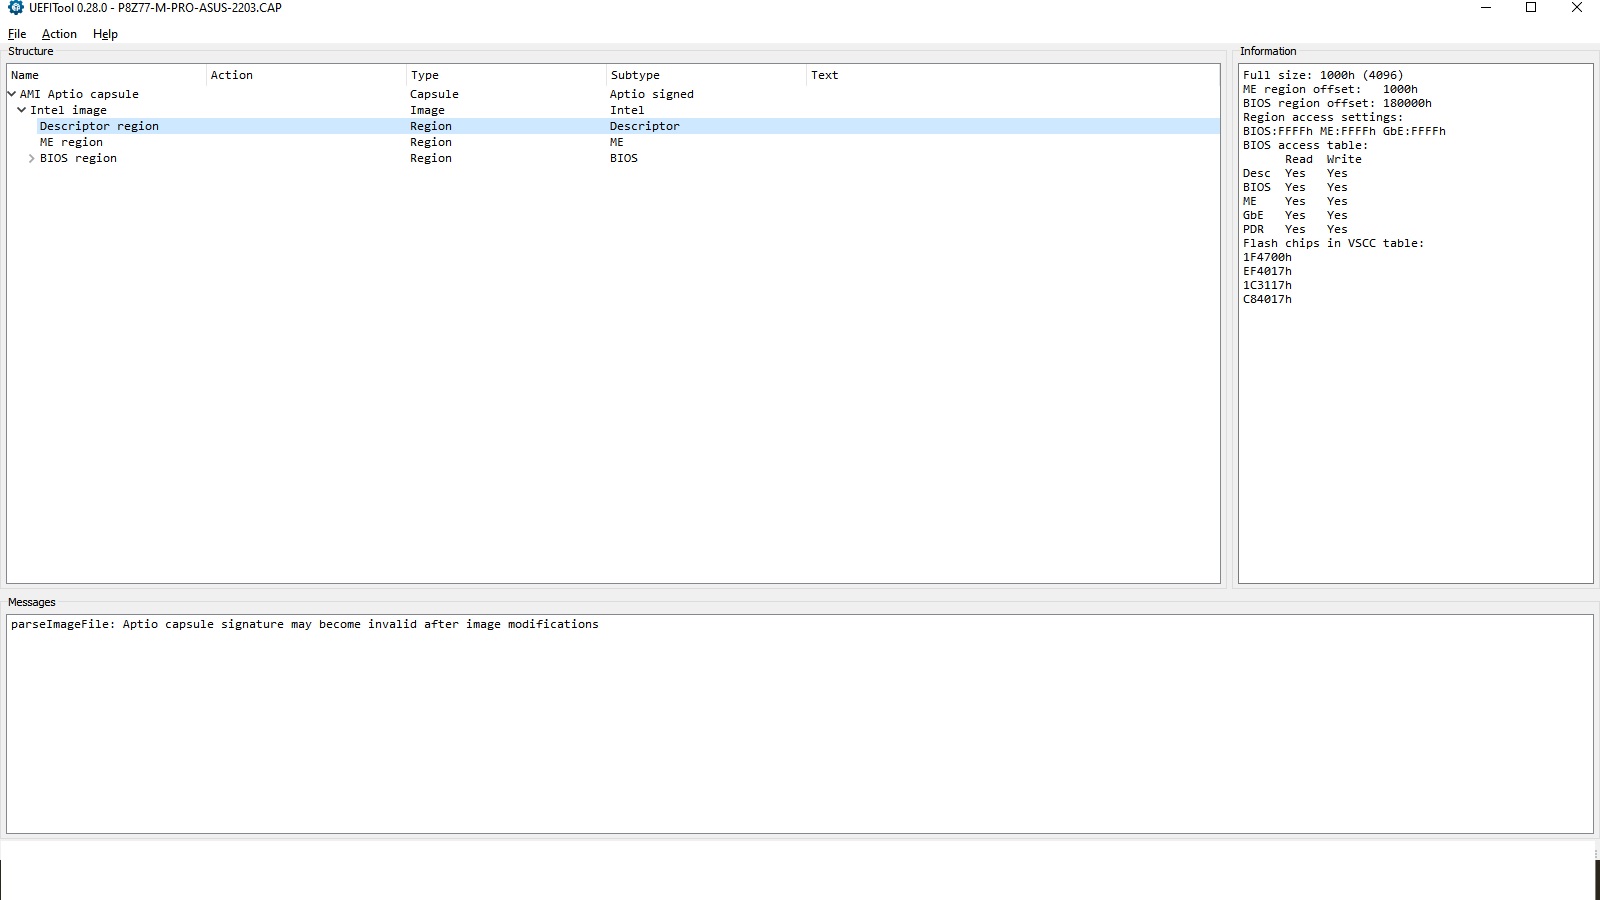
Thanks Fernando, I apologize for asking you instead of Lost_N_BIOS. Perhaps its the UEFI tool that I am using. Your version is UEFI NE alpha 58 while the one i am using is UEFI 0.28.0. I have attached screenshots of my UEFI tool which shows differently. Anyways, thanks for your efforts and help. I really appreciate your prompt reply.
@Abban : Please compare my screenshot with the ones Lost_N_BIOS has posted. The offset of the “Descriptor region” doesn’t matter. You need to know the starting offset of the complete “Intel image”, which is the “body” of the *.CAP file after having extracted the Capsule Header.
@Abban - Thanks for your notice of this issue, I have updated the guided info to show how to also see this with regular UEFITool versions (Non-NE-Alpha version) See added step 3a
Thanks for your guide bro. Love you !!! ----------------------------------
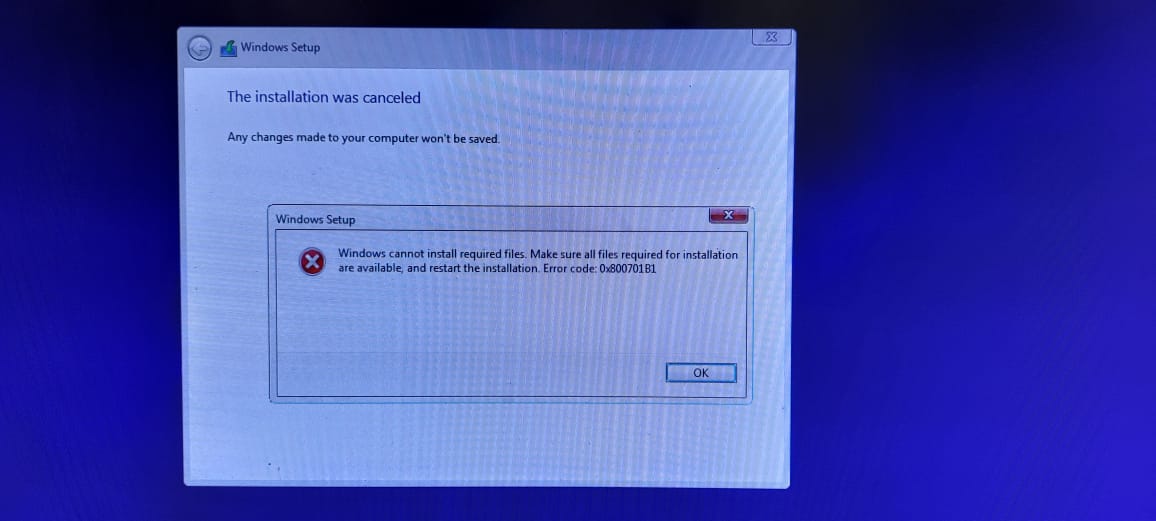
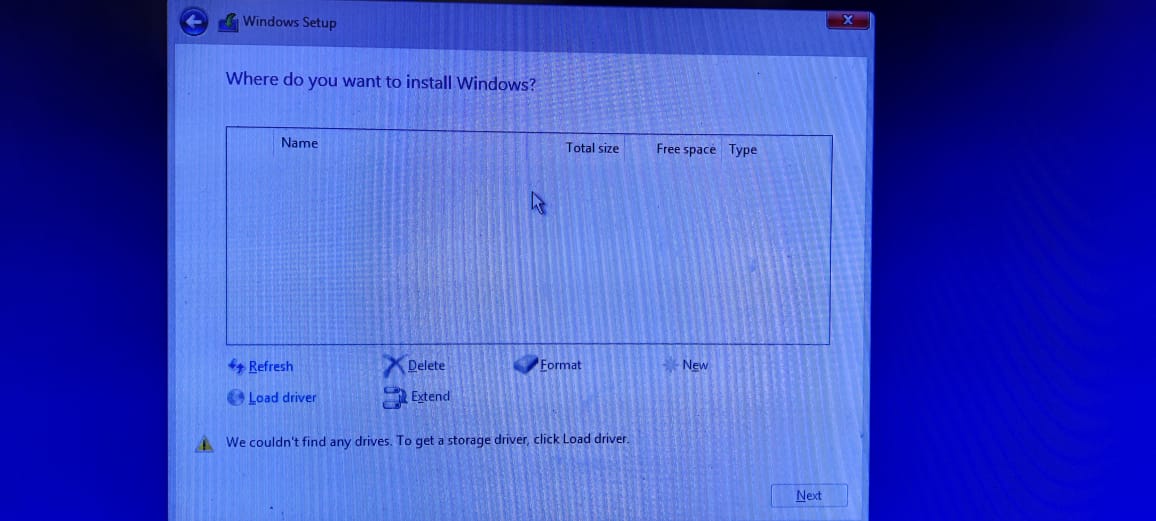
Hi Fernando, first of all I thank you for all your support and expertise. I was able to successfully MOD my P8Z77-M PRO bios and flash back it without any issues. But i can’t get the Windows 10 OS to install on my WD SN550 NVME 1TB SSD mounted on PCI-E x4 M.2 adapter. I get error that Windows cannot find required files to install (Please check the screenshot). After trying to reinstall Windows 10 second time after getting error install window shows no drivers listed. I have unplugged all my HDDs and trying to install only on NVME SSD. I tried disabling “Fast boot”, CSM and Secure boot and enabling CSM later but in vain. I even tried changing USB drives, tried installing from a latest fresh release of Windows 10 USB drive directly downloaded from the internet. Tried disabling ASMEDIA SATA controller even. Any help would be much appreciated? ----------------------------
BTW I have prepared my Windows 10 bootable USB drive using GPT (UEFI) and have also created a GPT style partitions on my NVME SSD. I don’t think it should matter. I am also thinking of creating a bootable MBR partition style USB instead of GPT and trying to install on a MBR partition on my NVME SSD just for testing.
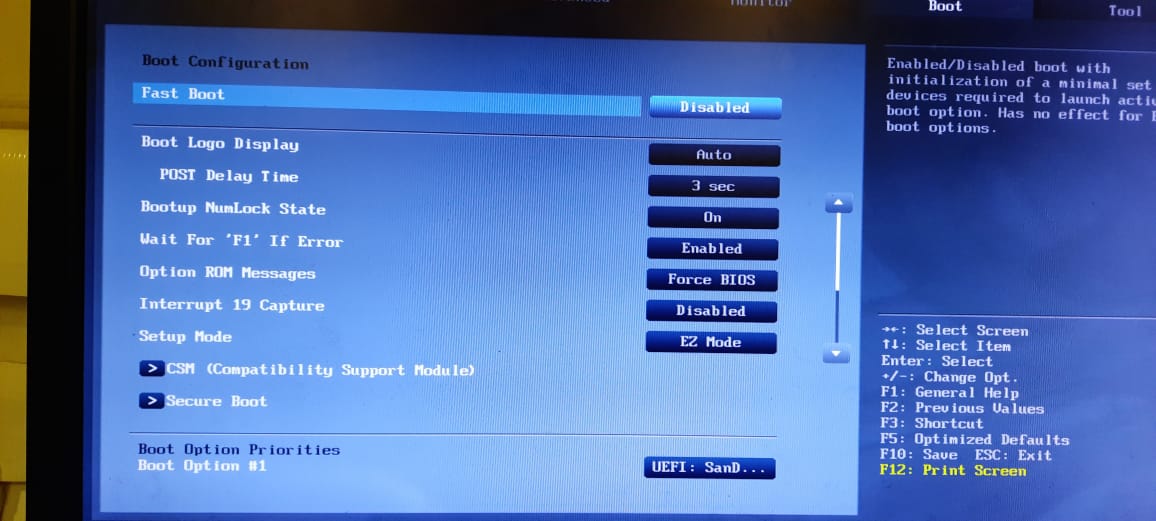
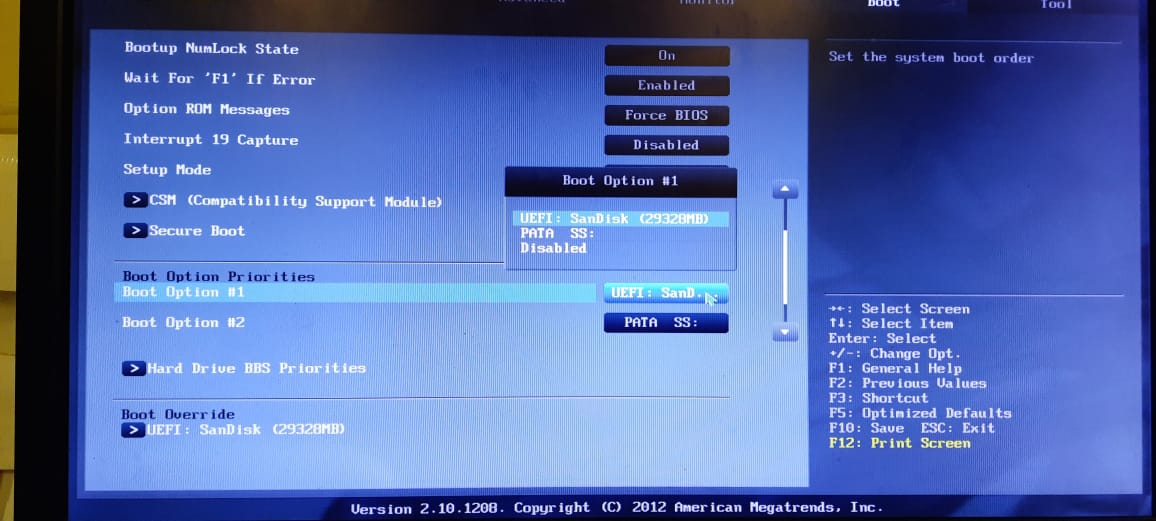
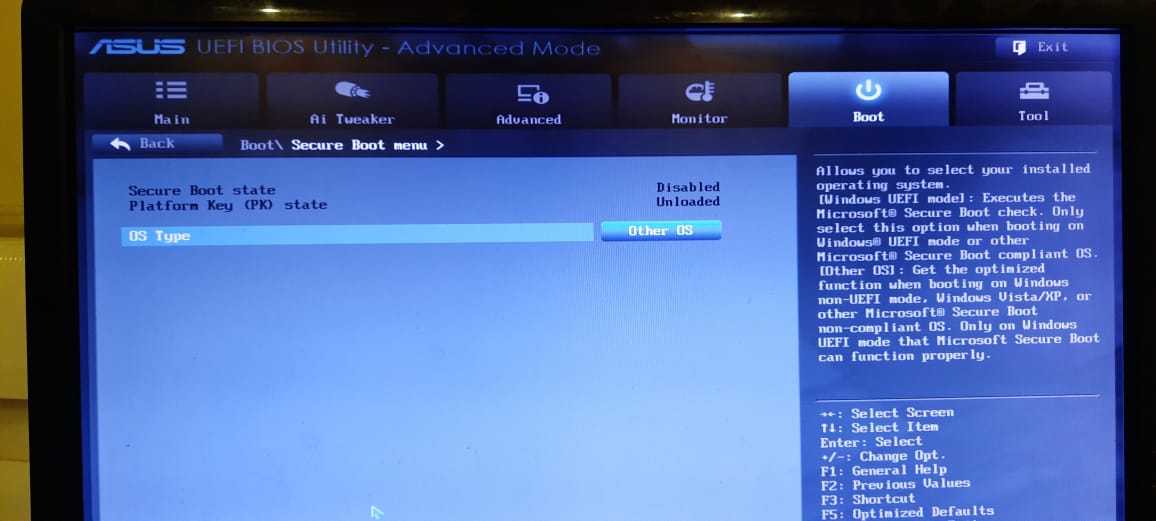
@Abban : Please re-read carefully the 4. chapter of the section "This is what you should do:" of the start post. What makes you so sure, that the flasbing of the modded BIOS was successful? Do you see a device named "PATA" or "PATA_SS" within the "BOOT" section of the BIOS? What about the "Secure Boot" setting within the BIOS?
Thanks for your reply, I have verified MODDED BIOS with the original BIOS CAP file and I have made sure that no padding files have been tampered with. I will also send you my MODDED BIOS file for verification. I see PATA SS option in my boot options and Secure Boot settings has been turned off and all the security Keys deleted. Please check my attachments.
Finally I got it working !!! I got windows 10 OS to install on my WD SN550 NVME SSD 1TB by doing the changes to the ASUS P8Z77-M PRO UEFI BIOS below (Options below are same on most of the ASUS UEFI motherboards):
1. Fast Boot - Disabled 2. CSM - Disabled 3. Secure Boot State - Enabled, OS TYPE - Other OS
NOTE: CHANGING SATA MODE SELECTION FROM IDE, AHCI OR RAID TO “DISABLED” IS IMPORTANT
Once Windows 10 is installed on SSD TURN ON Fast Boot, Secure Boot (Install Keys and change option “Other OS” to “Windows UEFI”) change SATA controller options from Disabled to AHCI (If you have other HDDs installed), Enable Intel Rapid Start and Smart Connect Technology options.
@Abban : Congratulations for having finally succeeded to get Win10 installed onto the NVMe SSD and thank you very much for your interesting report about how you managed it.
Are you really sure about the necessity to DISABLE the on-board SATA Controller before going to start with the OS installation onto an NVMe SSD? It is hard to believe, because I have installed Win10 very often onto different NVMe SSDs without having disabled the on-board SATA Controller(s) and I have never seen such report from any other user within this thread. According to my knowledge it should be sufficient to unplug all SATA connected HDDs/SSDs and to make sure, that the SATA mode within the BIOS is set either to "IDE" or "AHCI". Question: Are you absolutely sure, that you were not able to get the OS installed onto the NVMe SSD unless you had disabled the on-board Intel SATA Controller?
Hi Fernando, yes at least it worked for me by disabling SATA controller. Earlier in this topic I have come across that some people reported compatibility issues with SATA controller enabled and I overlooked it. Later when I read the article in the Dell website I tried disabling it. I have two SATA 6 Gbps HDDs installed in my system along with NVME SSD and have disconnected both HDDs earlier each time i tested with different options. But the last time I tried differently was with both the HDDs connected, and SATA controller disabled. Believe me I have been trying to get it to work by playing around with different BIOS options for 4 days now but couldn’t get to work until I disabled SATA controller and it worked for me lately.
Hi guys, you can add one more successful BIOS Mod for the ASUS M5A99FX Pro R2.0 I’ve been following this thread for a while, in fact it was last spring when I completed the NVMe boot module insertion procedure. Finally got around to flashing the BIOS this past weekend & everything proceeded as you detail in your most EXCELLENT guide. Booting off an NVMe SSD now
I have got the same issue and I have spent weeks on looking for solutions. Although attaching a sata device or setting SATA to either Raid or IDE will remove the yellow flag, this kind of solutions are not perfect.