does hp hdx 9000 face nvidia bumpgate? the HDX 18 doesn’t because it has a 9600m GT so hopefully the hdx9000 have some new revision of the 8800m gts
I don’t know if there are any revisions of the 8800M GTS, but I’m trying to make Quadro 5000M for us. First, I wanted to clone this card from Dell M6500. Just finished soldering my board, see the picture. But the card can’t seem to boot up 

Need to figure out the cause. Once it boots up, I’ll be able to go on and design an MXM-HE version of it.
1 Like
It’s working! There was a bad contact between the GPU chip and the board. But I damaged a RAM chip (1 ball is missing) before posting the previous photo, so the card is giving artifacts. Waiting for a batch of replacement RAM chips to fix the problem. I can’t run any tests now because I left the original heatsink at home in my country. I’ll think on solving it too. Here’s are some photos for now


2 Likes
Just finished replacing the damaged RAM chip. The problem seems to be gone. Now need to get the heatsink shipped from my home to do all the tests. I hope to receive it in about 2 weeks.

1 Like
What was the cost for production though? Usually for PCB’s, they force you to buy a batch of them. Also the 8800m gts is just mxm connection? Damn.
They asked me to pay $1000 for the batch. The minimum requirement for the order is 5 boards.
8800M GTS physically is an MXM card, but the LVDS signals are reversed.
It’s been a long time, but I’m back with some results.
I made 2 adapters and tried to replace the cardreader chip with a desktop PCI card, but it didn’t show up in the device manager. I had doubts about the connection itself because there’s some difference between desktop and mobile PCI connections. I found a docking station (PD01X) for some Dell laptops which allows connection of desktop PCI cards to those laptops, so I have a plan to purchase it to find out how the PCI slot is connected there.
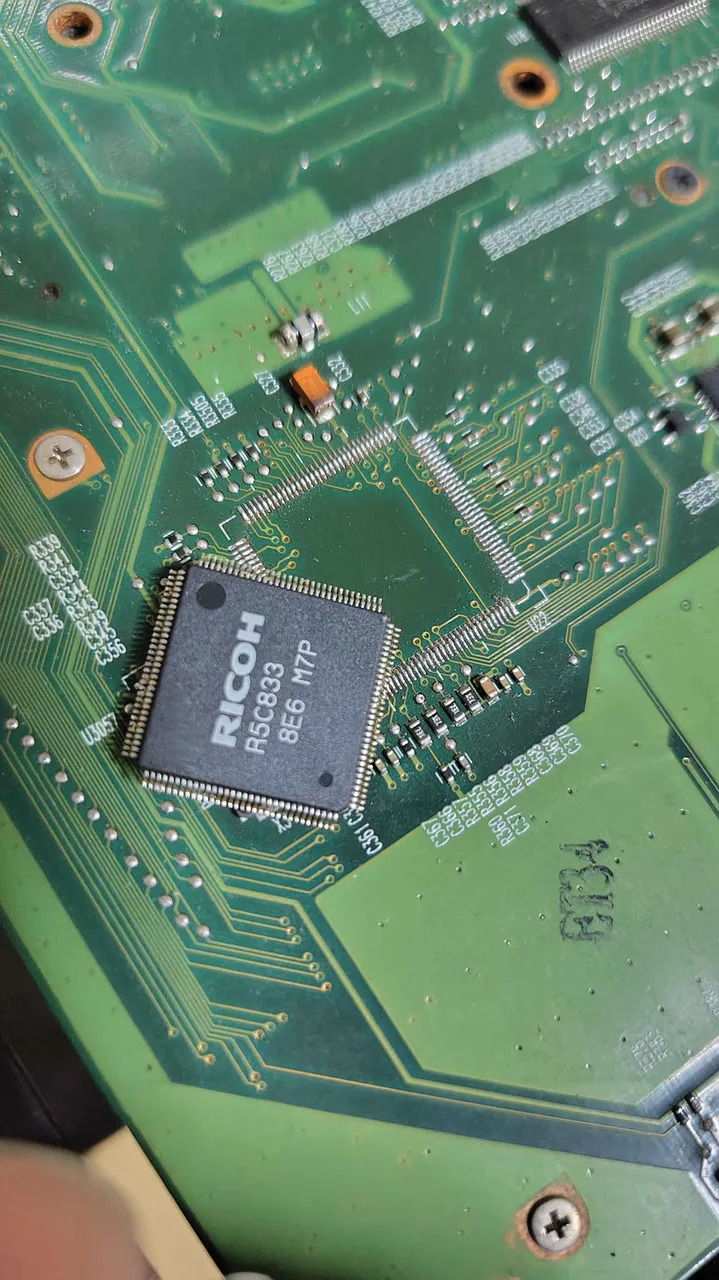
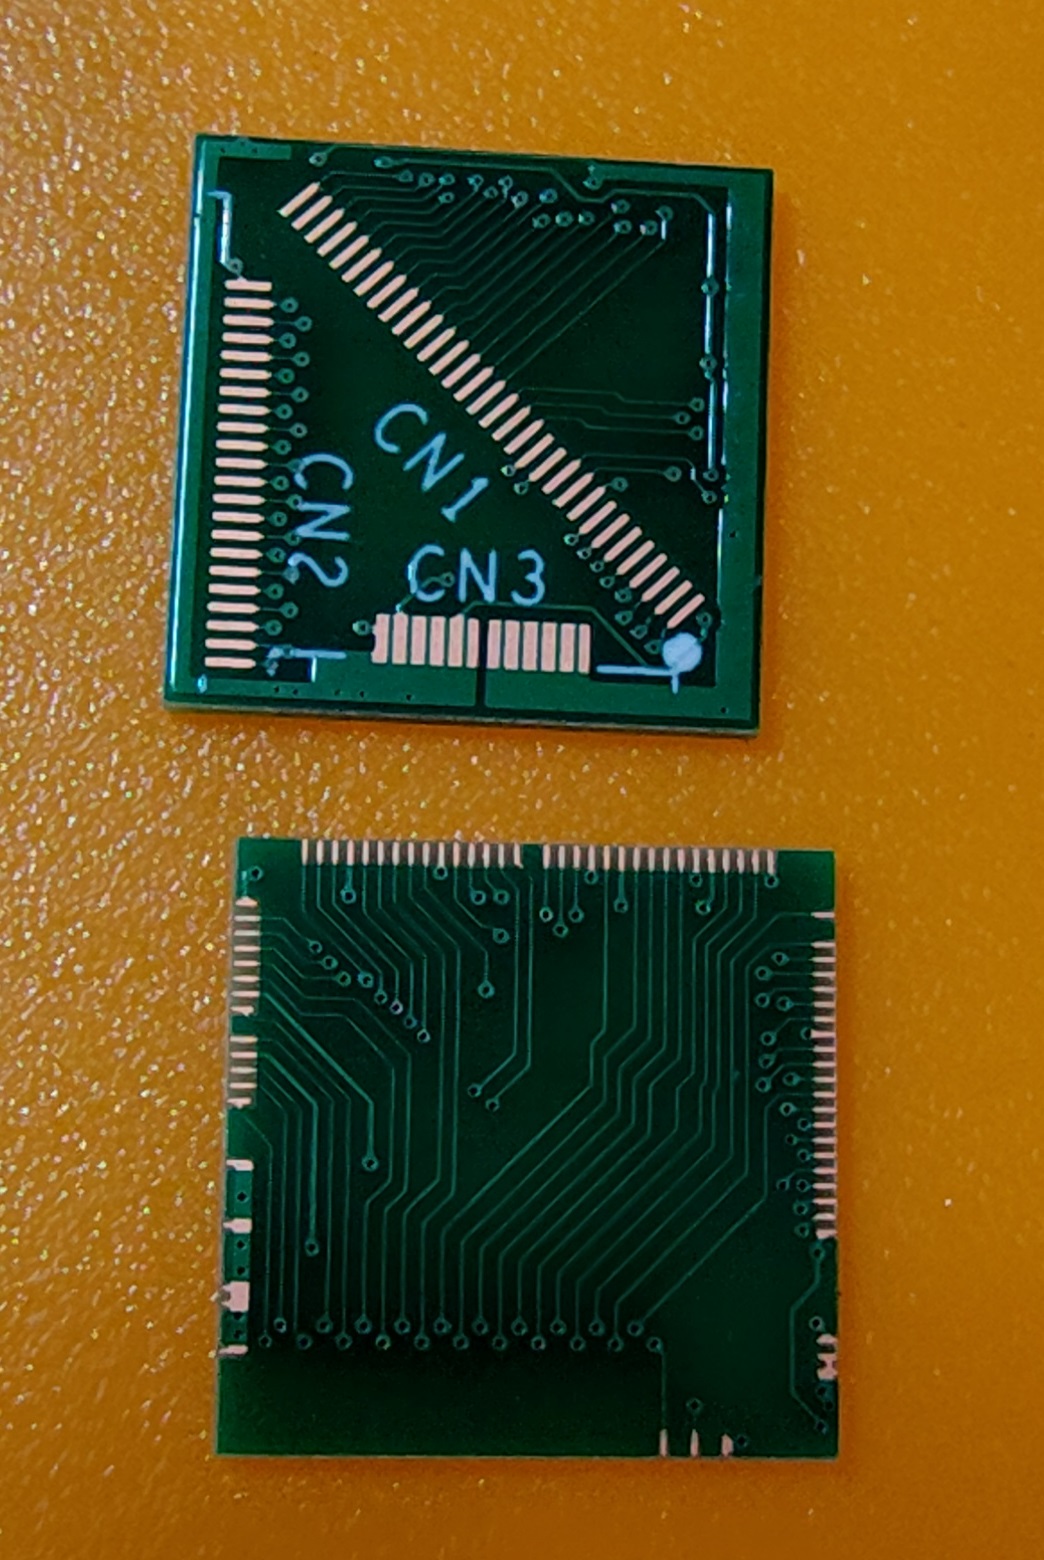
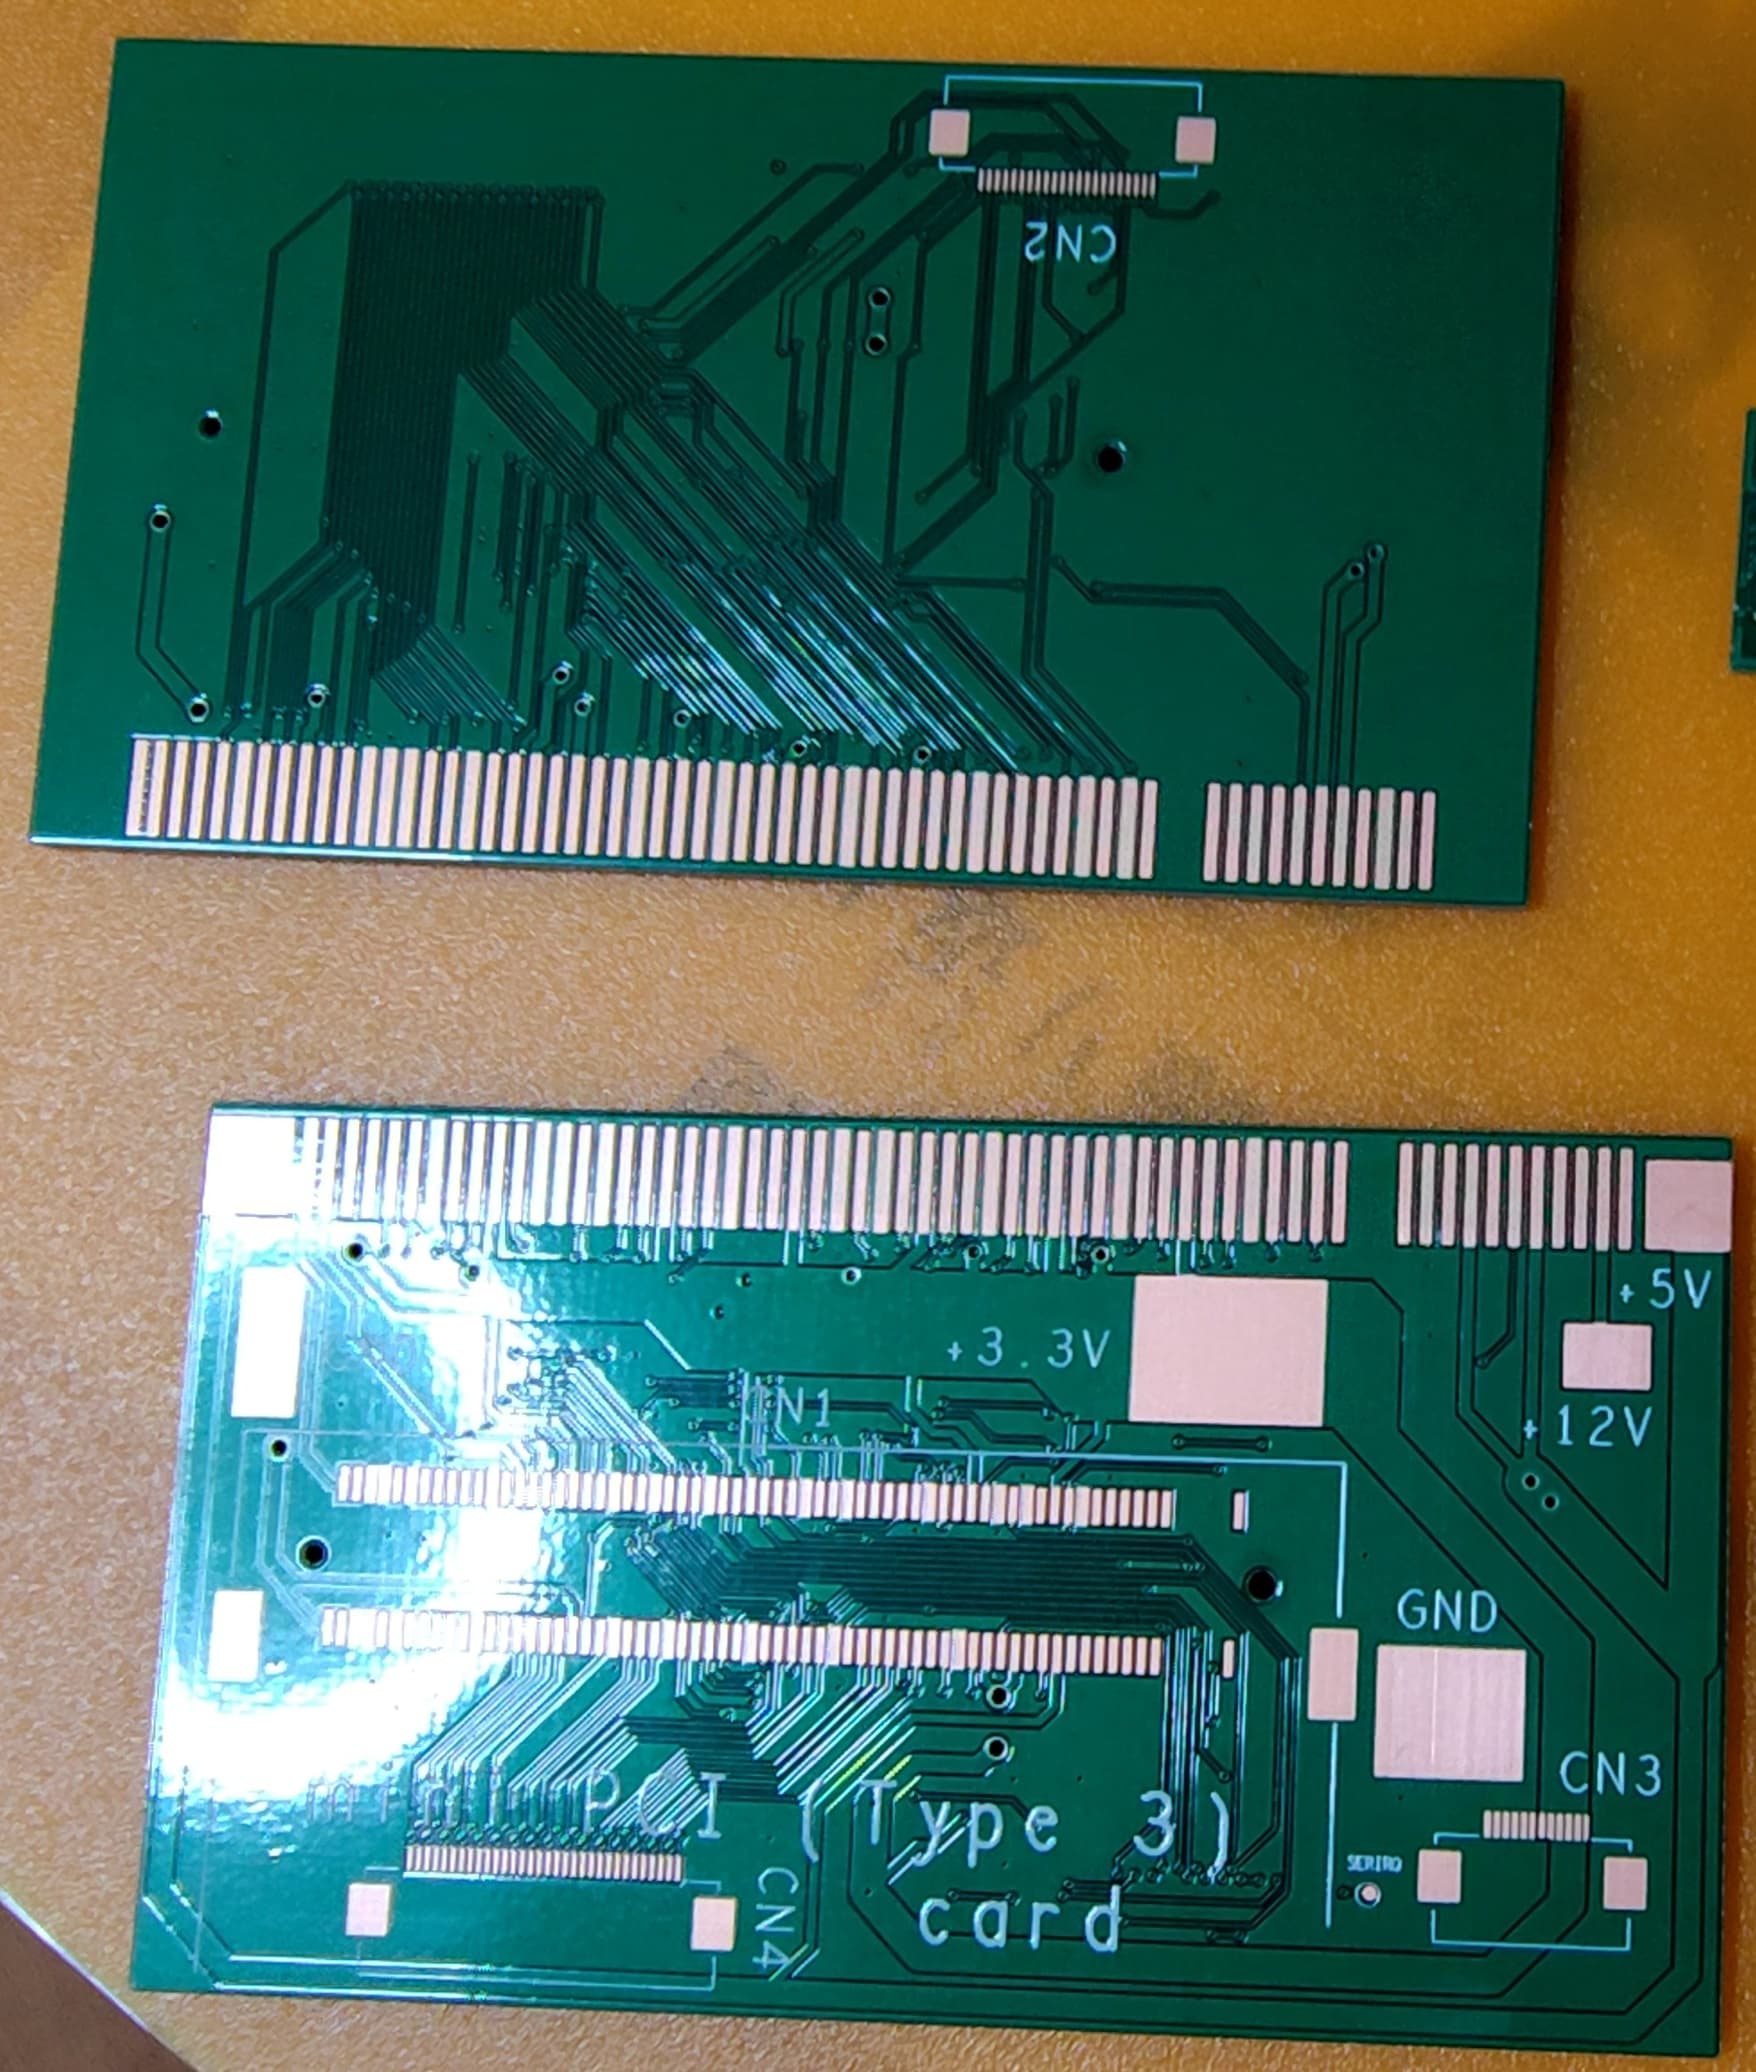
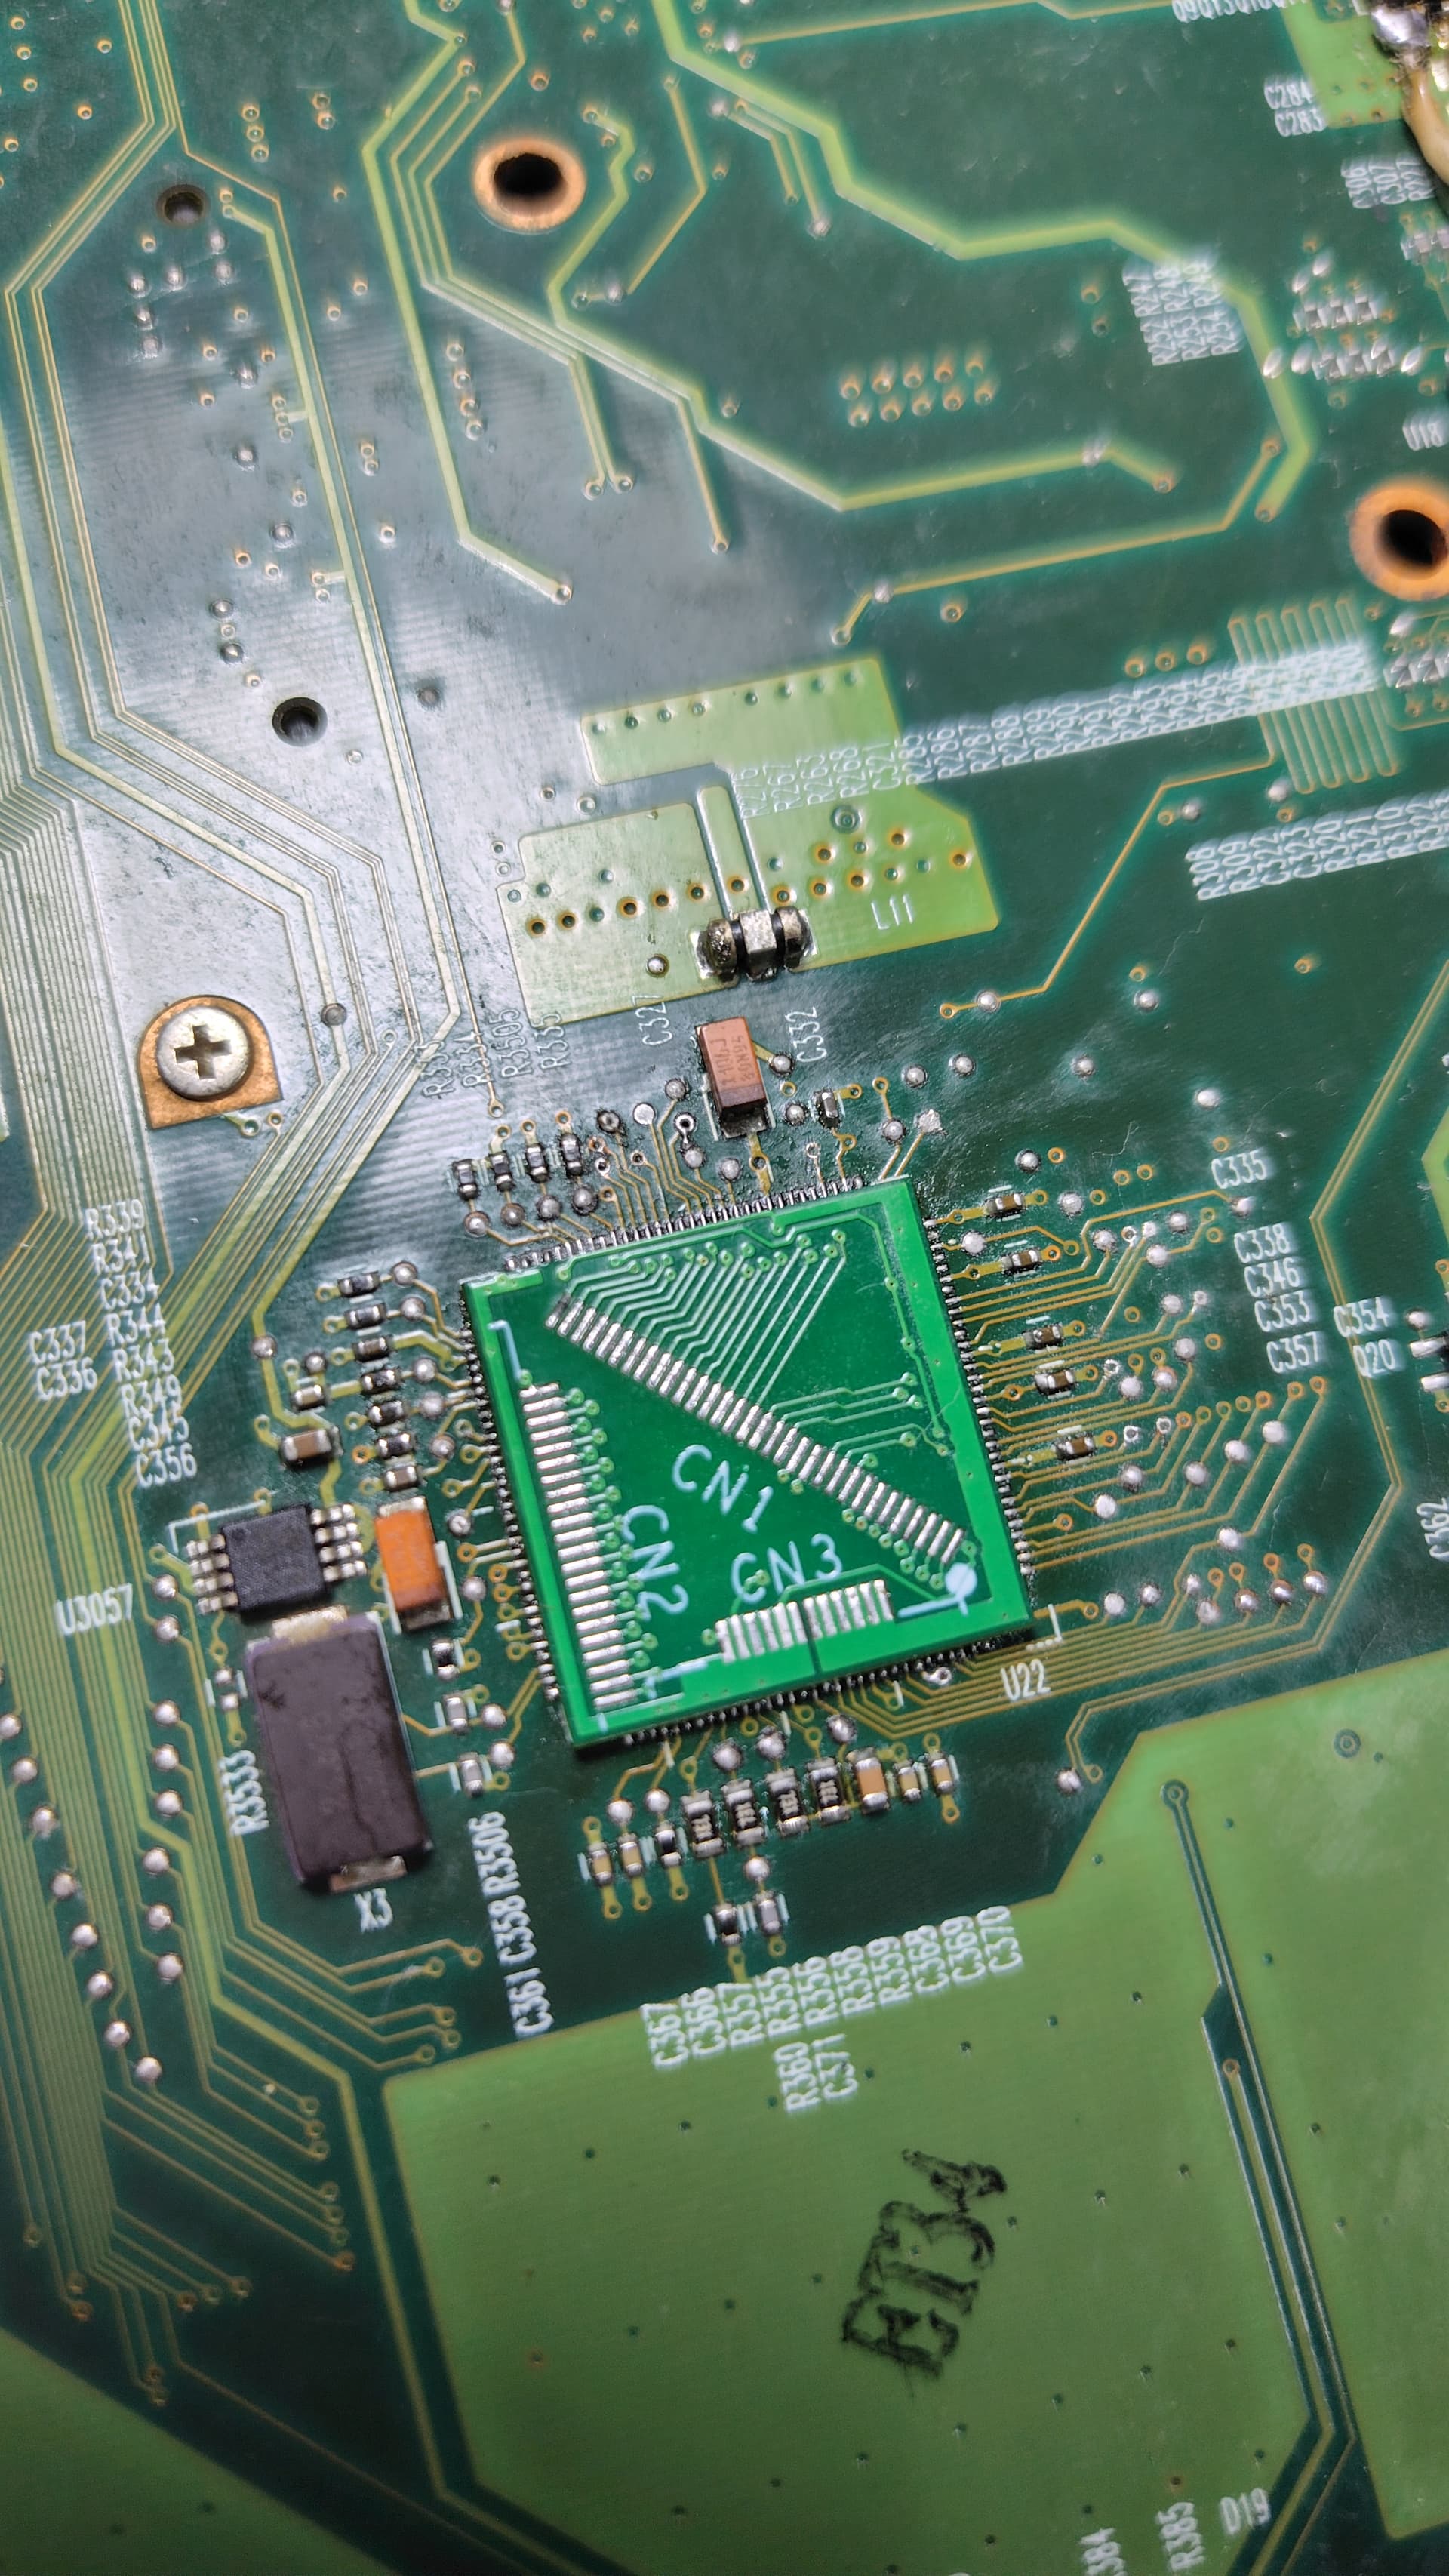
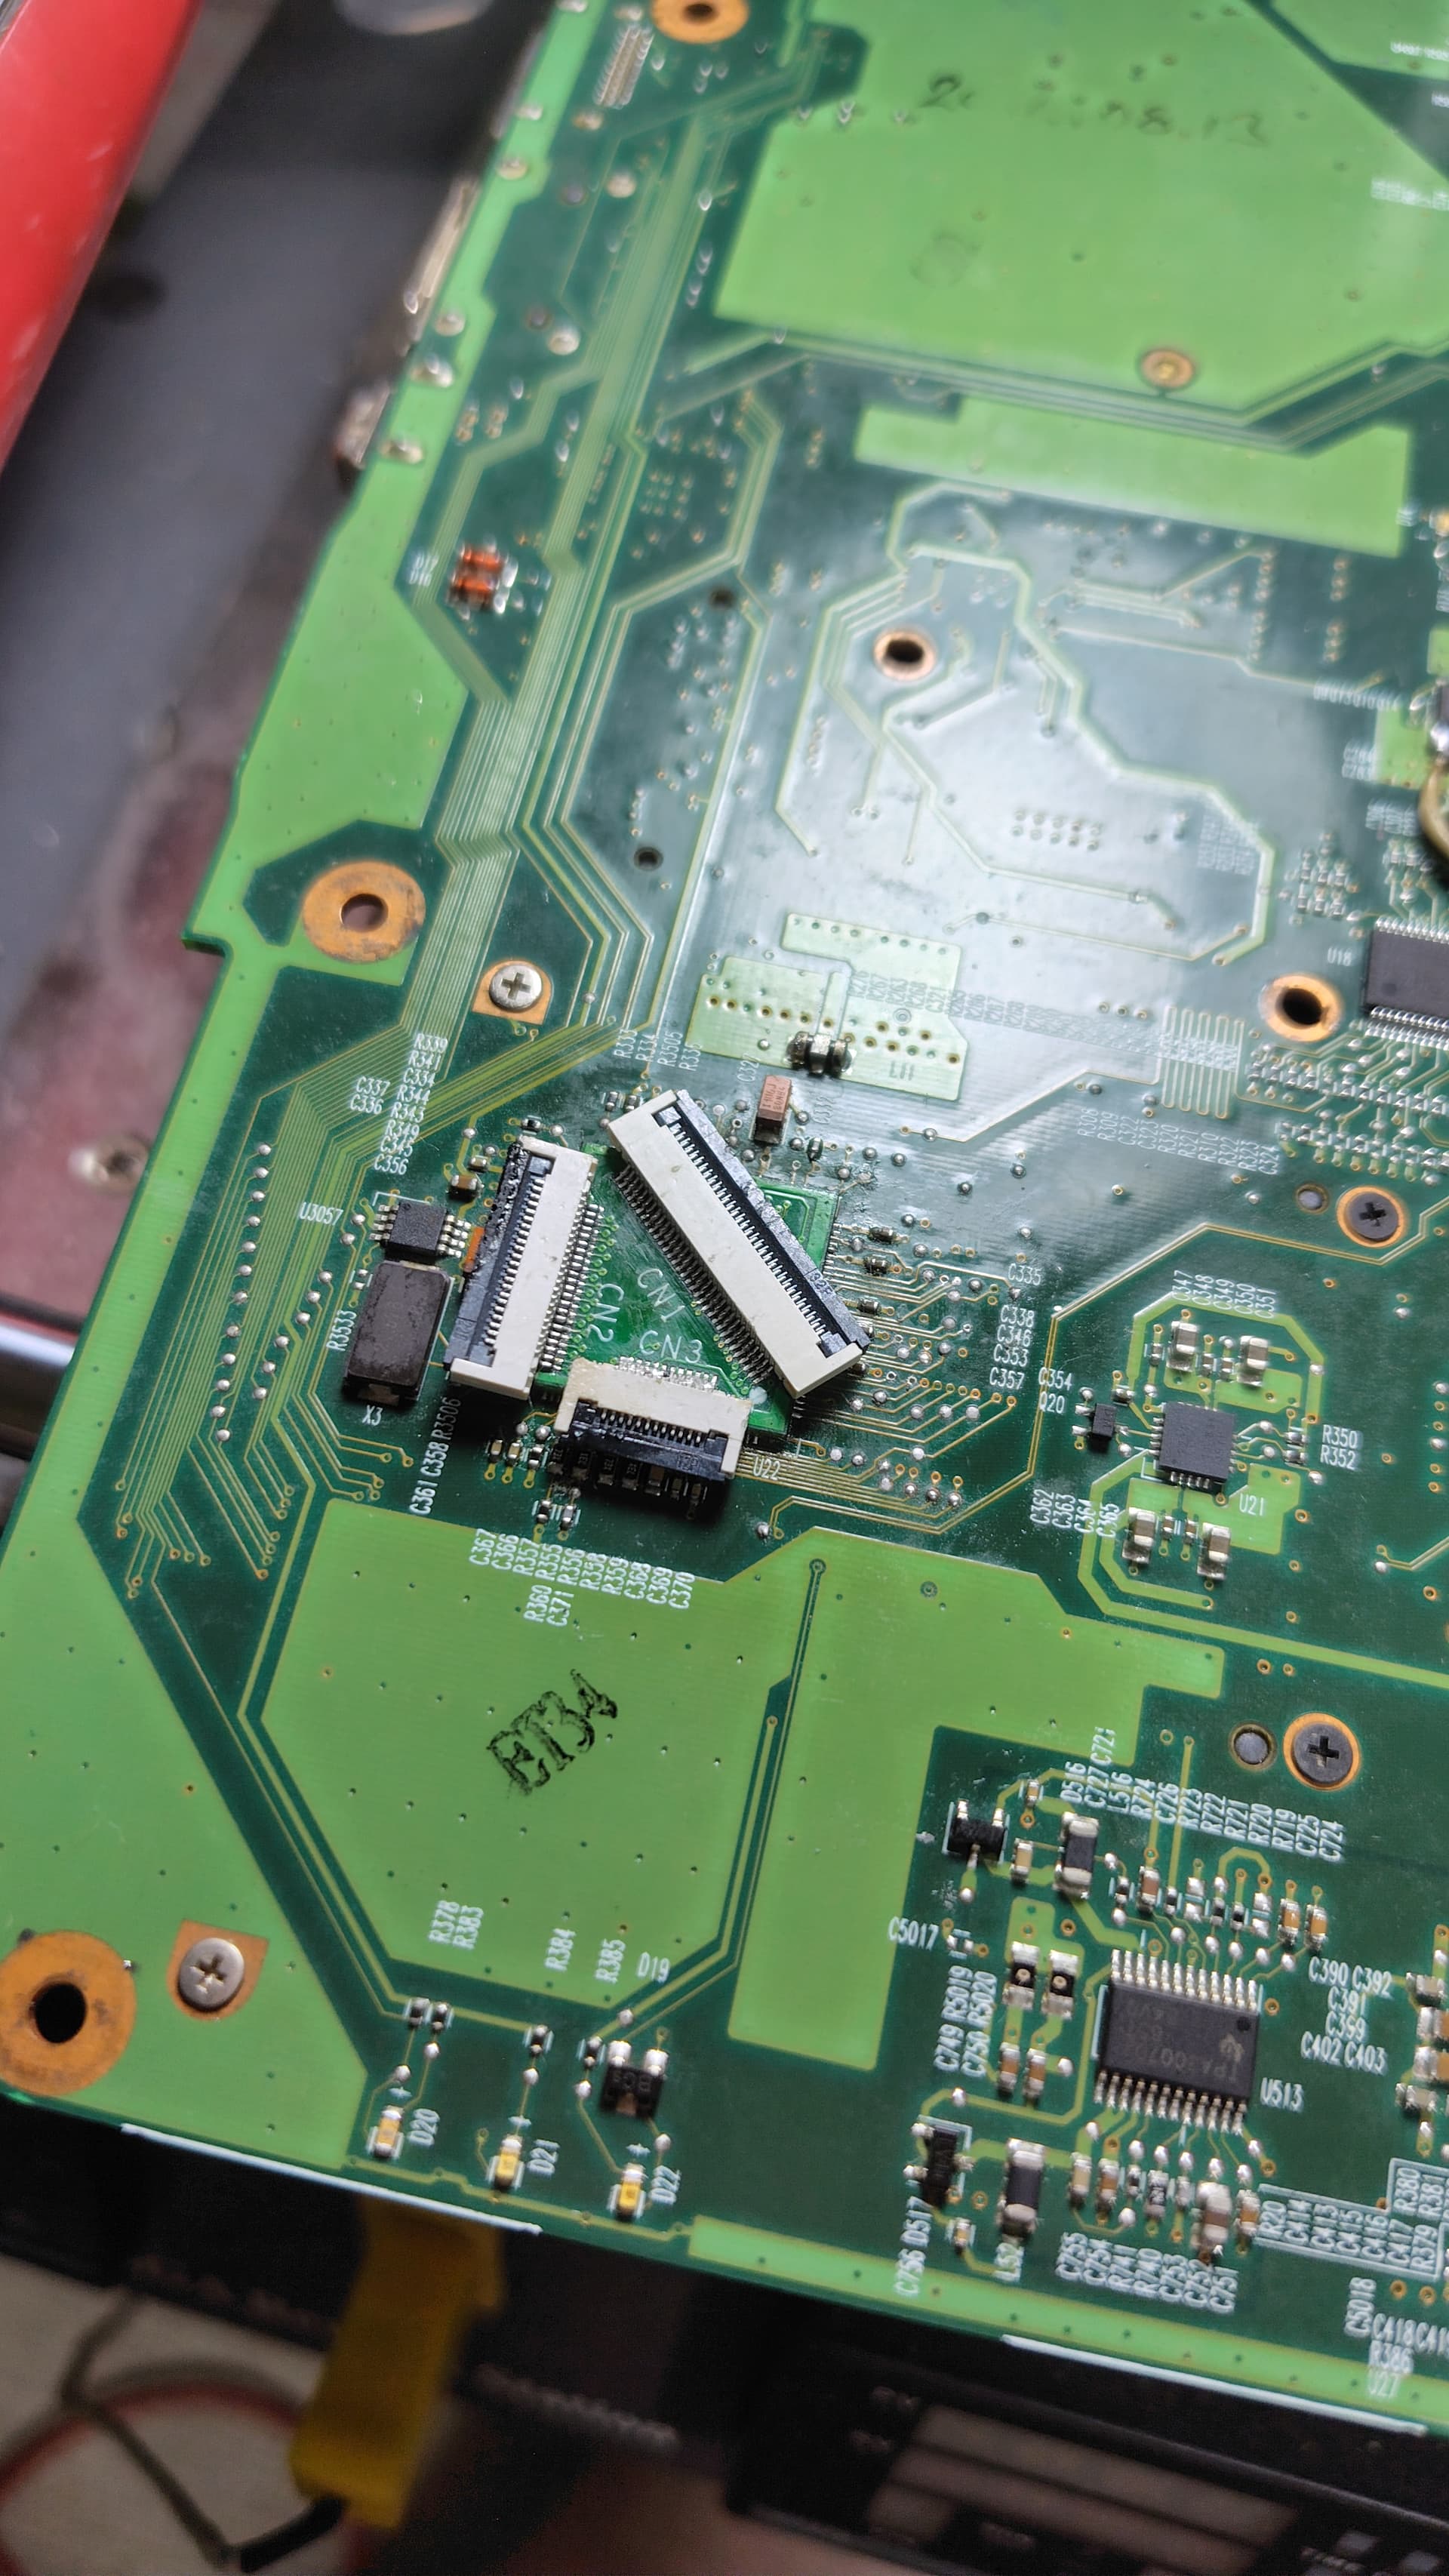
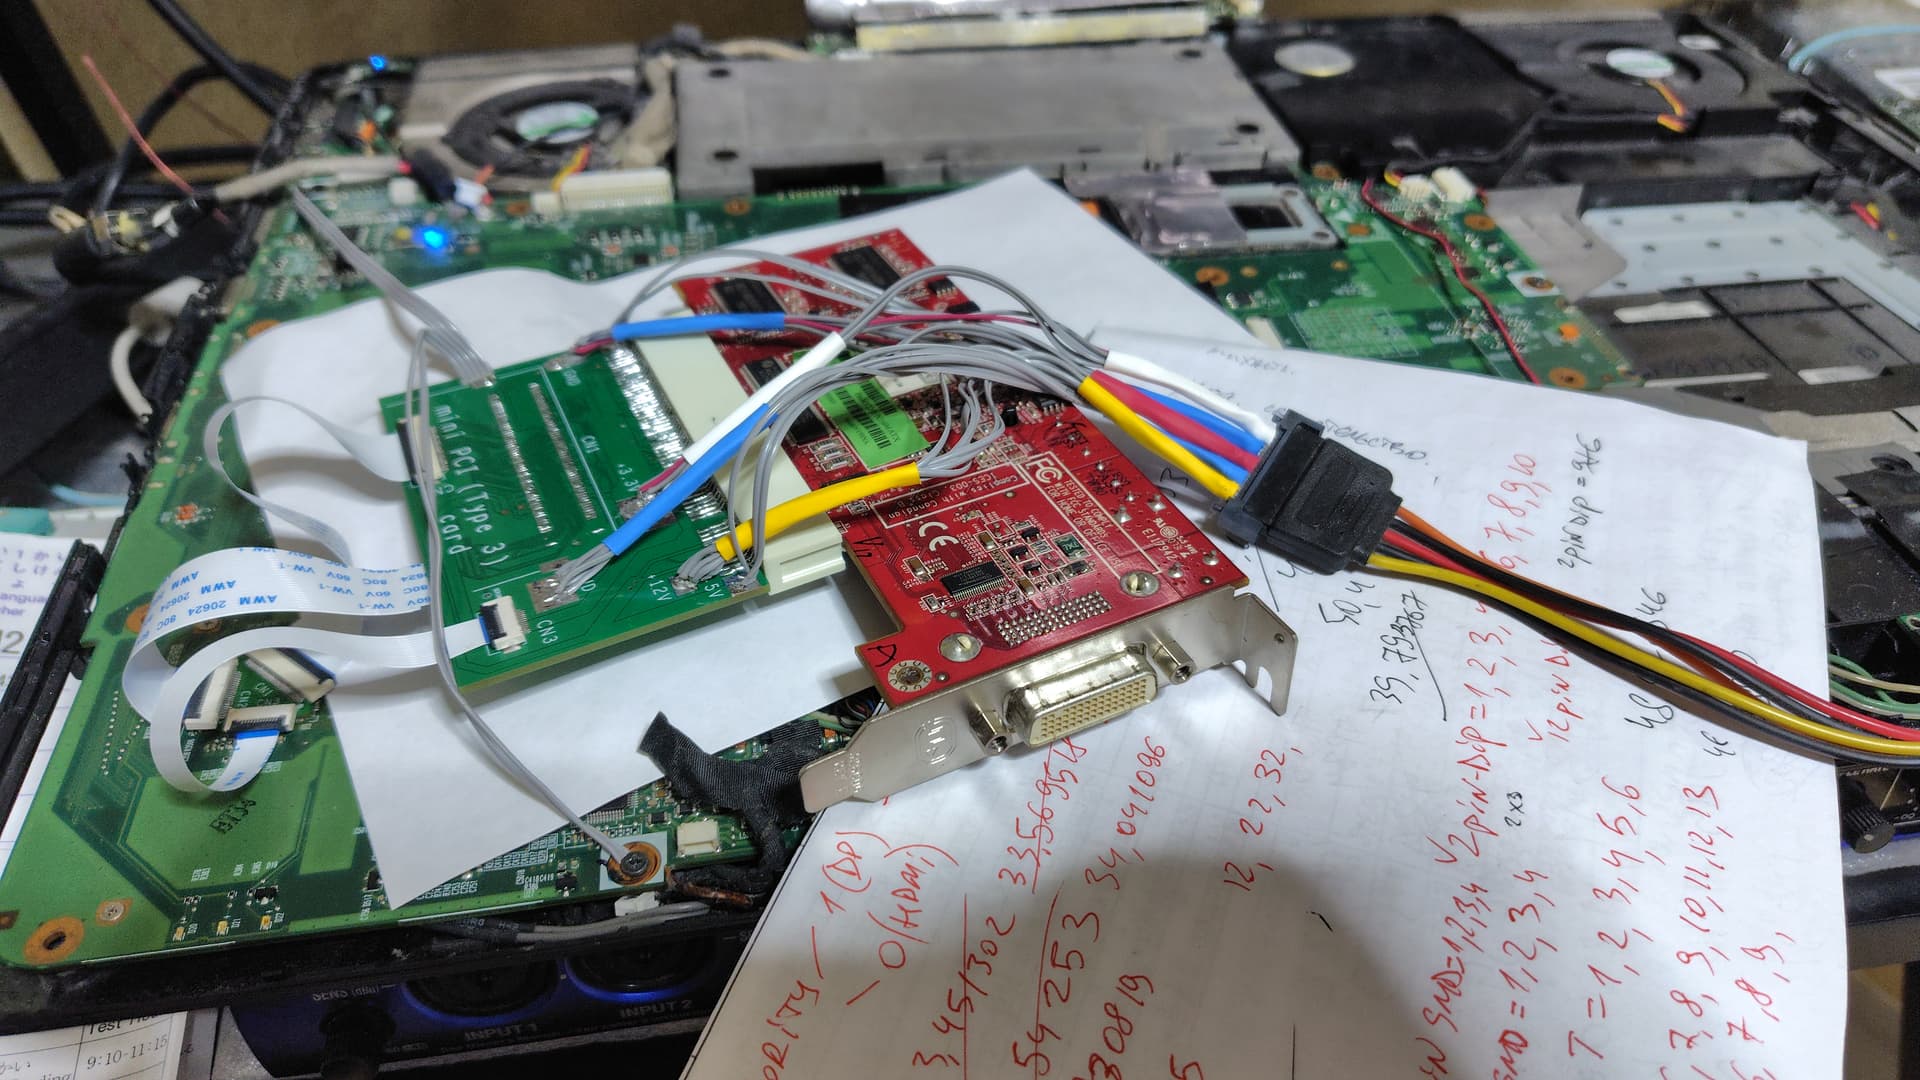
Another news is that I successfully edited VBIOS from GTX 260M for my GTX 280M card. Now the backlight and HDMI are working, but I can’t adjust brightness with hotkeys and can’t switch between the Dragons screen and HDMI monitor. The picture gets displayed on both screens automatically after you connect the HDMI cable. If you try to switch by using hotkeys, the external monitor gets disconnected and disappears from the Nvidia control panel even though it stays displayed in the device manager until you disconnect the cable.
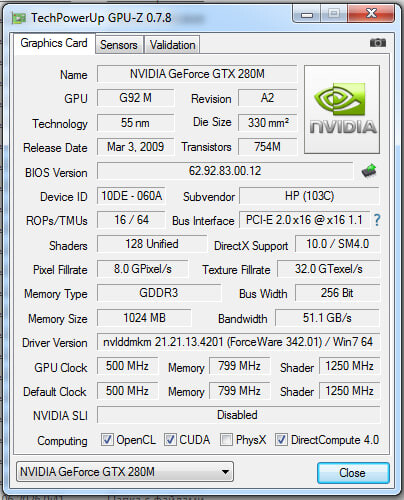
There was a guy in the past who installed his GTX 280M (with 260M’s VBIOS), but replaced the LCD screen with a monitor because the backlight wasn’t working at all. The card was outputting an incompatible PWM signal to the Dragon’s inverter, so I found the PWM settings in the 8800M’s card and copied those 2 values over to the 260M’s VBIOS. According to the nouveau driver’s source code the following 2 variables are what we need:
NV50_PDISP_SOR_PWM_CTL - PWM control
NV50_PDISP_SOR_PWM_DIV(or) - PWM duty cycle
In the 62.92.83.00.12 VBIOS from GTX 260M these are located at the following addresses with the following hex values and need to be changed appropriately:
0xDE58 (NV50_PDISP_SOR_PWM_CTL):
7A 80 C0 61 00 00 00 00 00 (change to 7A 80 C0 61 00 84 00 00 00)
0xDE61 (NV50_PDISP_SOR_PWM_DIV(or)):
7A 84 C0 61 00 00 00 00 00 (change to 7A 84 C0 61 00 00 04 00 80)
In the GTX 280M driver I only edited nvcvwu.inf by replacing all instances of PCI\VEN_10DE&DEV_060A&SUBSYS_04811558&REV_A2 (belonging to Clevo M570TU) with PCI\VEN_10DE&DEV_060A&SUBSYS_30D4103C&REV_A2.
VBIOS, BIOS, graphics driver:
https://www.mediafire.com/file_premium/0hefe2loukufzn4/GTX_280M_driver.zip/file
I also developed a universal adapter for multiple laptops including the Dragon to be able to connect MXM 3 cards. It will be a fast way to find more cards that could work with the Dragon. The adapter is also intended for Toshiba X300/X305/X500/X505/P500 and Dell M6400/M6500/M2010/M170/M1710/M6300/6400/9300/9400/M90/D810/E1505. And it will have their LCD connectors installed including 2 different variations for the Dragon’s screen ( straight and reversed LVDS connections) simply because I have already swapped LVDS pins in the cable and don’t want to do that again. Hope to start new tests with this adapter after it arrives from the factory within within a couple of weeks.
1 Like
Hi @remdale :
I tried to upgrade the Core 2 Duo T7500 CPU on my HDX9000 (the ATI gpu variant of the board) with a X9100 but i can’t make it to work even after connecting BSEL1 to VCCP like this:

Is there some bios mod required or I’m doing something wrong?
Hi. Could be because of the RAM or old BIOS. You should use 800 MHz sticks and to insure stability do a voltage mod for the RAM. Did you flash the latest BIOS? What does happen when you try to boot up the laptop?
When i power on the laptop it intermediately shutdown without any image on the screen and the bios in my board is the f40 so is this the latest?
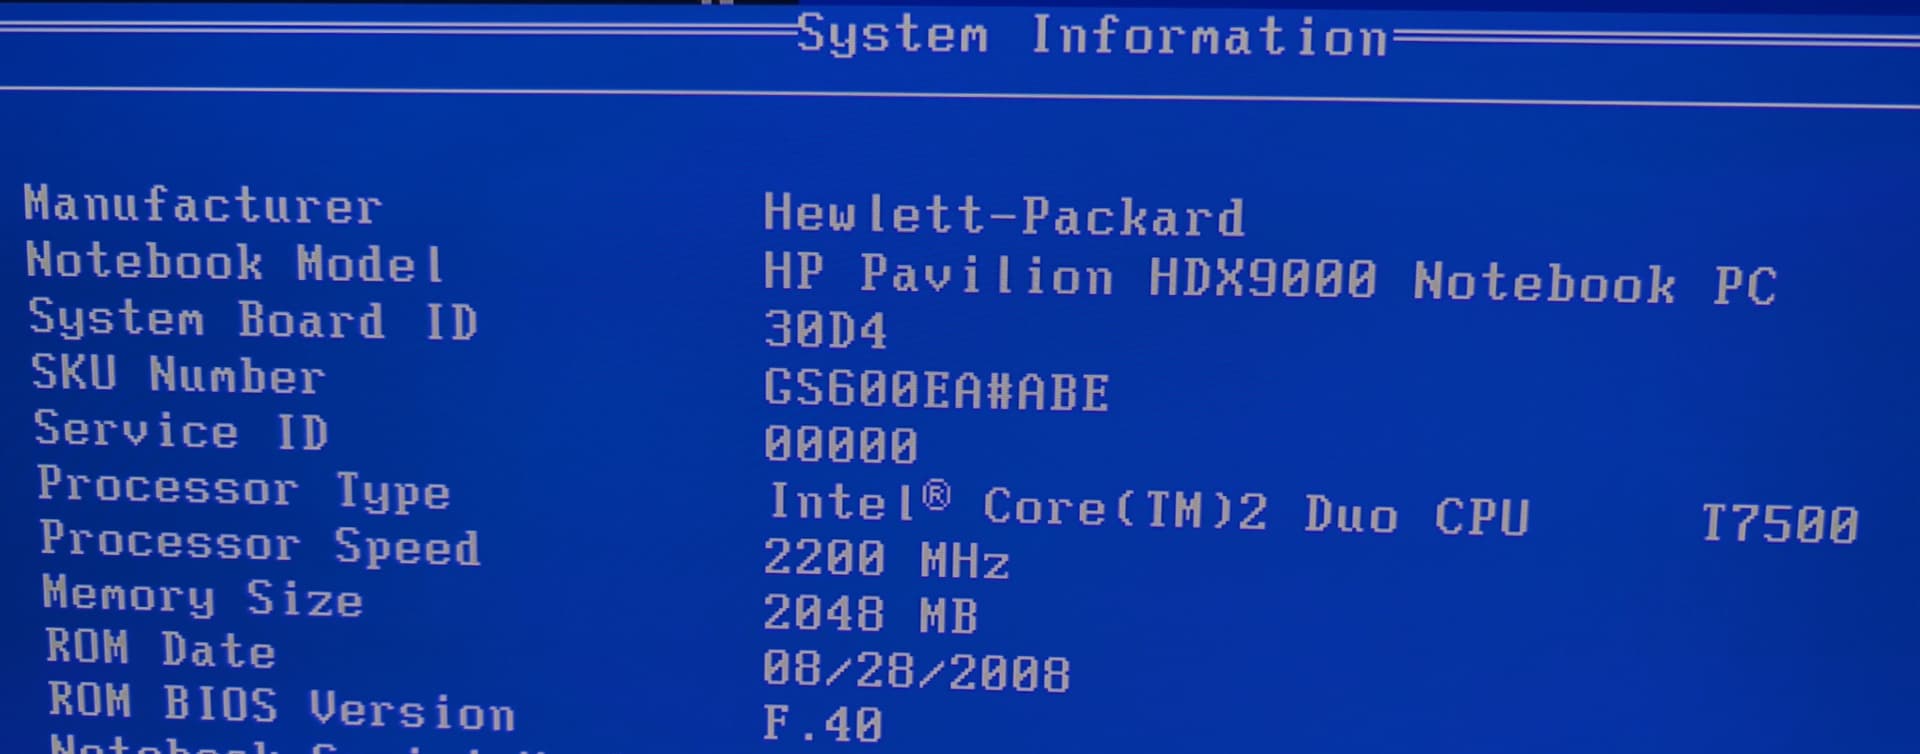
All of my DDR2 memory runs at 667 but it should be possible to overclock right?
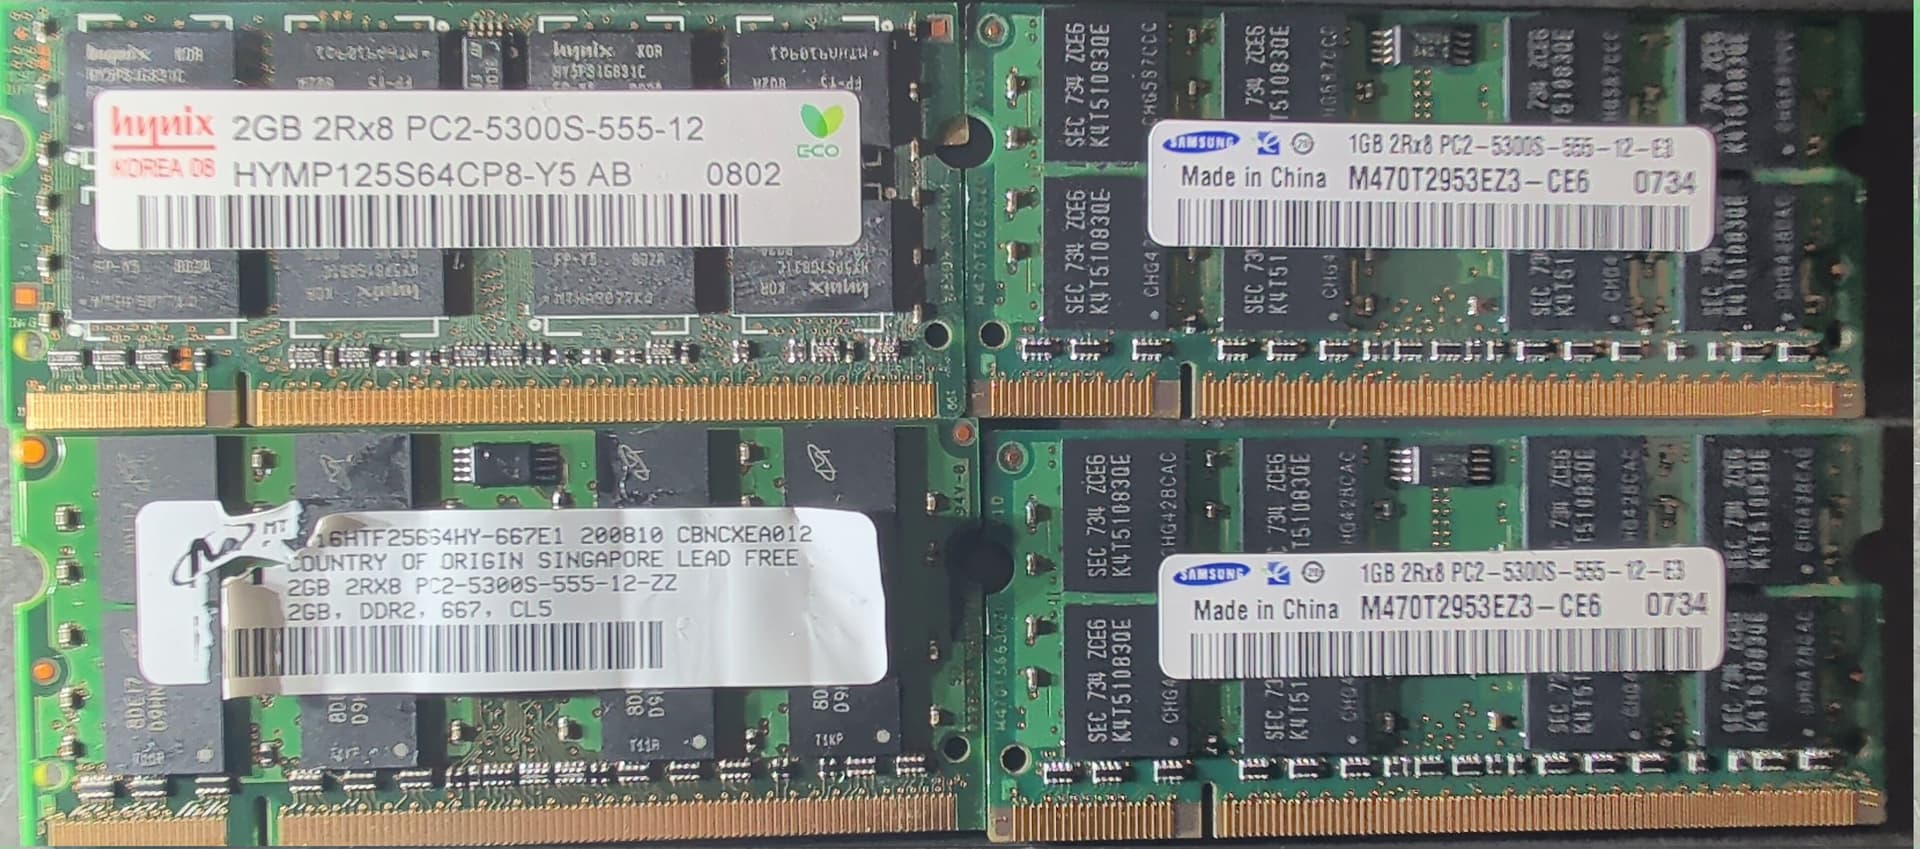
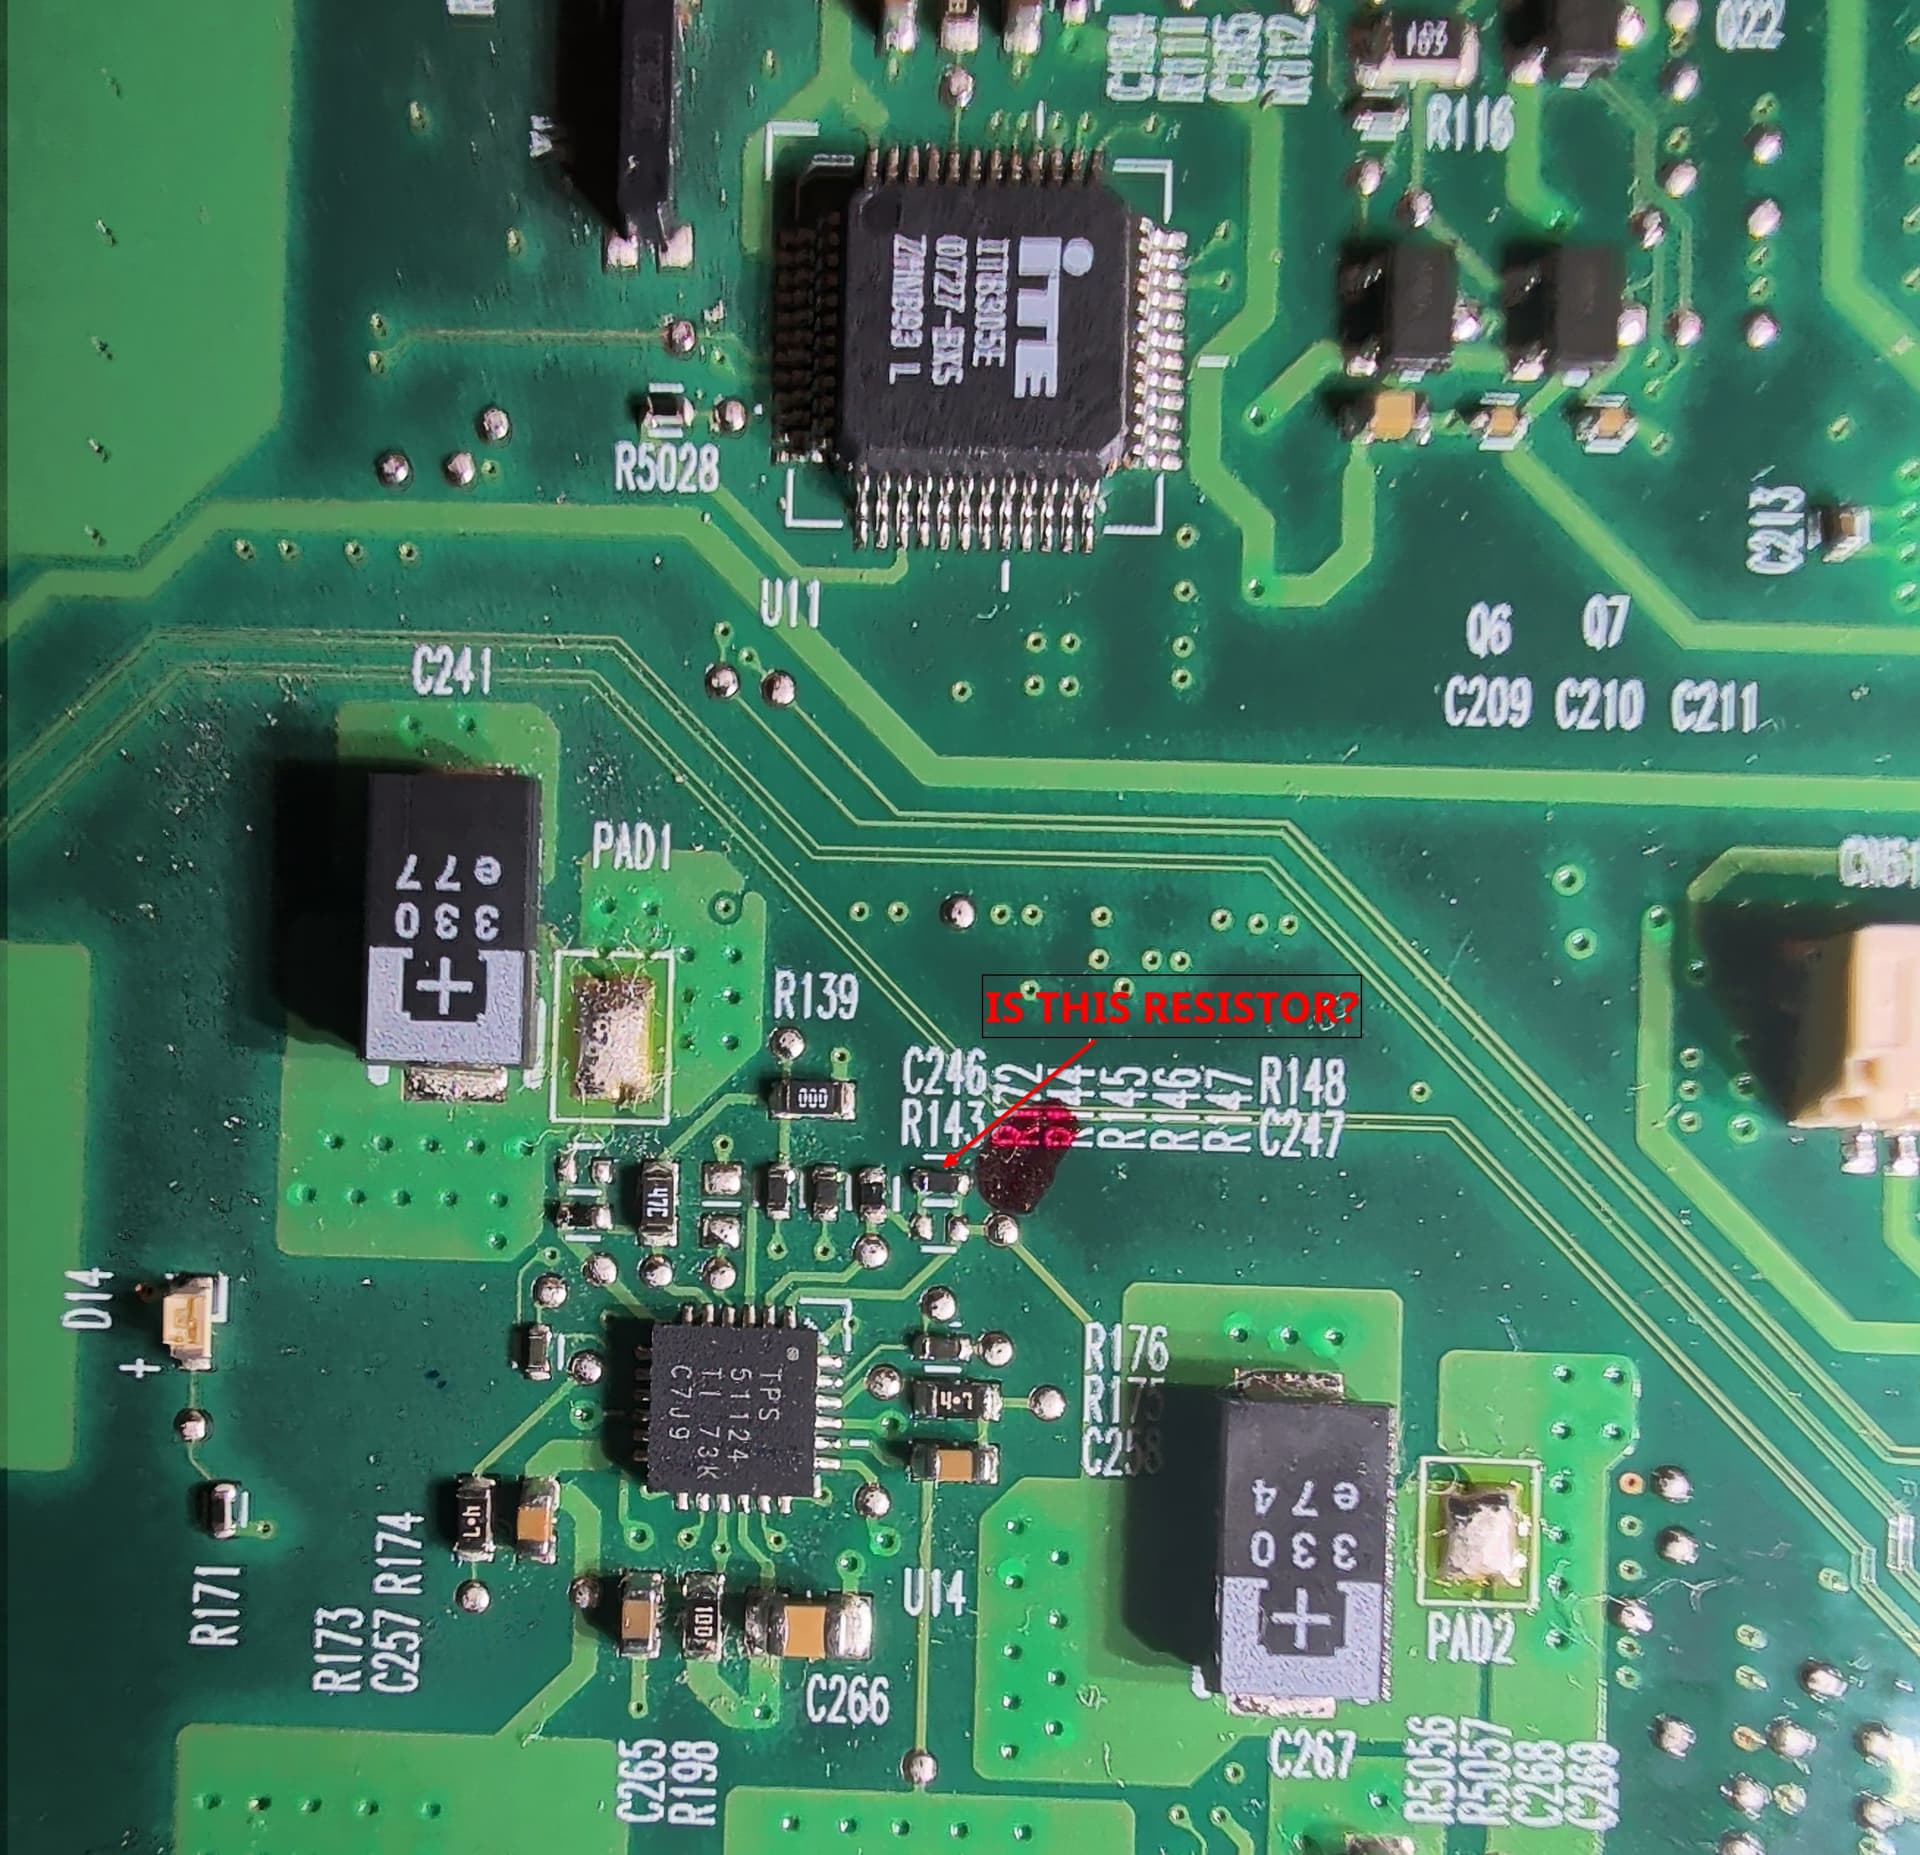
The voltage mod for the ram is by changing the R148 but where is it and what resistance value is needed for 1.96v ?
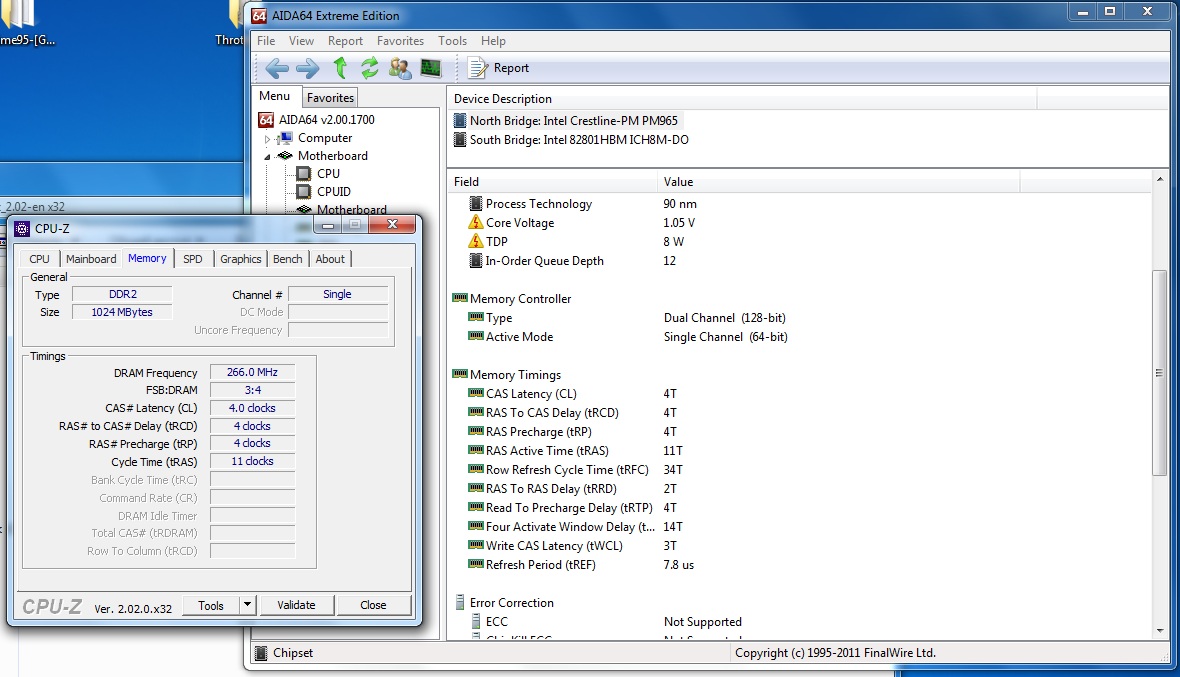
Your BIOS is ok, but you need to get a 800Mhz RAM because the frequency will jump up to around 890 Mhz because of the 3:5 divider (266 MHz FSB 5 / 3 = 443.3 Mhz, i.e 886.6 Mhz*).* Otherwise, you need to flash RAM with only 533 Mhz (i.e. CL4) timings to force the chipset to switch to the 3:4 divider. So your RAM will be working at around 700 Mhz. But you should do the voltage mod anyway because that frequency is too high for CL4.
I can share my modded SPD dumps for the following 4GB RAM sticks: PSD24G8002S, VS4GSDS800D2
4GB CL4 mod.zip (902 Bytes)
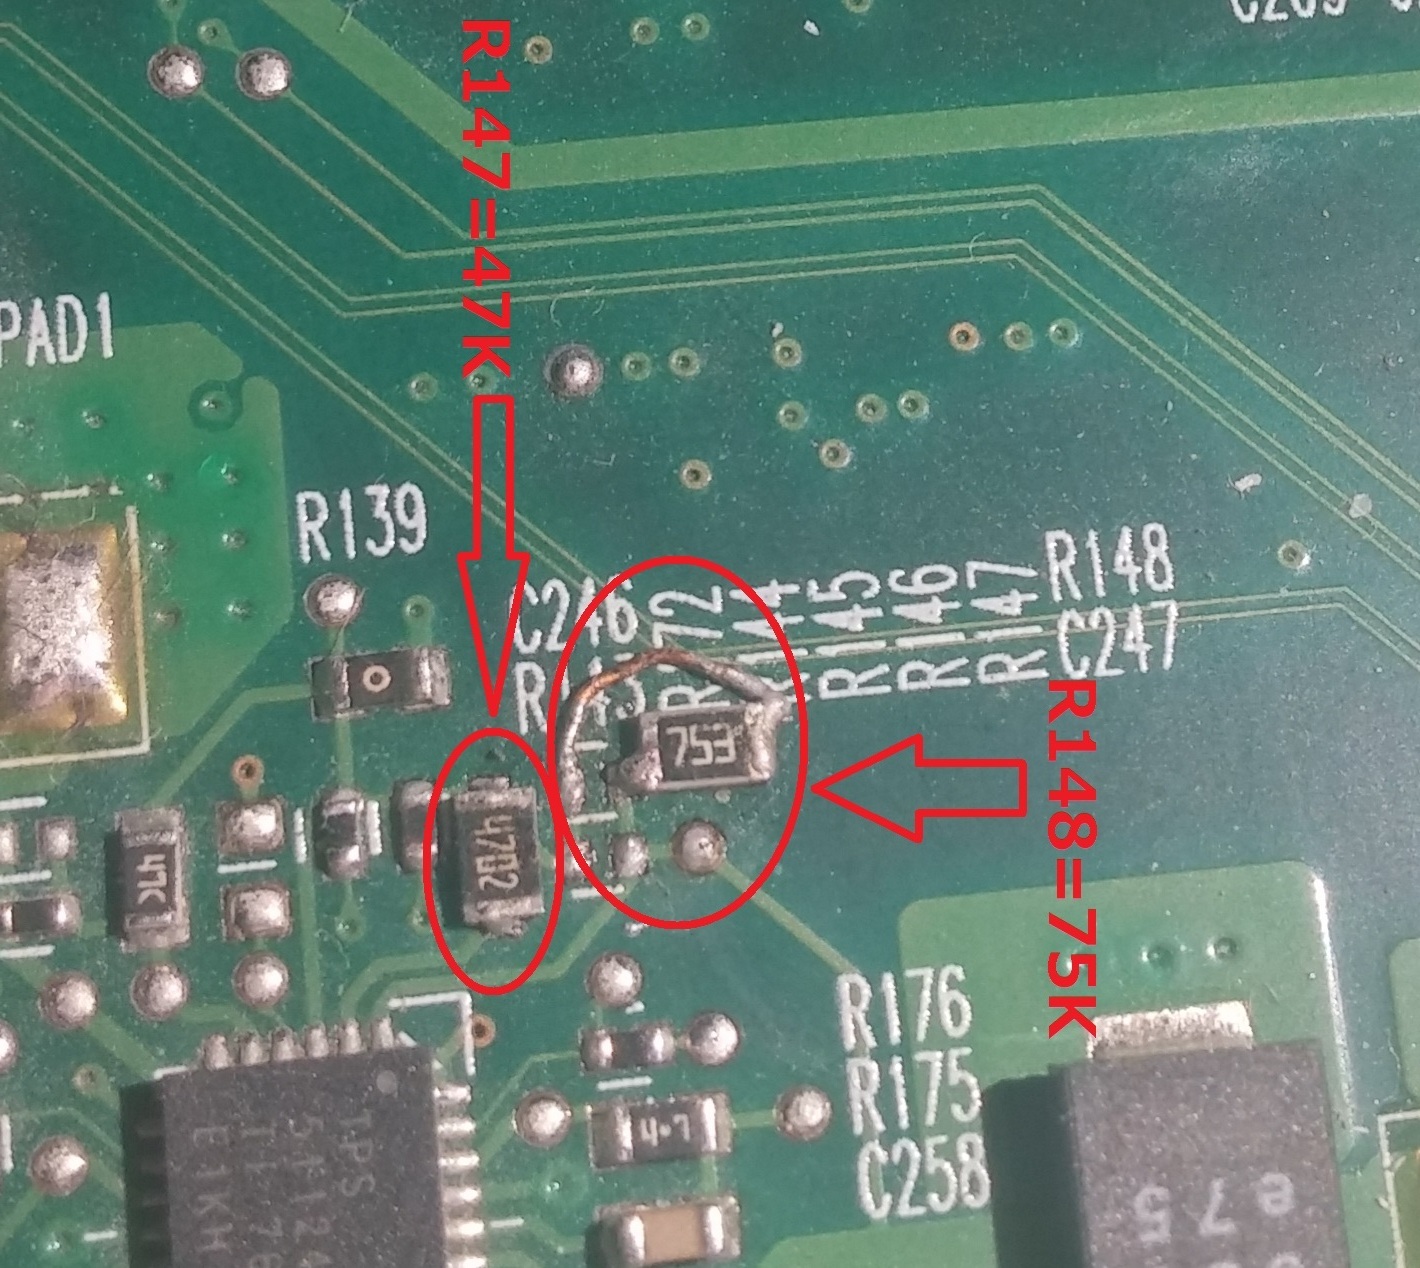
For 1.96v you need to use these values: R147 = 47K, R148 = 75K. But you should measure the exact resistance of both resistors. It should be as close to the declared value as possible.
Try to see if it helps.
Ok i did the voltage mod (measured 1.98v at C267) and flashed my ram with 533Mhz but it didn’t boot and i think this has nothing to do with the RAM because it just shutdown intermediately after pressing the power button regardless if the SODIMMs are installed or not when the X9100 is in the socket. When the core 2 duo T7500 is installed it stays on even without RAM so the X9100 cpu is dead or there is something wrong with my bios.
You know if there is a bios mod to use a quad core CPU in case this X9100 doesn’t work?
The immediate shutdown seems to be a power related problem in the CPU, but I didn’t know that you are unsure about the working state of the X9100. Try to see if the T7500 can boot up at 266 MHz FSB.
Quads can only boot up if you switch your BIOS to a single-code operation. There’s no BIOS for quads.
Well long time ago i tested this X9100 in another HP laptop and it didn’t work on that either so for all i know it can be fried as the Vcore resistance is very low at only 1 Ohm while the T7500 has 5 Ohms of Vcore resistance.
Now the T7500 work fine even after the BSEL mod but hwinfo and Throttlestop show 199.5 Mhz FSB:
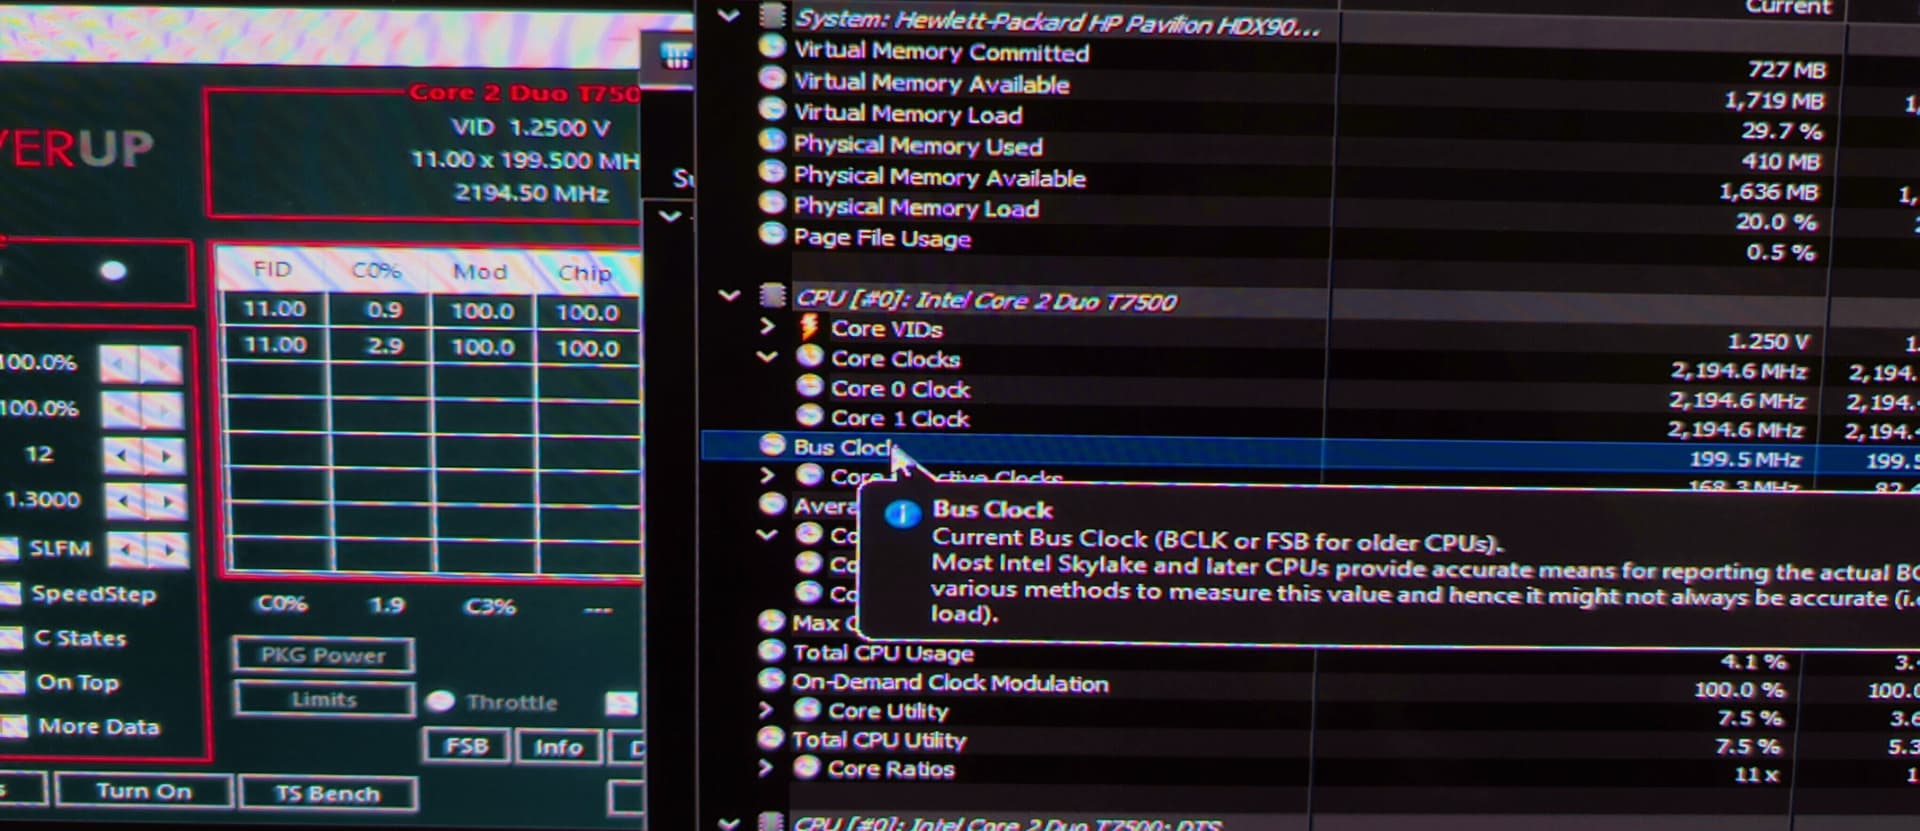
Is this not reported correctly or what is going on here?
Quads can only boot up if you switch your BIOS to a single-code operation. There’s no BIOS for quads.
Sorry i don’t understand what single-code operation is or are you referring to single core operation?
My working X9100 has 7.4 Ohms on the Vcore, so yours is definitely dead then 
For 800 MHz CPUs you need to do 1 more thing that I should have mentioned. There’s a direct connection between CPU’s BSEL pins and the clock controller (U18), so you need to break it by disconnecting pin 57. It should be enough
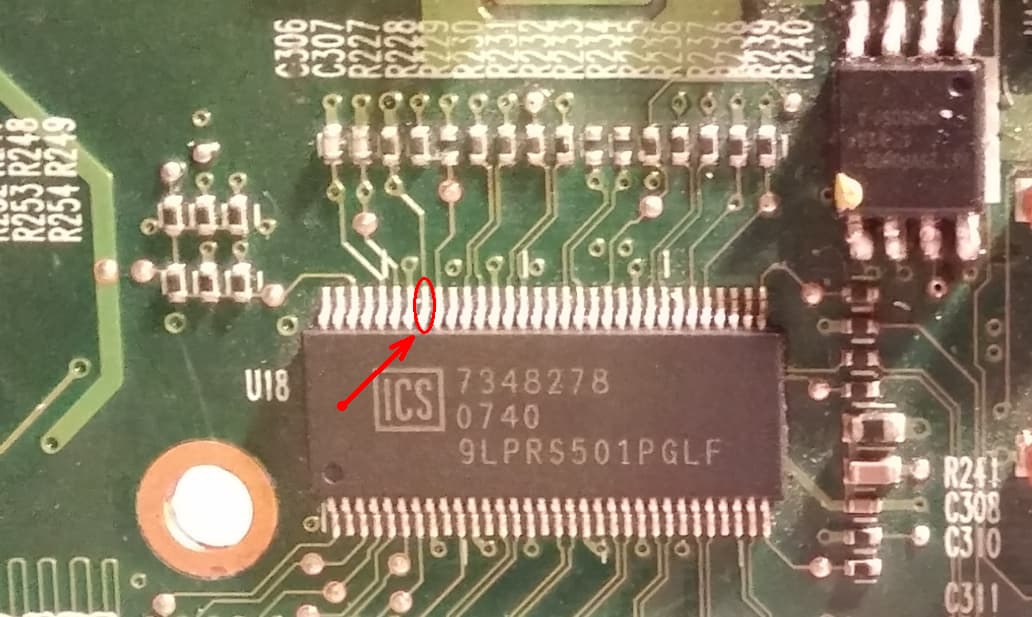
The single core mode can only be set through HP BIOS Configuration Utility (BCU) because the setting is hidden in the BIOS. But I’m going to share my modded BIOS with all unhidden settings soon.
You need to create a text file with the following 4 strings:
English
Dual Core CPU
*Disable
Enable
Put the file into the same folder with the utility and run the command prompt from there. Execute the following command:
BiosConfigUtility64.exe /setconfig:filename, where “filename” is your config file. You can find all available settings in the zip.
Alternatively, if you want to switch back to the dual core mode, you need to move the asterisk from Disable to Enable.
My working X9100 has 7.4 Ohms on the Vcore, so yours is definitely dead then
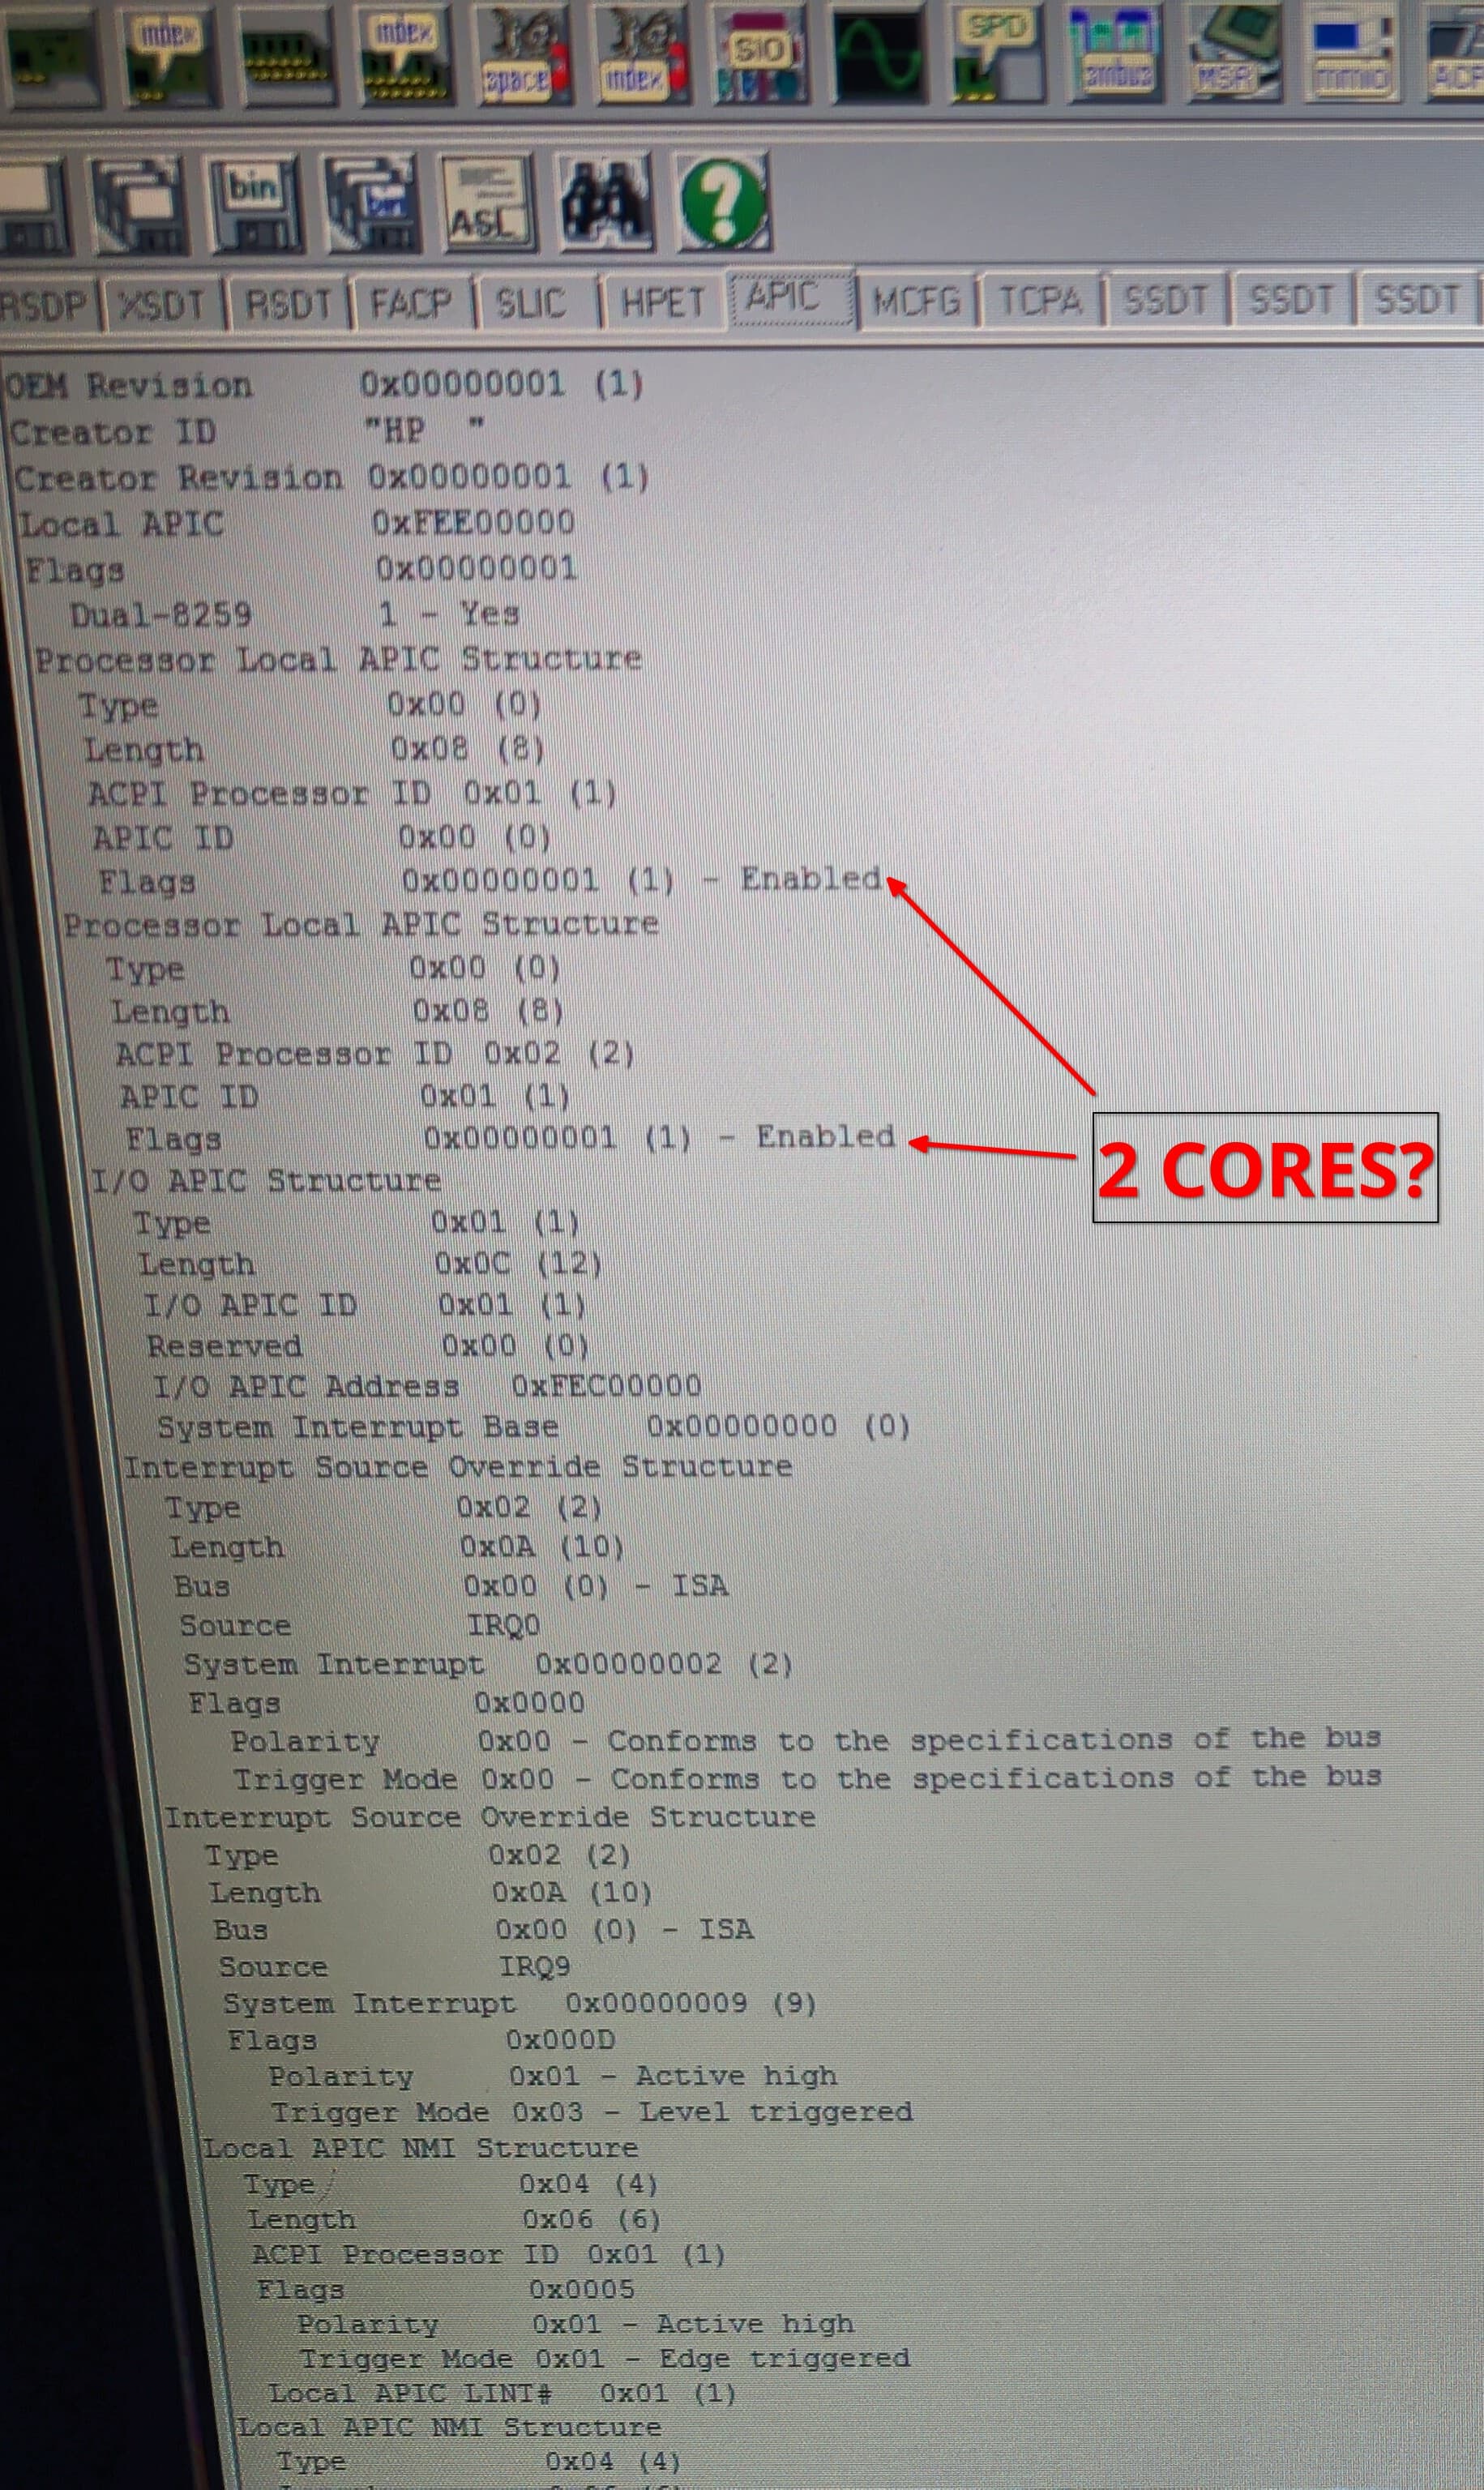
Well then i will have to buy a new one but the X9100 and QX9300 cost about the same so are you sure there is no way of using a quad core by editing the DSDT or APIC tables or something like that.
For 800 MHz CPUs you need to do 1 more thing that I should have mentioned. There’s a direct connection between CPU’s BSEL pins and the clock controller (U18), so you need to break it by disconnecting pin 57. It should be enough
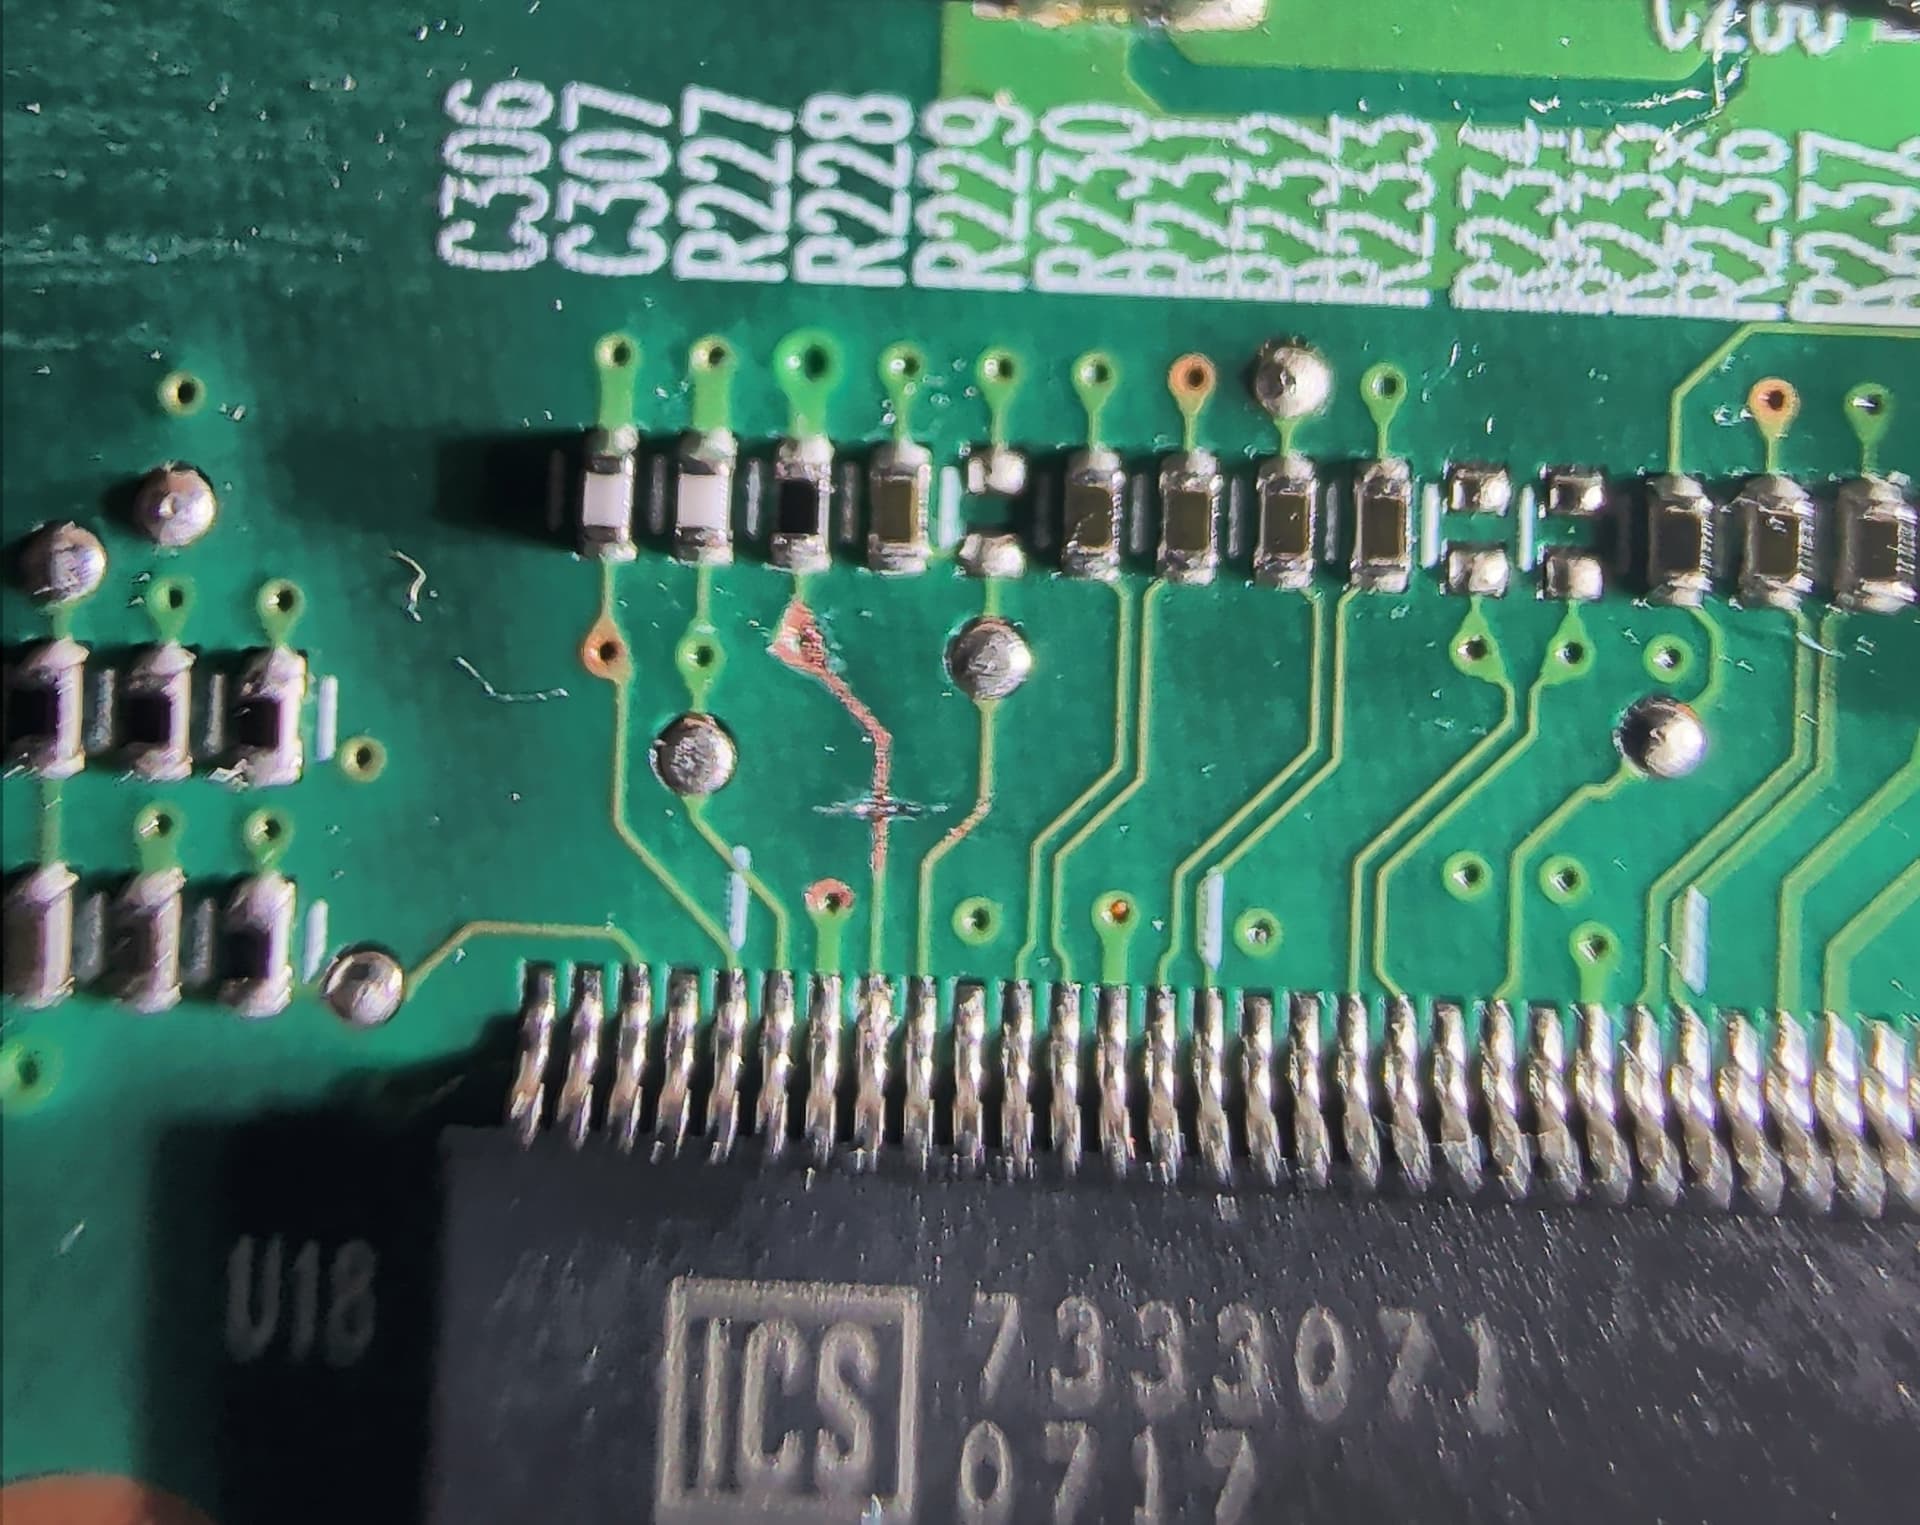
Ok i disconnected the pin 57 by cutting the trace but the FSB is still at 199.5Mhz 
You need to create a text file with the following 4 strings:
English
Dual Core CPU
*Disable
EnablePut the file into the same folder with the utility and run the command prompt from there. Execute the following command:
BiosConfigUtility64.exe /setconfig:filename, where “filename” is your config file. You can find all available settings in the zip.
Alternatively, if you want to switch back to the dual core mode, you need to move the asterisk from Disable to Enable.
Ok that worked.
I did what you said both with the APIC and DSDT, but it didn’t work.
The quad APIC is larger in size and so it would require reducing the size of one of the other tables following after it because the range where the tables are sitting is hardcoded somewhere. So I inserted the quad APIC by reducing the size of the TCPA table to 26 bytes. Here’s how it looked when I booted up with a dual core CPU.
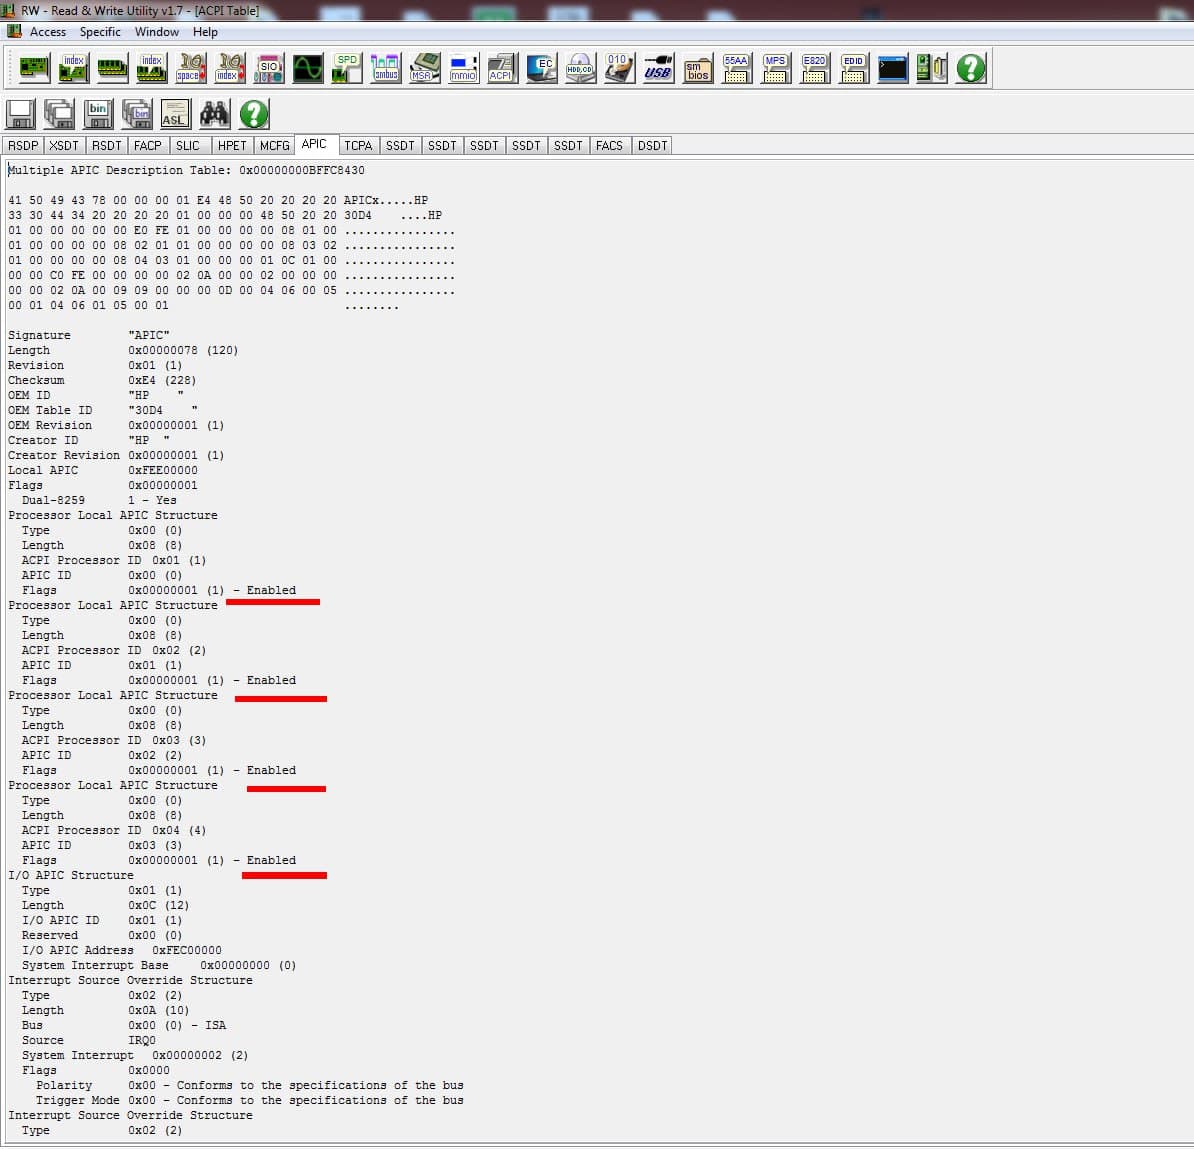
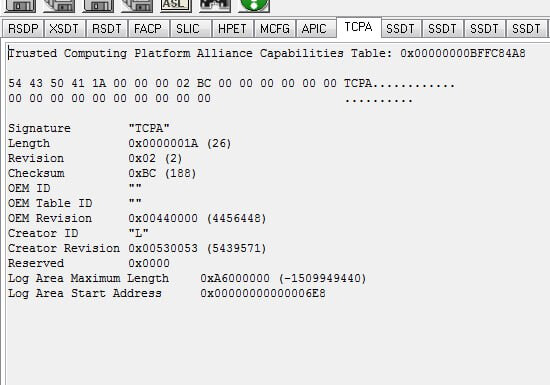
But as soon as you insert a quad with all cores enabled, the OS fails to boot.
Moreover, there is a CPU power management table located in a different place and it might need to be extended too, but the laptop will refuse to boot if you do so. The DSDT table doesn’t have this problem because it is a separate module and so it can be edited in whatever way you like.
Speaking of the FSB mod, try pull that pin down to GND with a 10K resistor. Floating pins might not be treated correctly by the controller.
1 Like
Ok so is there a way to boot the quad core cpu in dual core mode instead of single core or the bios doesn’t support that either?
Also is there any gpu with 2GB of vram that is compatible with the MXM slot on this laptop?
Speaking of the FSB mod, try pull that pin down to GND with a 10K resistor. Floating pins might not be treated correctly by the controller.
Yes that worked thanks 
Awesome, I was glad to help you!
I believe there’s no way to use just 2 cores, but even if we could it wouldn’t make any sense to me.
There are no MXM-HE cards with 2GB of VRAM. But I want to finish my experiments with Dell’s Quadro 5000M and then I’m going to start designing this card with the MXM-HE interface. If I successfully implement MXM structure processing into the Dragon’s BIOS, we will be able to use 5000M’s native MXM 3.0 vBIOS and it will also let us use a greater variety of MXM 3.0 cards.
2 Likes
Just an odd idea - if we can use QX9300 with two cores only, that would be a relatively cheap and obtainable unlocked E0 stepping CPU. Both SLGE7 and QHBQ X9100 are nowhere to be found and even if they were, they would be prohibitively expensive. Why though? They run cooler and clock higher than C0 stepping CPUs (SLB48 X9100 and all of the X9000s).
Other than that, is there any recent update on the GPU front? As always- keep up the great work!