One of the easiest methods.
Here is an example for Asus Z77-V LE Plus Main BIOS - 0910
1) For Aptio 4
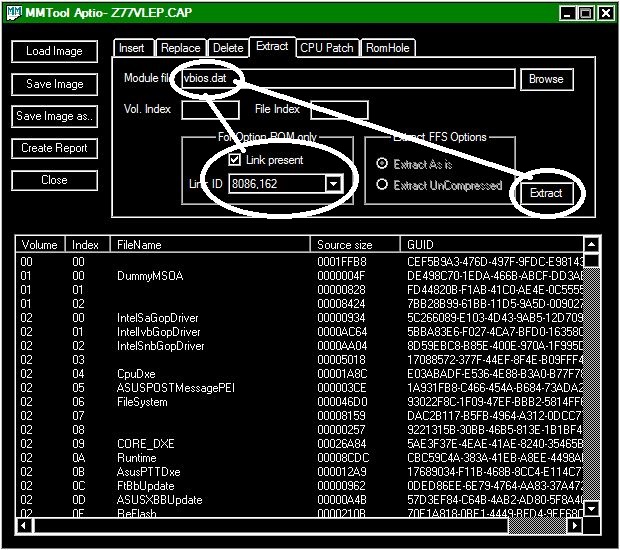
Open the BIOS file in MMTool and navigate to Tab "Extract". Extract the OROM VBIOS file, example as 'vbios.dat'
Example DevID:
For Desktop DevID SNB-102, IVB-162, HSW/BDW-402,412,c02,c12
For Mobile DevID SNB-106, IVB-166, HSW/BDW-406,416,c06,c16
For Aptio 5
Open the BIOS file in MMTool and navigate to Tab "Option ROM". Extract the OROM VBIOS file, example as ‘vbios_406.dat’
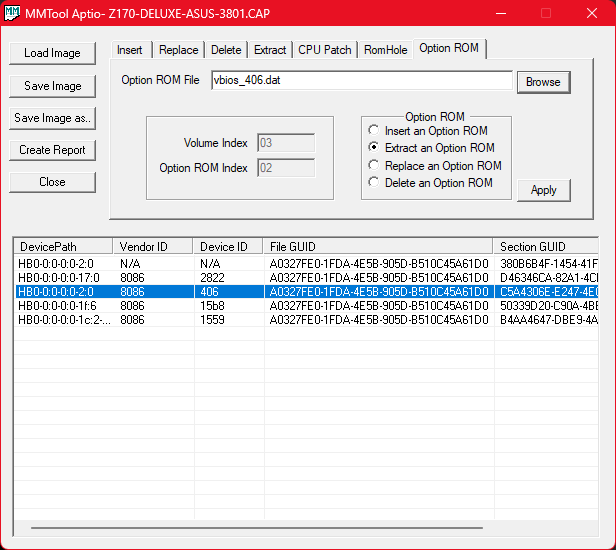
Example DevID:
SKL/KBL/CFL DevID - 406
2) Open the file ‘vbios.dat’ in any Hex editor
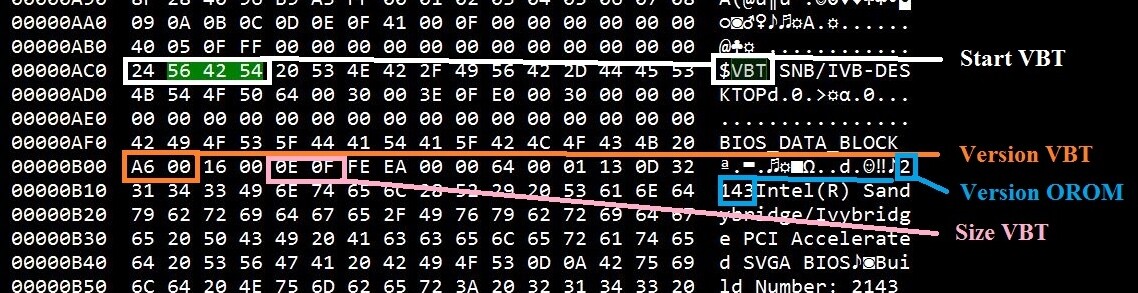
Look for what:
The OROM VBIOS version - SNB/IVB Desktop 2143 (We are looking for a BSF-script file ‘snb_2143.bsf’ (desktop)
The VBT version - " A6 00" -> A6 (v1.66)
The VBT size - "0E 0F" -> 0F0E (3854 byte)
This is important information for the following steps.
*3) If the BSF-script file to the desired version is not present, refer to the table to find a compatible one. To do this, we have the previous gathered data on the version and size of VBT.
*See the attached file ‘Table VBT OROM VBIOS Version and Size.docx’
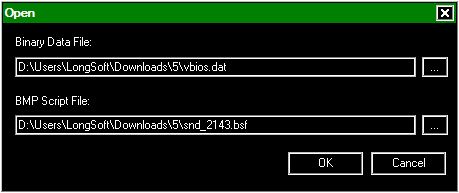
4) install the program Intel® Binary Modification Program (iBMP) and run.
5) In iBMP open the extracted ‘vbios.dat’ file and the BSF-script according the correct ORIM VBIOS version, in this case ‘snb_2143.bsf’
6) Save settings from the opened OROM VBIOS, example as "transfer.ssf", command
- Menu -> "BIOS Setting -> Save All" -> ‘transfer.ssf’
7) Close window (Ctrl+F4)
8) Open the saved "transfer.ssf" file in any Text editor and Remove the following *string:
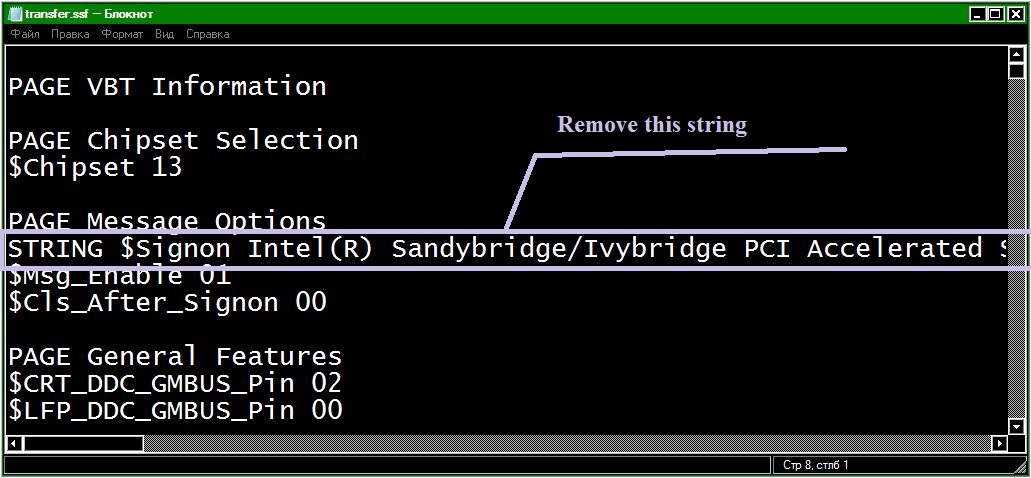
*Important! If you do not remove this string that all messages will be displayed on the version of the old version.
9) In IBMP open new pure the OROM VBIOS and BSF-script files of the correct version, example OROM VBIOS ‘snb_2170.dat’ and BSF-script ‘snb_2170.bsf’ (desktop)
10) Load settings from saved/edited "transfer.ssf", command
- Menu -> "BIOS Setting -> Apply All" -> ‘transfer.ssf’ and save, example ‘vbios_new.dat’
For update in UBU Tool (only v1.20-1.69), files saved as:
- Sandy/IvyBridge -> ‘Modules\VGA\vbiossib.dat’
- Hasweell/Broadwell -> ‘Modules\VGA\vbioshsw.dat’
For update in UBU Tool v1.70 and above), files saved as:
- Sandy/IvyBridge -> ‘Files\Intel\VBIOS\vbiossib.dat’
- Hasweell/Broadwell -> ‘Files\Intel\VBIOS\vbioshsw.dat’
- Skylake/Kabylake/Coffeelake -> ‘Files\Intel\VBIOS\vbiosskc.dat’
11) Be sure to check all settings, is nowhere to be alert or red entries.
12) Close IBMP and update main BIOS with the new file:.
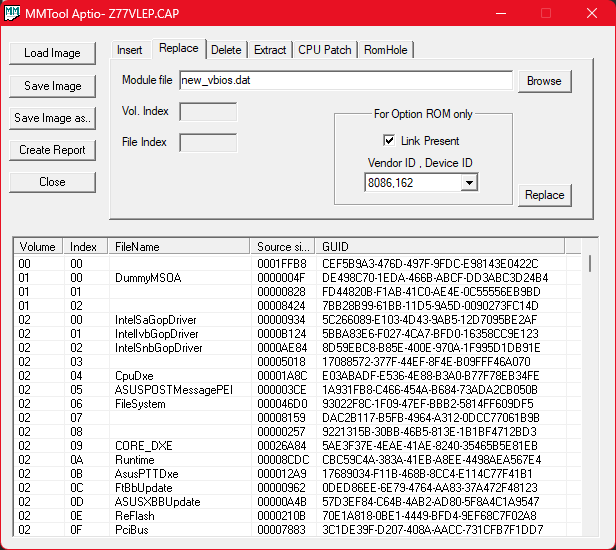
13) Update for Aptio 4
Open the BIOS file in MMTool and Tab "Replace"
Update for Aptio 5
Open the BIOS file in UEFITool
// screen //
14) Flash BIOS
Remarks:
a) Changes in version VBT - new options in the settings.
- In this case, the transfer settings is successful 99%.
b) Changed version and the size of VBT - Added new settings.
- In this case, it may require additional holding settings manually.
c) Ideal variant when the version and size of VBT, old and new OROM VBIOS, are the same.
d) Unfortunately, the transfer settings from OROM VBIOS Haswell 21xx in OROM VBIOS Haswell-Broadwell 10xx has its own complexity and requires finding solutions.
e) Settings VBT OROM VBIOS Haswell-Broadvell versions 1025 - 1028 coincide with versions 1029 - 1038, except BSF-scripts. But the transfer of settings is always one to one.
Attention owners of motherboards from Asrock Z87.
Unfortunately for the OROM VBIOS 2166 no BSF-script, the closest analog ‘hsw_2170.bsf’ is not appropriate.
But…
For you, there is good news. You can use ready files OROM VBIOS and VBT for GOP from similar motherboards Z97.
Example Asrock Z87 Extreme 4:
1) Downloan latest version BIOS Z97 Extreme 4
2) Open the BIOS file in MMTool
3) Extract the OROM VBIOS file, as ‘vbioshsw.dat’. (For UBU v1.20 and above)
4) Extract "as is" the VBT for GOP file, GUID 878AC2CC-5343-46F2-B563-51F89DAF56BA, as ‘vbthsw.ffs’. (For UBU v1.20 and above)
5) Put these files ‘vbioshsw.dat’ and ‘vbthsw.ffs’ in a folder Modules\VGA
6) Update and flash.
Checked:
Asrock Z97 Ext3 -> Z87 Ext3
Asrock Z97 Ext4 -> Z87 Ext4
Asrock Z97 Ext6 -> Z87 Ext6
All ports are working without problems.
Important! Names motherboard models must match.
Alternative method
Quick transfer of settings from one OROM VBIOS file to another.
CloneVBT
In this case, the target file may already contain third-party settings.
Only 3 conditions for quickly transferring your settings from the source file to the target:
1) Source $VBT name == Target $VBT Name
2) Source $VBT version == Target $VBT version
3) Source $VBT size == Target $VBT size
Launch Format:
> clonevbt <source> --> Only Info
> clonevbt <source> <Target> --> Info and/or Clone
Example:
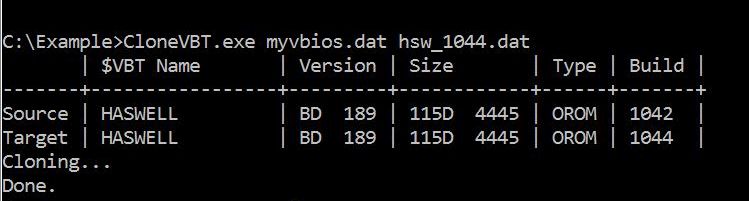
After successfully transferring the settings, you will receive a new file ‘cln_vbios.bin’
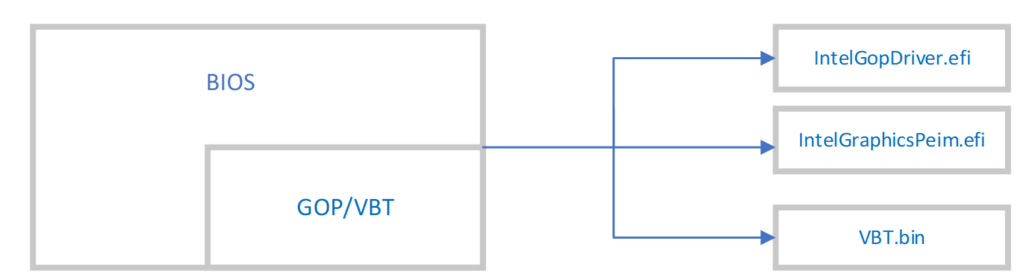
Transferring settings UEFI GOP VBT from the old version to the new one.
(Note: This is the VBT related to GOP UEFI, not vbios.)
A better understanding of this Intel UEFI GOP VBT and what differs from the vBIOS VBT
(Credits)
Example of a RAW GOP VBT SKYLAKE - 212 and its GUID present in an Intel 300 bios:
VBT version and size
For the correct operation of the EFI Intel GOP Driver, an external configuration file of the GOP VBT is required.
GOP VBT file in structure is similar to VBT which is located in OROM VBIOS, but has its own specific features. Therefore, it is highly undesirable to use BSF from OROM or vice versa.
The transfer of settings is exactly the same as that of OROM VBIOS.
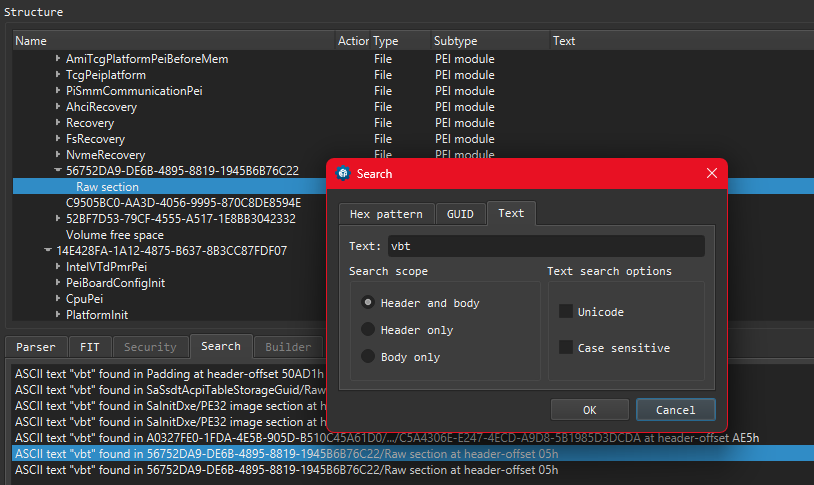
1) Open BIOS file in UEFITool
2) Find string as Hex
00F82456425420
or
00F8........2456425420
or 2456425420
2 options, because the file can be located in various structures of the EAW section.
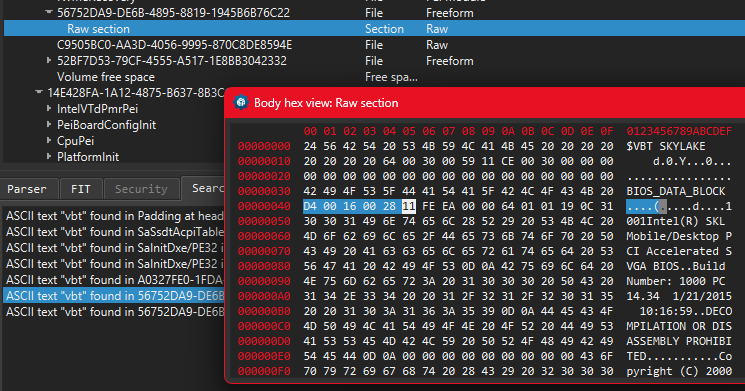
3) Extract file as body. Example: 'old_vbt.bin'
4) Look at the version of the VBT. You can see using the utilities:
drvver old_vbt.bin
or
clonevbt old_vbt.bin
5) Open iBMP and choice old_vbt.bin and BSF desired version.
6) Save All setting/ Example: 'vbt_set.ssf'. And close Window.
7) Open new fle VBT. Example 221 - vbt.bin and vbt.bsf
8) Open file 'vbt_set.ssf' and Apply All setting and Save file- Example: new_vbt.bin'.
8.1) You may have to adjust some of the settings you need. Check them out.
9) Open BIOS file in UEFITool v0.2x and find GOP VBT, see 2)
10) Replace as body and Save BIOS file
Done.
* 10) UBU 1.75.1. Only HSW+ and SKL+.
Put the 'new_vbt.bin' as 'vbthsw.bin' for HSW+ or as 'vbtskl.bin' for SKL+ files in the "Files\Intel\VBIOS" folder.
Direct link dowload:
Tools & Files
Good Luck! :)
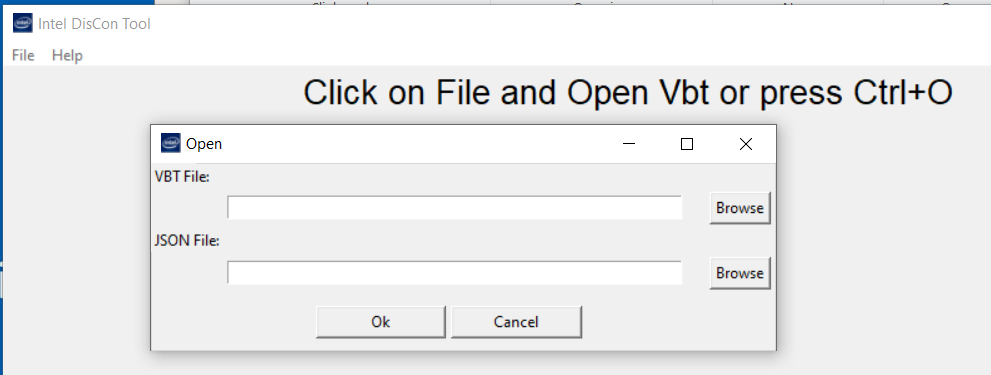
@MeatWar (2023) Note to all users with interests in this suject:
The Intel iBMP (.BSF type config) is now EOL and it would be nice if any users can gather any info/share on the current next gen tool, the Intel DISCON Tool (.xml file config).
 .
.
