Hi,
I have an ASUS N56VZ and I first followed this guide right here:https://www.bios-mods.com/forum/Thread-G…res-UEFI-Aptio4
and that… went horibbly wrong… Long story short I bricked my laptop sigh and the reason was that
1- I used the old, dated /GAN command
2- Instead of making a full dump I used the update file which is 6mb instead of 8
3- I didn’t came here for proffessional help
So, I am asking you all:
1- How to dump, unlock, and flash a bios file
2- Which file format should I use
3- Which programs should I use
4- Should I unlock my bios in the first place (the repair of the brick cost me around 30 dollars which may not be a lot but its a lot in my country)
I don’t know if I try to unlock my bios agian but just in case if I do in the near future or if someone else wants a more reliable guide, I’m posting thiis thread
@celloh - I thought your name looked familiar when I saw your post, will reply again on other thread shortly.
Good to hear he only charged you $30, it’s high, but not as high as I expected to hear once you replied back about this. I’m anxious to get on your other thread and see the aftermath (ie serial, UUID, LAN MAC ID, keyboard backlight etc)
Step #1 - Purchase CH341A + SOIC8 test clip w/ cable, this is best way to know you have a reliable way to recover (always) and not have to pay someone to fix it.
Step #2 - Make backup with that programmer once it arrives, and then have someone check that file for you to confirm it’s a good backup.
Step #3 - Proceed with unlock attempts, or ask for help to unlock etc. (As you’ve done now)
I can help you unlock BIOS without the above, but it would be good if you get it and wait out all that first. However, yes, I can make you an unlocked BIOS without causing it to brick 
If you are wanting to know how to do this yourself, learn etc, I suggest you do the above steps #1-3 before we get started, not as many things to edit on Aptio IV as in Aptio V, but if you are learning to edit it’s best to do it in a safe way rather than having to pay or wait long delivery time to fix things.
First, make a FPT BIOS region dump - Check BIOS main page and see if ME FW version is shown, if not then download HWINFO64 and on the large window on left side, expand motherboard and find ME area, inside that get the ME Firmware version.
Once you have that, go to this thread and in the section “C” download the matching ME System Tools Package (ie if ME FW version = 10.x get V10 package, if 9.0-9.1 get V9.1 package, if 9.5 or above get V9.5 package etc)
Intel Management Engine: Drivers, Firmware & System Tools
Once downloaded, inside you will find Flash Programming Tool folder, and inside that a Windows or Win/Win32 folder. Select that Win folder, hold shift and press right click, choose open command window here (Not power shell).
At the command prompt type the following command and send me the created file to modify >> FPTw.exe -bios -d biosreg.bin
Right after you do that, try to write back the BIOS Region dump and see if you get any error, if you do show me image of the command entered and the error given >>
FPTw.exe -bios -f biosreg.bin
If you are stuck on Win10 and cannot easily get command prompt, and method I mentioned above does not work for you, here is some links that should help
Or, copy all contents from the Flash Programming Tool \ DOS folder to the root of a USB Bootable disk and do the dump from DOS (FPT.exe -bios -d biosreg.bin)
https://www.windowscentral.com/how-add-c…creators-update
https://www.windowscentral.com/add-open-…menu-windows-10
https://www.laptopmag.com/articles/open-…ator-privileges
Then, in order to flash back your edited BIOS region, you’ll need to unlock BIOS Lock and SMI Lock. I’ve written a guide about this, you can start at step #6, I’ve gathered the info for you below from steps #1-5
[GUIDE] Grub Fix Intel FPT Error 280 or 368 - BIOS Lock Asus/Other Mod BIOS Flash
SMI Lock >> 0x5C
BIOS Lock >> 0x5D
Rename your .efi file to >> Shellx64.efi
So, at grub prompt, you will type the following, one line at a time, enter between each, then BIOS lock and SMI lock will be disabled (unless error, can’t write EFI or other, if so show me)
setup_var 0x5C 0x0
setup_var 0x5D 0x0
Then you are ready to edit and test BIOS flashes. First step, disable those two exact settings in a AMIBCP edit (in Optimal column), then test that BIOS and see if after flashing it back in those things are disabled, or you have to disable then again in grub.
If the setting change in AMIBCP didn’t apply (ie after flash of that BIOS, you have to again unlock in grub to flash more), then change needs made either at setup module instead, or NVRAM.
Some BIOS rely on what AMIBCP changes (AMITSE/SetupData) for settings, other use NVRAM or Setup, only testing will let you know which it is.
To check the current values of those settings, without trying to flash in a new BIOS, you can do this in grub and see if output is 0x0 (disabled) or 0x1 (enabled) - setup_var variableValue without a setting following it.
setup_var 0x5C
setup_var 0x5D
Or, to test your above edit, you can simply try to reflash that same edited BIOS without doing the grub change, if it lets you then you know the setting change you made is good and all unlocked now.
Then use that BIOS as your base to move forward.
Actual unlock of your BIOS “Menu” will require a few edits, some to the setup PE32 module, and some other edits with AMIBCP may also be required.
Your BIOS menu visibility is controlled by a “magic String” in the setup module (At 0xA91Ch), I’ve discussed that at the below places in the past. Magic String shown/explained a little bit (Magic string often before > EE 2E 20 71 53 5F D9 40 AB 3D 9E 0C 26 D9 66 57)
[Request] How to Access Locked/Hidden BIOS Menu Settings (16)
Also here, shorter - [Request] How to Access Locked/Hidden BIOS Menu Settings (12)
For individual settings, AMIBCP and or Setup Module GUID-000000 edit will be required if setting doesn’t appear after AMIBCP Access Level Change, to unsuppress item.
Those will need looked at on an individual basis by comparing images of BIOS vs AMIBCP and AMIBCP test change first, then if no change, edit setup as mentioned.
To unsuppress an item, that change to Access Level didn’t make visible (change access level back first) - here is a general example I gave recently, at post #2 Gigabyte Aero 15 OLED BIOS Unlocking and Modding Issue
This just general example, and may not exactly apply to how items are suppressed in your BIOS
If you want to move forward with unlock, but don’t have flash programmer yet (or don’t plan to order one  ), let me know and I can safely do the edits for you instead, so you wont end up bricked again.
If you want to do this, give me your BIOS region FPT dump and unlock those two settings with grub, then wait.
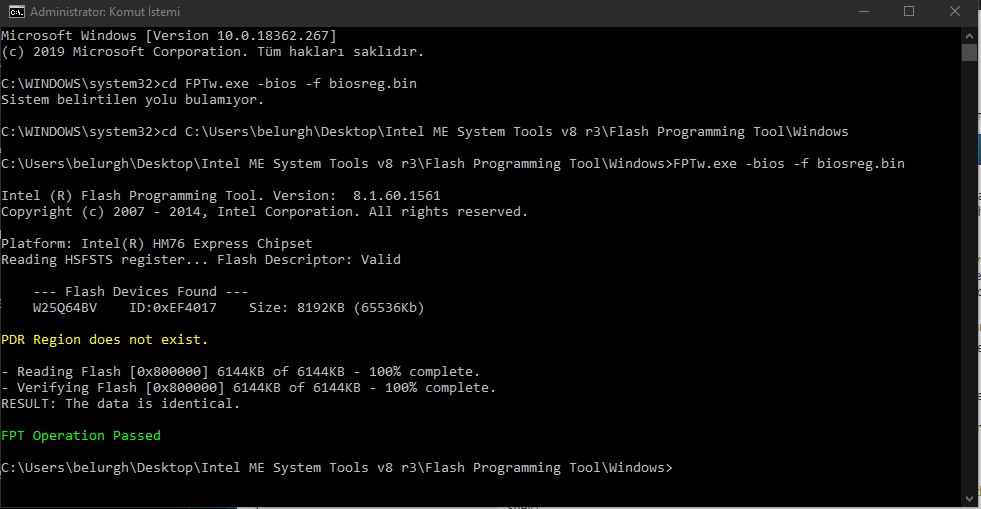
@Lost_N_BIOS here is the pic of command prompt right after biosreg.bin dump also here is the link to the biosreg.bin https://mega.nz/#!7olDTA7T!WyrspCGi7Mn09…-dUQWp4ERQBX3Fk
I also ordered a soic8 clip with A10blabla they should be here in a couple of days
also one question: is this hundred percent safe??
What is A10blabla 
Great, thanks for the image, you can write back BIOS region modified without issue using FPT.
IS that image, after you unlocked the SMI/BIOS Lock in grub? If yes, so that means those are unlocked in the dump above, correct? Just want to confirm
* Edit - can you please upload that to another file host (Free), Mega.NZ hasn’t been working for me for a long time Never mind, got it to load finally
No, there is no 100% safe BIOS flash, even stock BIOS using stock BIOS flash method can brick. Sounds like I should do this modification for you, correct?
@Lost_N_BIOS I meant CH341A with A10blabla :DD that image is before me unlocking the SMI7/BIOS lock in grub.
I’ve done theese steps so far
Should I do the unlocking part or do I not need to?
also what is a grub prompt and which file am I supposed to open with UEFItool
also yeah I’d be really happy if you did the mods for me ![]()
as I said in the past Im a ultra noob so how do I do this?
If that image is before you did anything with grub, and you made a FPT dump and could flash it back, then it’s all already unlocked and you don’t need to do anything in grub.
Grub and UEFITool is all explained in the guide I linked you to, but you wouldn’t be using UEFITool, since I said start at step #6 (I used UEFITool for you and gathered the info already)
But, nothing needed to be done now, based on your image above it’s all already unlocked and you’re ready to go.
Sorry, I ran out of time tonight and didn’t even get to reply to but a few threads, I will get this made for you tomorrow
@Lost_N_BIOS I’t’s OK, take your time ![]()
![]()
@Lost_N_BIOS Btw, I didn’t done a full bios dump. Should I?
should I?
@celloh - you can’t do a full BIOS dump without flash programmer, or until you have unlocked FD on there or do a pinmod to unlock FD
Please zip images for me of all your current visible BIOS, show at least one image of all main sections, and if needed 2-3 images of advanced so I can see all currently visible subsections.
Sorry for further delay, I thought I asked this from you and already had it, but I don’t see any images if the folder I have for your BIOS
With a camera and then zip or 7zip Some BIOS you can use F12 hotkey to take images to USB, but I think this BIOS too old for that probably, but try and see. if not, use camera
Oh you want me to boot into bios and take images I thought you wanted me send bios.img or something haha ; D
Yes, first one. I need to see what you can see, so I know what make visible, and what is already visible etc. You’ll need to do this again once I unlock it, so I can make rest that didn’t show up visible too
@Lost_N_BIOS here is a ton of pics
BTW my SPI flash programmer just arrived but I am still waiting on soc 8 clip. btw how do I know if my bios is 25 or 24?
btw btw, (:D) how do I use the programmer? can you direct me to a thread maybe ?
bios image.rar (1.23 MB)
@Lost_N_BIOS Alright got my soic8 clip as well but uhh one of the pins is bent is that normal?
Should I desolder the bios chip?
@Lost_N_BIOS hey uhh… so I unsoldered the bios chip connected it to the soc8 cable and installed the drivers but whenever I open the CH341A programm v1.29 it says detection to the driver not installed correcctly please instal: and then it gives me an link. I looked at the link but its dead and the program won’t detect my chip
. also after trying a few times and failing I touched the bios chip and it was really hot… I hop I didn’t fryied it… is it possible tho? to fry t?
I really hope you answer quickly
also also whenever I press detect the RUN LED blinks for a second
also also the hot thing happened again this time and I can swear there was slight smoke coming out of the programmer or the chip but i might be imagining things
also also the programmer won’t detect my chip
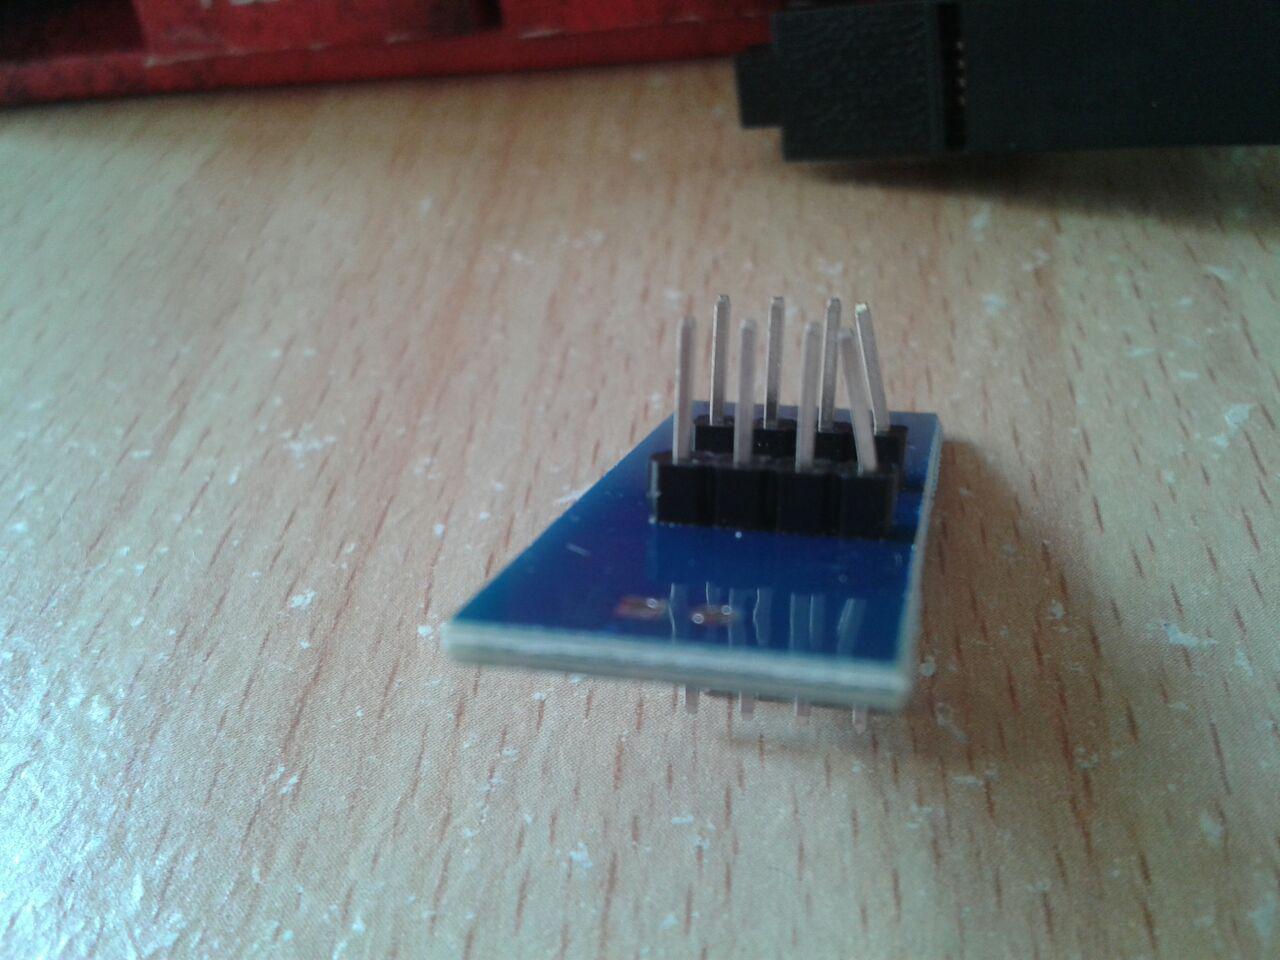
normally all 8 pins are straight, just bend them back in position.
@celloh - Thanks for pics. Here is a few guides on how to use programmer, DO NOT erase or write anything until you’ve given me a backup dump to check, to be sure your are OK and have valid backup before you do anything else.
Open all software versions, and on the “Auto” tab, uncheck erase and blank check, this way nothing happens accidentally. You can do this now, without programmer installed or anything connected.
http://s000.tinyupload.com/index.php?fil…257455007472602 << main driver and general CH341A software
CH341A Image Guides
https://www.bios-mods.com/forum/Thread-G…341A-programmer << Same as one directly below, but with all images expanded/visible at once
[GUIDE] Flash BIOS with CH341A programmer
[Guide] Using CH341A-based programmer to flash SPI EEPROM
[GUIDE] The Beginners Guide to Using a CH341A SPI Programmer/Flasher (With Pictures!)
As mentioned above, carefully bend that pin back, grab at bottom with needlenose pliers and bend straight.
Why are you soldering or unsoldering anything??? This is point of SOIC8 clip, so you don’t have to desolder anything???
Driver is above. What is your chip ID?
SLOW DOWN NOW!!! Also, please start editing your posts if no one has replied!
You need to slow down, before you brick your board and don’t have a proper BIOS backup made. Hopefully you didn’t damage any pads or traces removing that BIOS Chip.
I suggest you solder it back on now, make sure you put it back on correctly too.
Hot and smoke, sounds like you shorted something, not good! It’s not going to detect anything if you burned out the programmer, you will need a new one.
But, to be sure you need to get the correct driver installed (above) and then use the correct software version for your chip ID. I can suggest what’s best once you tell me your chip ID.
SLOW DOWN! There is not a race here, faster you go, especially without help, quicker you break things.
There’s no reason to rush around or try to do this asap, especially since your board “was” working.
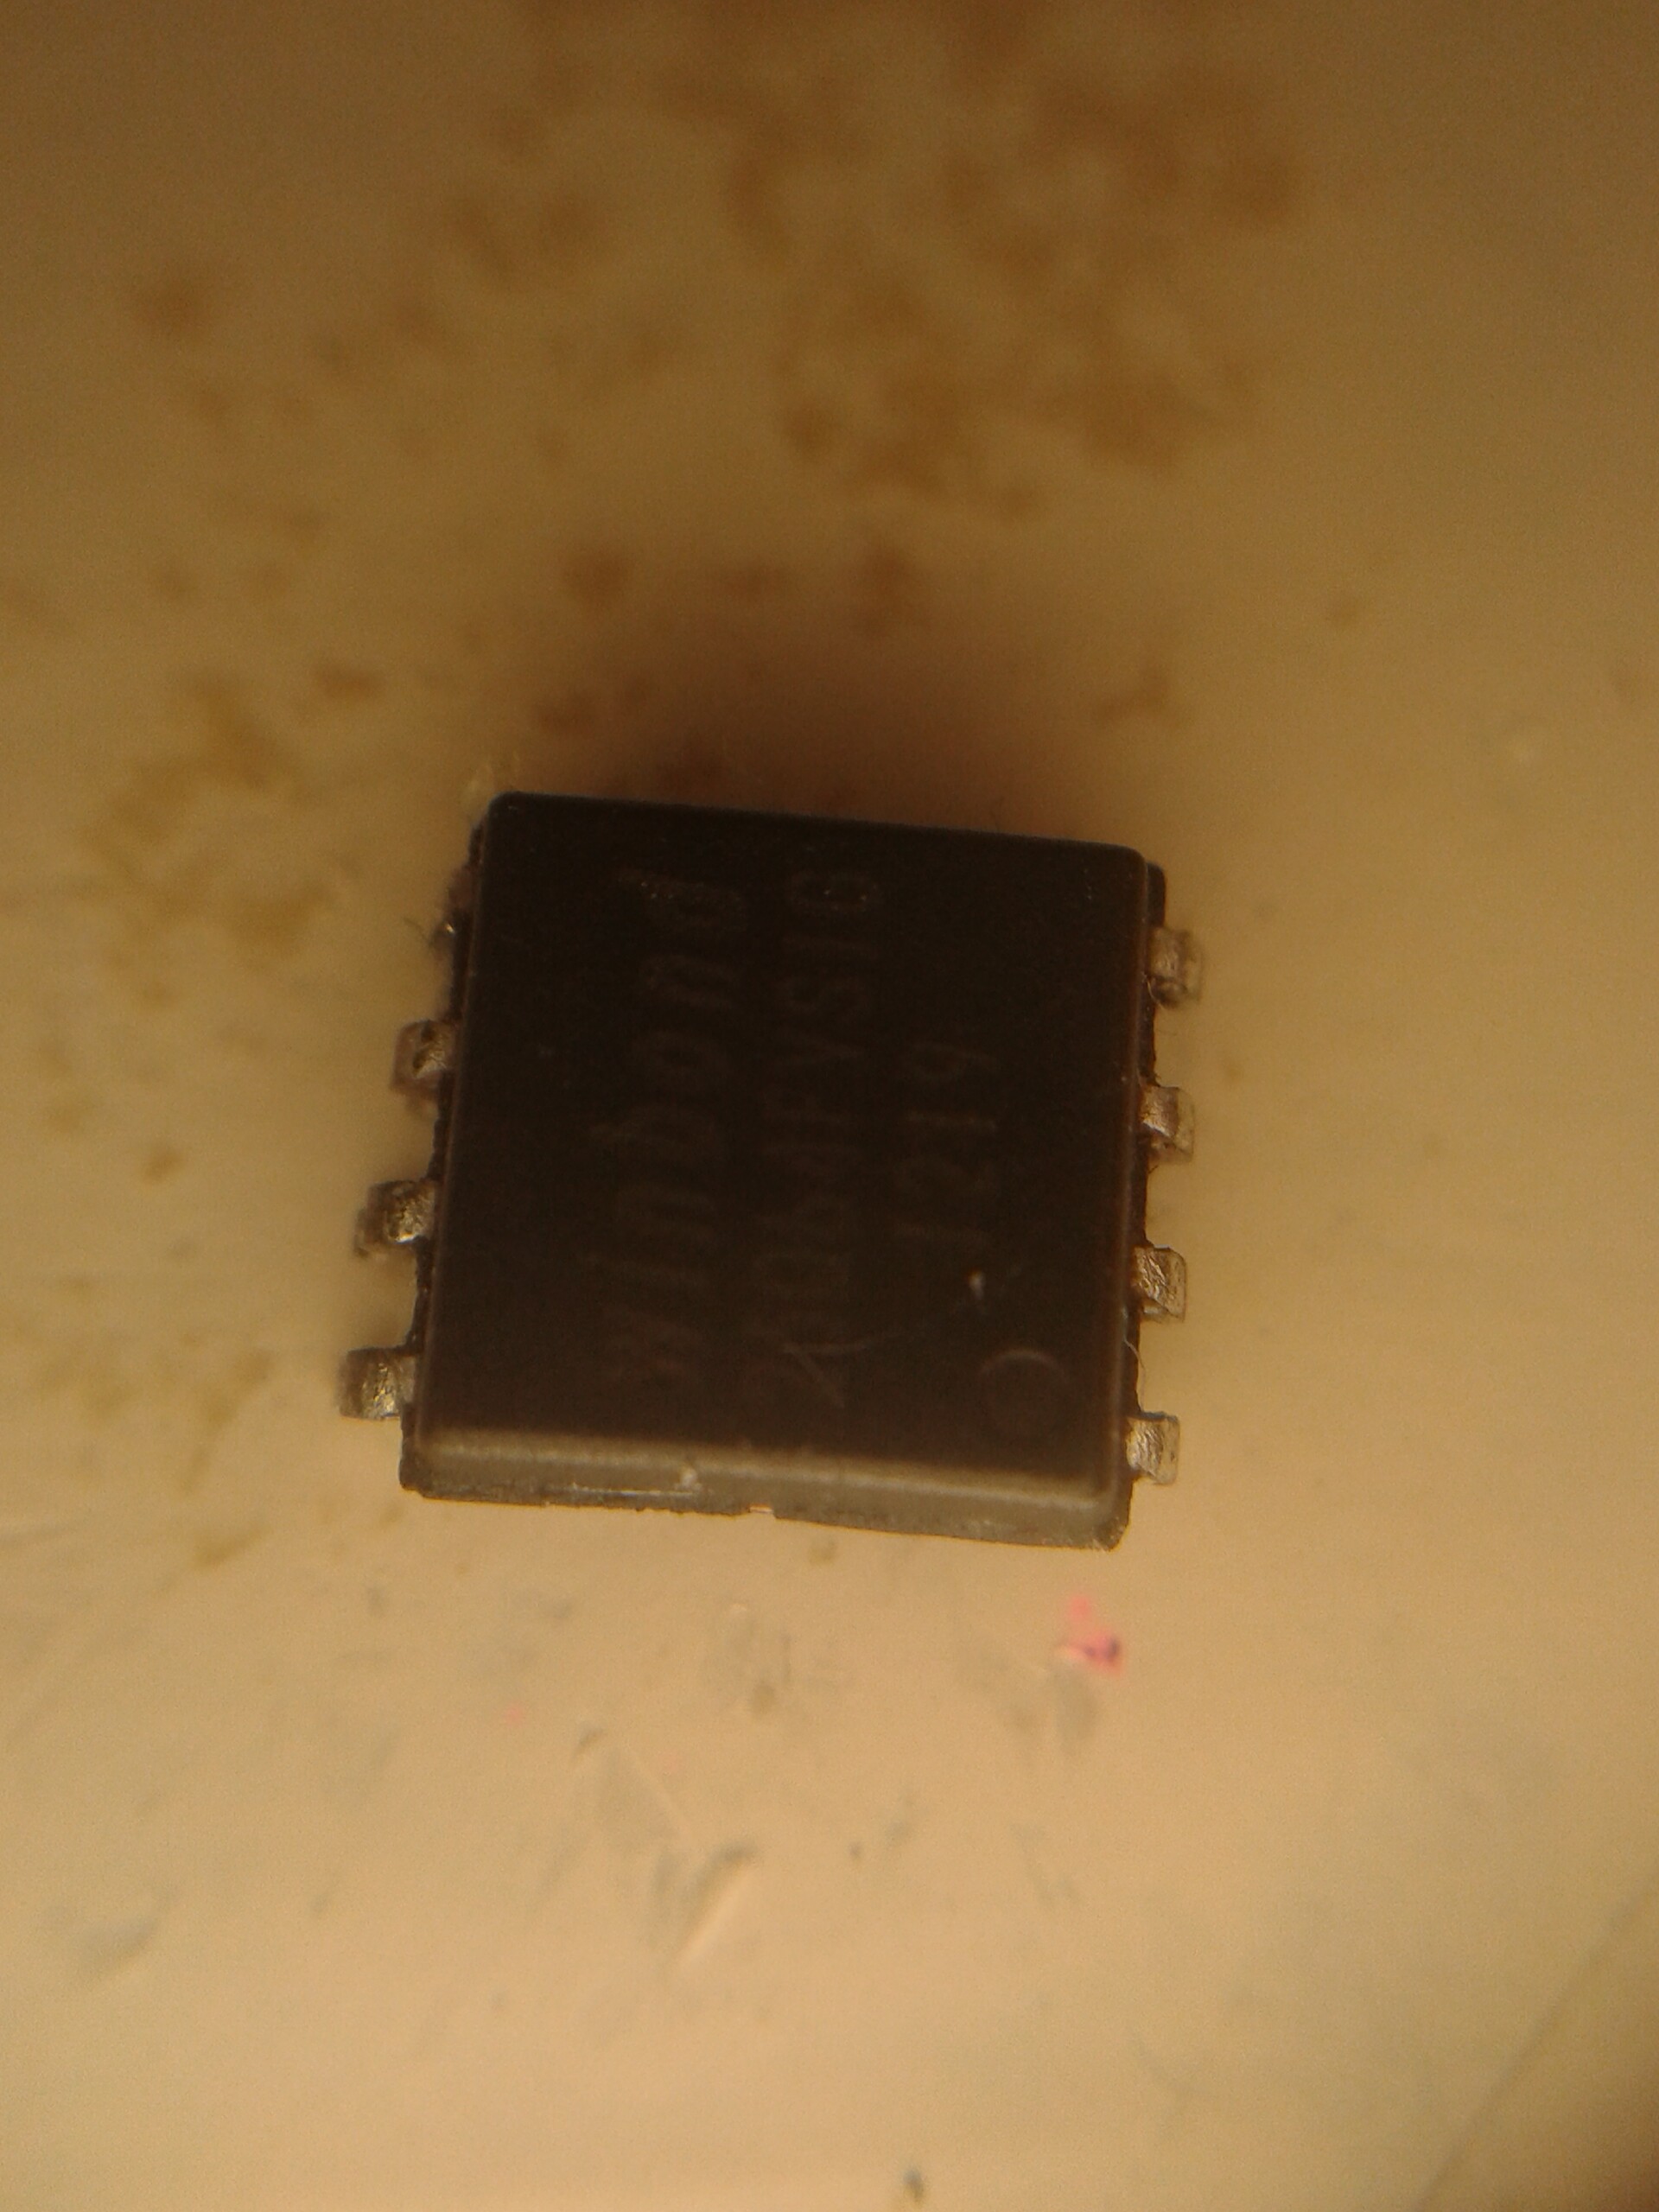
@Lost_N_BIOS thanks for your reply. Im glad you don’t think that the chip is fried. This is what it says on the chip winbond 25q64FVSI6 also it said (on a different column) 1219 here is a pic of it
I didn’t say anything about the chip not being fried. Although, it’s probably not. However, if you saw, or smelled magic smoke, you probably did release the Gremlins in your programmer
Does the red light come on when you connect the programmer to USB Slot? If yes, it may be OK, if not, it’s probably fried. Also, if not, test something else in that USB port to make sure the USB port is not fried or disabled, if the port doesn’t work, reboot and check it again.
If it never works again, test your programmer on another system and see if it’s LED comes on there or not.
For chip W25Q64FV, use software 1.30 or 1.34 and choose chip ID W25Q64BV It wont write to it properly without that, and sometimes dump may fail too.
However, it will always detect the connected chip and ask you to choose ID. If it’s powered up (Red LED) and you are not seeing “connected” in bottom corner then chip is fried (not high chance of this), or you are not connecting it or the cable properly.
If you are not 100% sure of your connection, show me how you have it all connected.
That chip looks in bad shape, hopefully you have enough legs to connect it back to the board. Otherwise you will have to order a new one (cheaper if you order 3-5), but also longer wait when you want to order "cheaper"
Sorry you removed this from the board, that wasn’t necessary at all, that’s the reason you got the SOIC8 cable, so you wouldn’t have to desolder anything.
@Lost_N_BIOS got some good news! The power led comes on when i connect the usb! But i gave the chip to a different technician (i know yoy said dont pay for this kind of stuff but I obviously dont have enough skills for this) they said that they would back up my chip for 3.50 dollars (yep its cheap)
That is good he will back up the chip for you, send me that file. Why do you need a tech to do this though, you have the programmer now, you can do it. it’s easy.
I would expect you not to be able to desolder a lead-free chip from board, before I’d think you couldn’t figure out the programmer with an image guide
I think you just gave up too quickly, or let it scare you maybe? Plus, if you can’t back it up, how are you going to write to the chip?
Be sure you solder it back on properly, aligned correctly and no shorts before you power it on. There will be a dot (indentation and or painted/both) in one corner of the chip, this is pin one.
On the board where you removed the chip, there will be a white triangle or some other white indicator at the PCB where pin one should be connected. Use lots of flux when you put it back on, so everything flows where it should, then cleanup once you’re done.
Power LED coming on is good, but is not 100% sign that it’s not damaged, but probably is OK.
And yes, that is good, cheap, acceptable price to backup a chip for someone. Same or maybe $5 would be good acceptable price to program one for somebody.